简介
拆卸 2013 款后期 iMac 显示屏需要剪开屏幕四周的胶条。胶条被剪断后,就不能用于重新将显示屏密封到位,因此需要重新贴上一组新的胶条。
你所需要的
-
-
如果您要重新使用现有的显示器,还必须去除显示器背面的旧粘胶条。
-
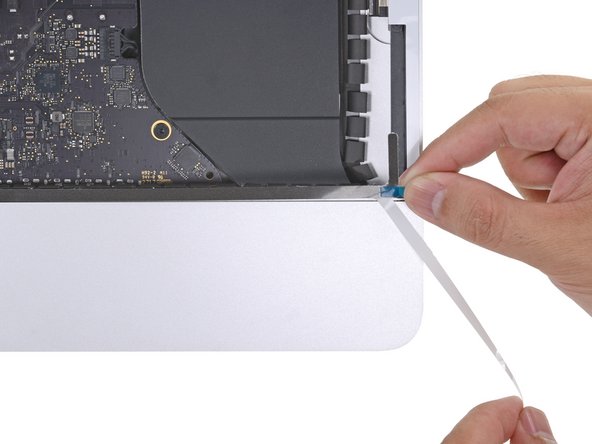
用镊子或手指剥掉胶带。 从底部开始,“向上”向设备顶部剥离。
-
清除所有旧粘合剂后,用 90%(或更高)的酒精和无绒布仔细清洁表面。 朝一个方向擦拭,不要来回擦拭。
-
-
-
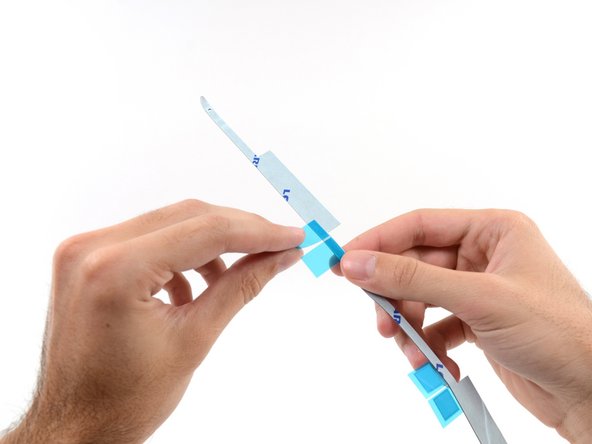
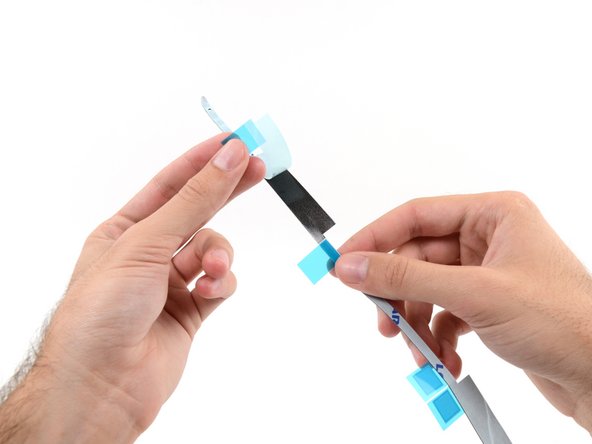
预先铺好粘合带,这样您就不会意外地将粘合带安装在错误的位置:
-
胶条22 在左上角
-
胶条23 在右上角
-
21位于右侧垂直
-
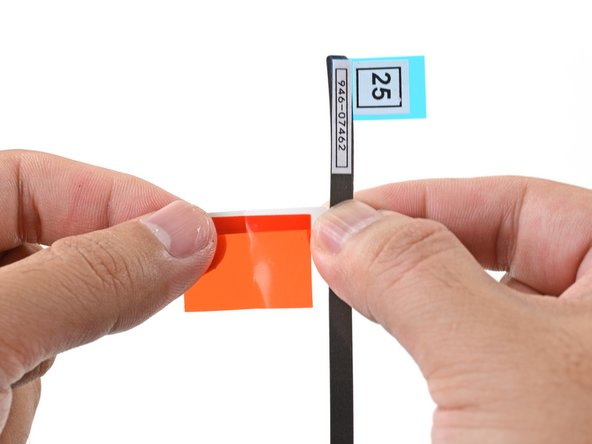
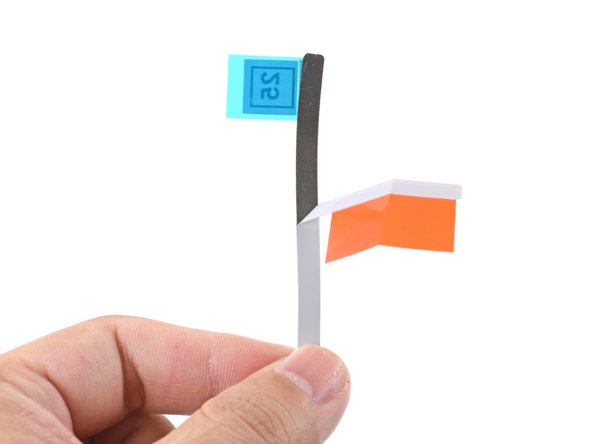
25 在右下方,暗面朝上。
-
26 在左下方,暗面朝上。
-
16 位于左侧垂直方向
-
-
-
-
沿 iMac 周边逆时针方向操作,以同样的方式再添加三个胶带:
-
23在右上方
-
22在左上方
-
16 位于垂直左侧
-
在 iMac Intel 27" Retina 5K 显示屏上,右上角胶带的蓝色卡舌不会像非 5K 型号那样与顶部天线对齐。这没问题,不会影响显示胶条或天线的性能。
-
-
-
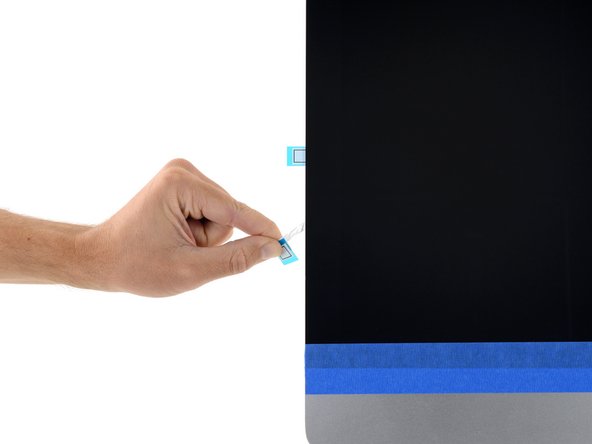
将麦克风槽口置于麦克风孔上方,将胶带与底部边缘对齐。
-
如果您的 iMac 没有麦克风孔,请对齐条带的右端,使 L 形弯曲 位于右侧垂直胶条旁边。 L 形弯头不应与右侧垂直粘合剂重叠。
-
对齐条带后,小心地将左侧暴露的边缘放置到 iMac 上以确保对齐。
-
-
-
如果你已经确认 iMac 工作正常,并准备将其粘好,请跳至 步骤22。
-
轻轻地将显示数据接口插入主板上的插座。 确保将其直接按入插座并完全插入。
-
将显示数据接口锁向下翻转到插座上。
-
将显示器电源接口插入主板上的插座。
-


103等其他人完成本指南。


5条评论
Is there any reason to believe that Apple would deny any warranty repairs due to these adhesive strips not being identical to Apple's? I'd like to open and clean my iMac before taking it in to have the display replaced under warranty, but the vibes I'm getting from Apple support suggest that Apple may deny me service if the adhesive strips 'show any signs of tampering', i.e., being replaced for any reason. This sounds silly to me, as it doesn't void Apple's warranty to upgrade my hard drive.
gibsonjont - 回复
<<<crickets>>>
gibsonjont - 回复
Unfortunately, these strips are not even close to the original ones. Has anyone tried to reopen the iMac with these strips in place? A real pain… The original one must have a sort of foam in-between so that one can cut through with the ifixit wheel or a knife. After that, it is easy to remove the adhesive swipes on both sides. Trying to reopen an iMac with the iFixit strips in place is really hard and impossible with the iFixit wheel. Sad…
True ! Same goes with OWC’s strips : no foam.
The only way to reopen the iMac should it be needed, is to use razor blades…
José -
Clear tuto, I did it on several IMac, the first time was a discovery… than it became easier on the following, as usual the best is to take your time and follow the instructions which are very clear