当前版本的文档还未经巡查,您可以查看最新的已查核版本。
简介
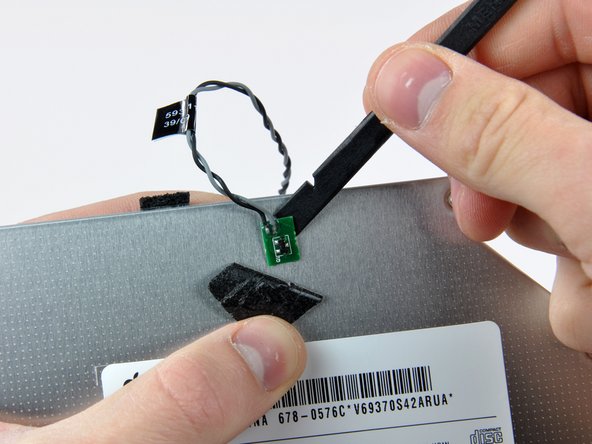
DVD刻录机不刻录? 重新开始工作并更换光驱。
你所需要的


要重新组装你的设备,请按相反顺序执行这些说明。
要重新组装你的设备,请按相反顺序执行这些说明。
59等其他人完成本指南。


6条评论
Great tutorial. The recommended T10 Torx Screwdriver was too big - I had to use a T9.
Also, it isn't necessary to unplug the optical drive thermal sensor connector socket on the logic board (Step 10), I just disconnected the optical drive thermal sensor from the drive (Step 17) before removing it.
Awesome guide! I bought your suction cups for the front glass, and a toolkit, along with a 2TB HDD to replace the original 1TB drive. It was easy to replace both the optical drive and the HDD with the right tools and this very detailed guide to follow. I have had no problems with the internal cooling fans running fast with the new HDD either. It all came apart easily and seems to have gone back together without any problems as well. A huge help! You saved me several hundred dollars in repair bills. Thank you!
Left a comment in the other area too, I used this guide and another linked to it to replace both an HDD and the Superdrive. Perfect Instructions - I was daunted by this task the moment I opened the iMac, but these instructions made it doable. I also replaced the HDD and the Superdrive while in standing position. All I needed were a bunch of Pill Bottles for the screws, my cheap precision ratchet screwdriver set which had the proper size Torx Screw Bit, and an old iPhone Toolkit which had the rest of the things I needed. I used a Palette Knife to remove the sensor. The hardest part is getting the Screen screws back in, because the magnets make it difficult. I can probably do this now with other Model iMacs- This was the second iMac I used your guides to replace the HDD, this was my first Superdrive. Thanks a LOT.