当前版本的文档还未经巡查,您可以查看最新的已查核版本。
简介
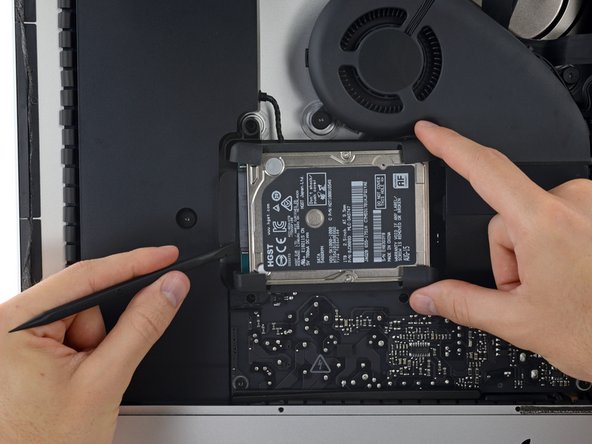
请按照本指南中的步骤升级或更换 iMac Intel 21.5" EMC 3068 中的 SATA 硬盘。请注意,如果您要升级硬盘,则需要在执行此升级之前将 克隆您现有的硬盘 并复制到替换硬盘上,以保留您的文件和操作系统。
本指南中的某些图片使用的是 2015 iMac,其视觉效果略有不同。这些差异不会影响维修程序。
你所需要的
-
-
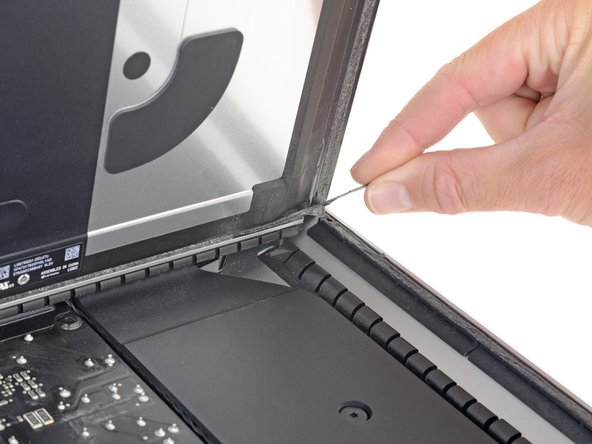
在开始你的iMac的任何维修操作之前:拔掉电源线,按住电源按钮至少十秒钟,以释放电源的电容器。
-
-


要重新组装设备,请按照相反的说明进行操作。
要重新组装设备,请按照相反的说明进行操作。
25等其他人完成本指南。


3条评论
This tutorial is excellent but has the final step missing: how to replug the SATA connector given that it is stuck under the storage bay.
I had to unscrew the storage bay to be able to replug the SATA connector and follow the tutorial in reverse to finish it.
Don't try to remove the left speaker as it requires to remove the CPU fan first which adds extra steps to the process.
The most difficult part of the whole process was connecting the new HD to the connector (even if not stuck under the bay). There's not enough slack in the connector's cabling to allow use of one's fingers. It took me 20 minutes and the use of a couple of wooden popsicle sticks and a spudger to eventually nudge it in place. Otherwise, great tutorial Adam O'Camb!
2020 kaufte ich mir einen iMac 21,5 Zoll einfachste Ausführung (8GB RAM, 2,3 GhZ). Der Computer brauchte mindestens 65 Sekunden, um Applikationen hochzuladen, was die Arbeit mit dem Computer nahezu unmöglich machte. Letzte Woche habe ich die HDD-Festplatte dank des Reperatur-Kits von ifixit ausgetauscht. Seitdem funktioniert der Computer mühelos. Applikationen, Dokumente, Bilddateien lassen sich unter einer Sekunde öffnen. Man bekommt schon das Gefühl einen neuen iMac gekauft zu haben! Ich kann das Reperatur-Kit samt Anleitung nur wärmstens empfehlen. Hierbei ist allerdings zu beachten, dass die Reparatur genaustens nach Anleitung durchgeführt werden sollte. Kleiner Tipp: Wenn die Schrauben von dem Lautsprecher gelöst werden, lässt er sich leicht nach links verschieben. Damit ist das SATAkabel leichter zugänglich! Viel Erfolg!