简介
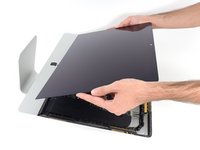
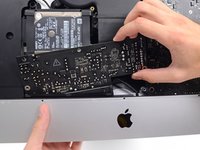
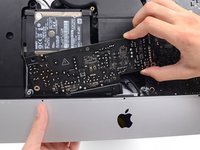
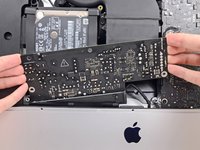
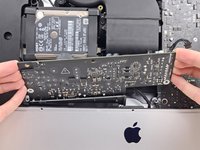
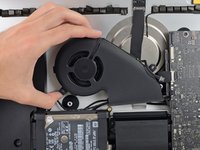
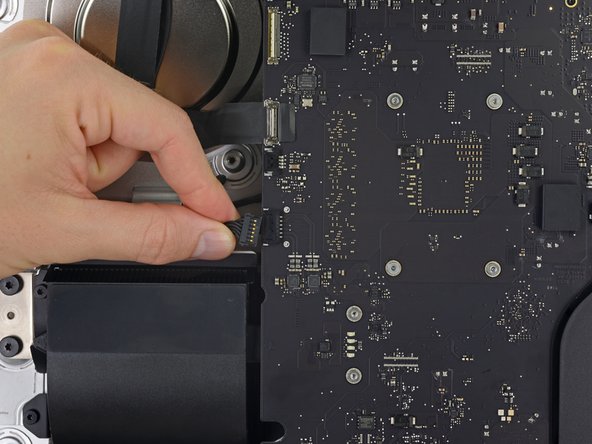
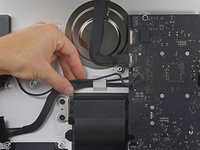
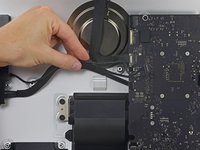
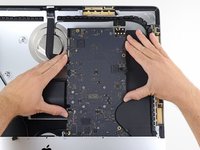
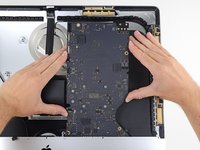
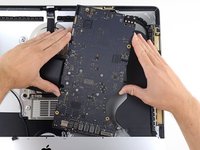
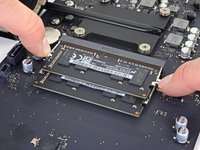
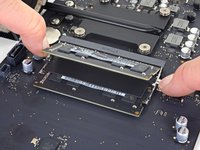
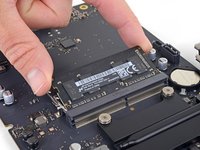
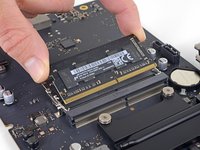
这个指南详细介绍了在iMac Intel 21.5" EMC 3068中拆卸主板,以便卸下或更换内存。
此指南中的一些图片使用的是2015年版iMac,该版本在视觉上有轻微差异。这些差异不会影响维修过程。
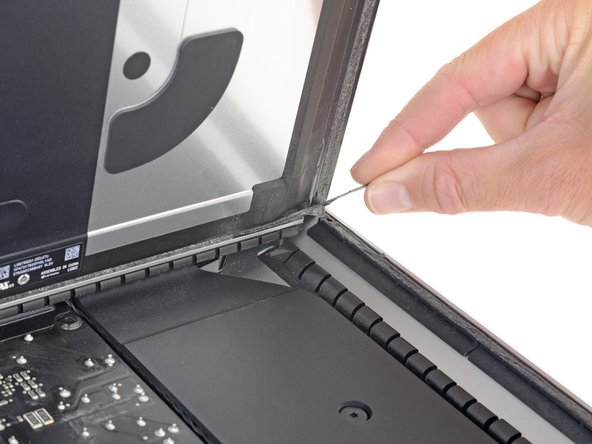
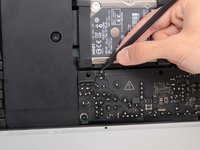
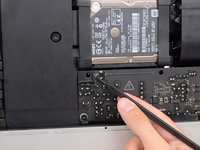
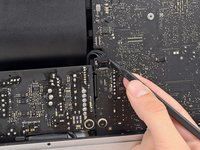
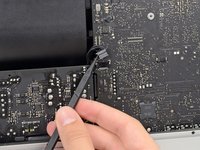
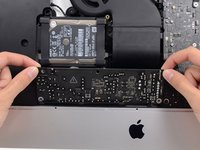
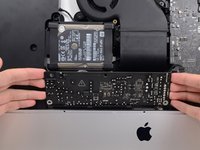
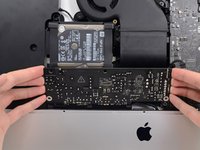
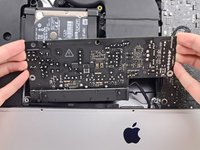
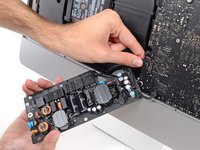
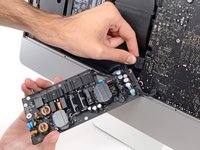
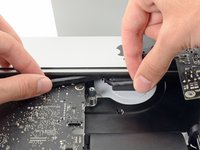
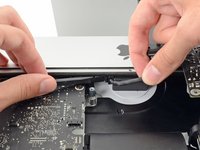
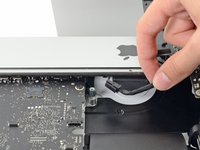
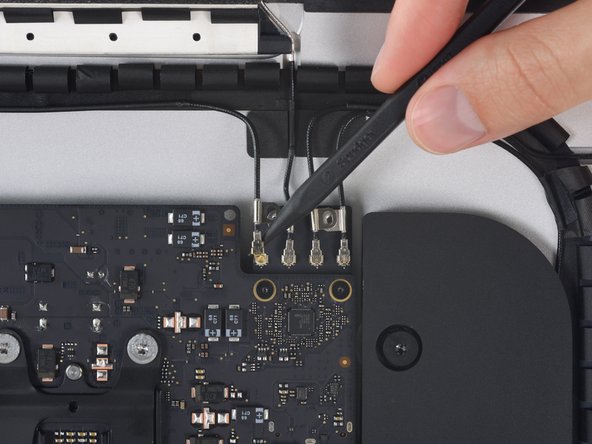
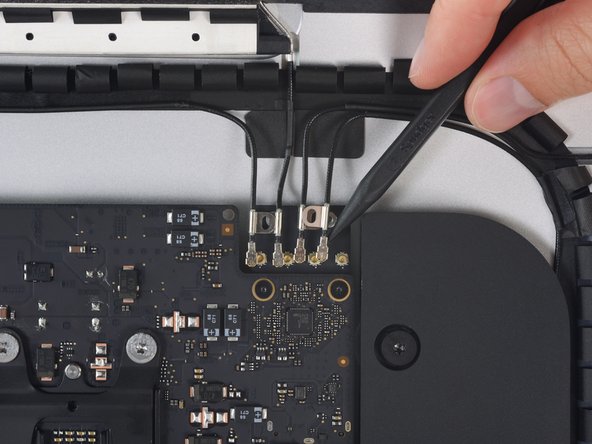
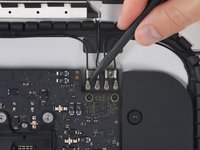
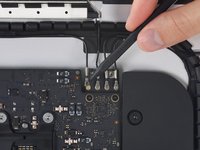
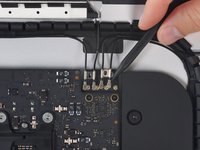
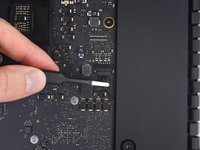
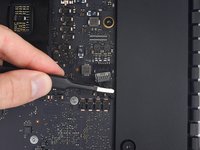
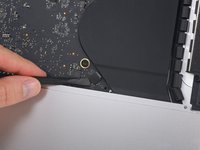
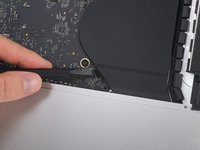
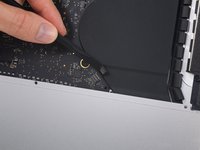
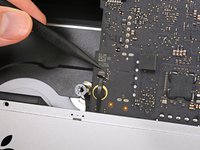
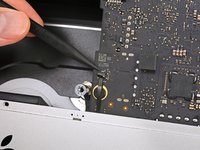
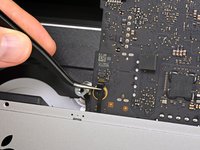
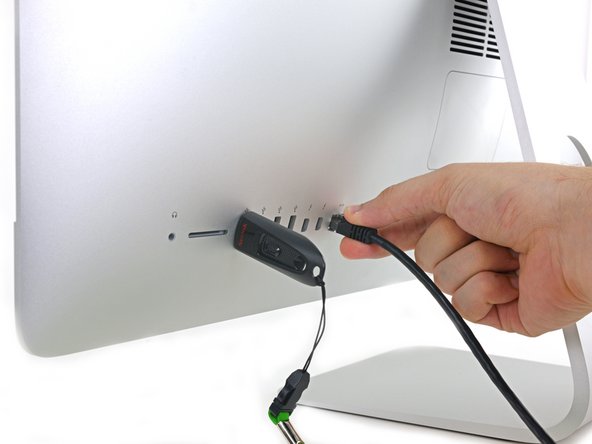
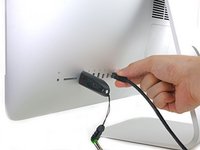
此指南被标记为“潜在危险”,因为它要求你去处理一个包含大电容器的电源供应器。请先拔掉iMac的电源插头,并按下电源按钮至少10秒来让电容器放电。在处理主板时,请只触摸边缘,不要触摸表面组件。
你所需要的
-
在这个步骤中使用的工具:iMac Intel 21.5" Cardboard Service Wedge$4.99
-
在开始你的iMac的任何维修操作之前:拔掉电源线,按住电源按钮至少十秒钟,以释放电源的电容器。
-
-


要重新组装你的设备,按照相反的步骤操作。
31等其他人完成本指南。


11指南评论
Thought this was going to be extremely difficult but once I started with these instructions it actually wasn’t that bad, though it took me a slow and careful 3.5 hours. Was quite nervous handling that power supply though!
Excellent guide! It took me about 1.5 hours to complete the entire RAM+SSD installation. The iMac has massively improved and feels like a new computer: way way faster than before, with a 1TB Samsung SSD, 32GB of RAM and a brand new installation of macOS Catalina. Be very careful with the I/O ports, especially with the USB-C/Thunderbolt ones: the alignment is critical, as well as the correct position of the logic board in relation to the case. Even a slight misalignment can impede the USB-C plug from fully entering the port, making it hard or impossible to establish a connection.
Great guide… took a mediocre “unupgradable” iMac to 32 GB ram and new SSD HD (the other guide… but crosses with this). Excellent guidance. If you have to fix or upgrade anything else while changing out the RAM, this is the time and performed steps to do it with. Read the others to see the variations you need to do (like steps to clone the HD before changing, etc.) but as deep as you get into this machine, it exposes pretty much everything. Again, great work!
Wonderful guide! I was afraid that I am not going to make it since I don’t have a lot of experience in such things but following the steps carefully, paying attention to every detail, has led me to successfully upgrade my iMac 3086 with 1TB SSD and 32GB RAM. I was really afraid that this RAM upgrade probably won’t work because it’s been said on everymac.com that the maximum is 16GB and I’ve read somewhere about a person whose iMac didn’t even start after such intervention. I decided to purchase Crucial 2x16GB at 2400MHz, despite that the iMac has 2133Mhz bus. I trust this brand and I’ve already upgraded my MacBook Pro 15” mid-2012 with the same brand, again pushing the RAM beyond the official limits and it still works great. The SSD I put here is also from Crucial and I just turned on the iMac and it runs like never before! The whole procedure took me a bit over 2 hours. Thanks for the great work with this guide!!!
Hey Alex, I’m also worried about the compatibility of the Crucial RAM, so could you tell me which especific model did you use, please?