简介
移除前面板来进入你的iMac的内部元件
你所需要的
-
-
-
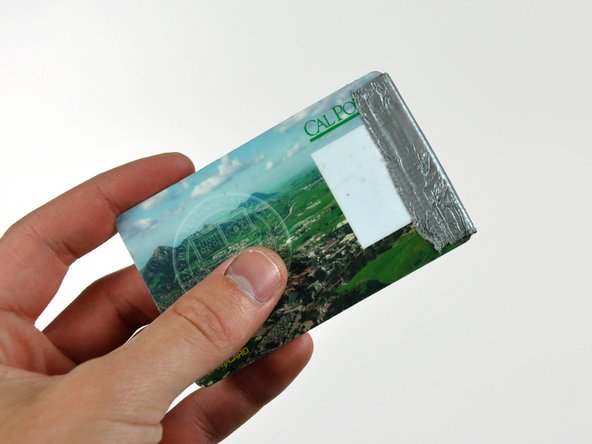
将塑料卡向上插入靠近后壳顶部的通风槽的一角。
-
将卡推向 iMac 的顶部以松开前面板闩锁。
-
将前面板拉离后壳。
-
对前面板板的另一侧重复此过程。
-
如果挡板无法松开,请尝试将下边缘按回后壳并重复此打开过程。
Apple uses a powerful magnet to release these latches, but the official tool is not available. If you have access to a few failed hard drives, you can take out the magnets from those, and stack them up to have a magnet strong enough to easily open these latches.
Simply place the magnet on an upper corner of the machine, and when you hear a click, gently pull the corner of the front case forward. Repeat the process for the other upper corner. Use care not to pull on the iSight cables.
Note: Use care when handling the hard drive magnets, they are powerful, and you don't want them to snap together on your fingers. OUCH!
You can use a credit card. Mine survived, though it did get a little bent.
I used two credit cards for extra thickness and the latches released very easily.
The magnetic latches are about 2-3 cm from the left and right edges right at the top edge of the case. I just ran a rare-earth magnet over the from of the bezel in this area. You can hear it click when it disengages. RadioShack has these kind of magnets for $3, the call them "super magnets".
This was a nuisance. Had to really move the card around to get it to finally release.
Be very careful not to damage the metal clips with a credit card. My iMac was very stubborn and I ended up bending the clips in a way they cannot be bent back. The clips do still work and the front bezel does still go back on, however it no longer sits flush with the back of the iMac.
The double credit card worked for me. Have to be persistent. It's a very light latch, no force needed or anything, or any click when it releases.
-
-
-
如有必要,取下缠绕在麦克风和摄像头电缆上的聚酰亚胺胶带(可以扔掉它)。
I was able to skip Steps 6 & 7 entirely. The microphone and camera cables had enough slack to flip the front cover off and lie it flat above the rest of the computer.
Step 4 is completely unnessecary. Just lift the bezel up and wiggle it until the metal clips let go. Then lift the bezel straight up.
-
-
-
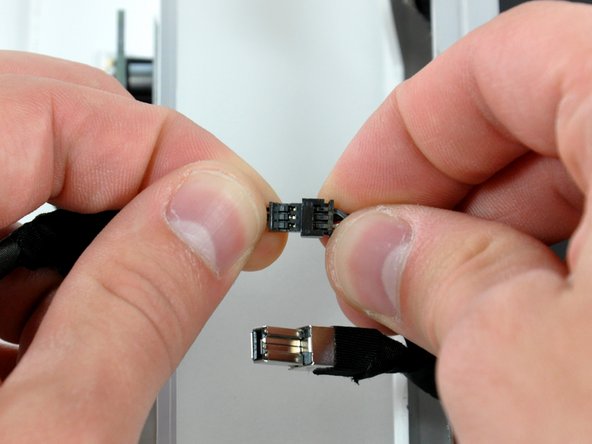
断开摄像头和麦克风电缆。
Make sure the white wire is on the same side of both parts of the connector before reconnecting.
It is possible to reconnect the microphone cable in the wrong/reversed orientation with the connector. The microphone will still work but will be muted and result in a "tinny" sound on the receiver's end.
Can anyone ID these connectors (at least the camera connector) so that I may make an extension (to move the camera out and re-house it myself). I probably have the gear to do the mic already.
Is the camera connector some standard I can order M & F versions online to terminate to an extension cable?
hutchwilco - 回复
-
请按逆顺序操作来组装你的设备
请按逆顺序操作来组装你的设备
由衷感谢以下译者:
90%
WaveWSBS正在帮助我们修复这个世界! 您也想加入吗?
开始翻译 ›


That is a really, really unnecessarily complex way of fitting a new hard drive. Thanks, but no thanks...
annax - 回复
annax, if you can suggest a simpler way we're all ears!
Jake Simmonds - 回复
I found this guide to be very useful. The installation was super easy, especially since I've never opened my iMac before. I was able to skip steps 6, 7, 9, 10 and 14. Wish I had one of those long skinny magnetic torx screwdriver's though. I had to use duct tape to hold the screws on the end of the bit for step 12.
I used this opportunity to vacuum out the dust with mini attachments. Much needed after 3 years ;0)
Awesome site!!! Thanks for sharing your knowledge and saving me time and $$$!
Eric Patten - 回复
Yes I did it! thanks for this very good manual
Philippe d Anfray - 回复