当前版本的文档还未经巡查,您可以查看最新的已查核版本 。
Before you work on the computer, unplug the computer and press the power button for 20-30 seconds to drain the stored energy in the power supply.
Loosen the two Phillips screws securing the access door to your iMac.
These screws are captive in the access door.
Orient the iMac face-up, on its backside.
Use your thumbs to press both RAM arms in past the front bezel for enough clearance to lift it off the rear case.
Re-orient your iMac so it sits upright on the stand.
Insert a plastic card up into the corner of the air vent slot at the top of the rear case.
Push the card toward the top of the iMac to release the front bezel latch.
Pull the front bezel away from the rear case.
Repeat this process for the other side of the front bezel.
It may be necessary to apply several layers of duct tape to the top of the access card to aid in releasing the latches.
If the bezel refuses to release, try pressing the lower edge back onto the rear case and repeat this opening process.
Lay your iMac stand-side down on a table.
Lift the front bezel from its lower edge and rotate it away from the rest of your iMac, minding the RAM arms that may get caught.
Lay the front bezel above the rest of the iMac.
Peel back the aluminum EMI shield up off the lower three edges of the rear case.
It is not necessary to peel the EMI shield off the display.
We found it helpful to tape the EMI shield up against the display to keep it out of the way.
Remove the two 5 mm T6 Torx screws securing the display data cable to the logic board.
Using its attached black tab, pull the display data cable connector up off the logic board.
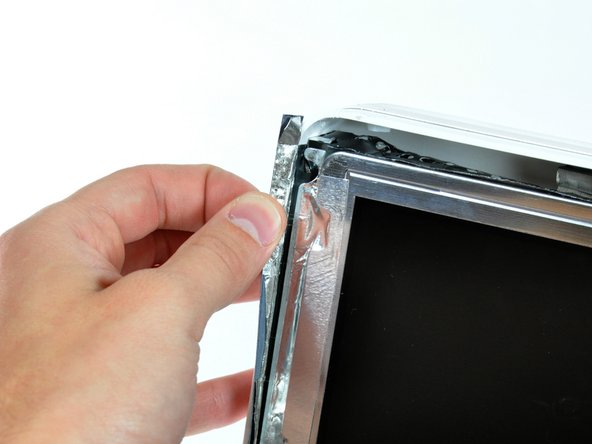
Peel back the aluminum EMI tape from the two vertical edges of the display.
During reassembly, it is helpful to use several small strips of tape to hold the EMI shielding along the left and right edges of the display footprint out of the way before lowering the display into the rear case of your iMac.
Remove the four recessed coarse-thread 7.5 mm T10 Torx screws securing the display to the rear case.
These screws are recessed, so a thin screwdriver such as this is essential for removal. Bit drivers tend to be too short for this application.
Remove the single 5 mm T6 Torx screw securing the IR board bracket to the logic board.
The IR board and cable finger are now free from the logic board and may fall.
Remove the IR cable finger and move the IR board, with cable still attached, out of the way.
Remove the single 17 mm T10 Torx screw securing the right speaker to the logic board.
Lift the right speaker out of the rear case and move it out of the way.
Both speakers are still attached to the logic board.
If necessary, lift the IR board cable to free the left speaker cable pinned beneath.
Pull the speaker connector toward the top edge of your iMac to disconnect it from the logic board.
嵌入本指南
选择一个尺寸并复制下面的代码,将本指南作为一个小插件嵌入到你的网站/论坛中。
单个步骤
完整指南
小——600像素
中——800像素
大——1200像素
预览