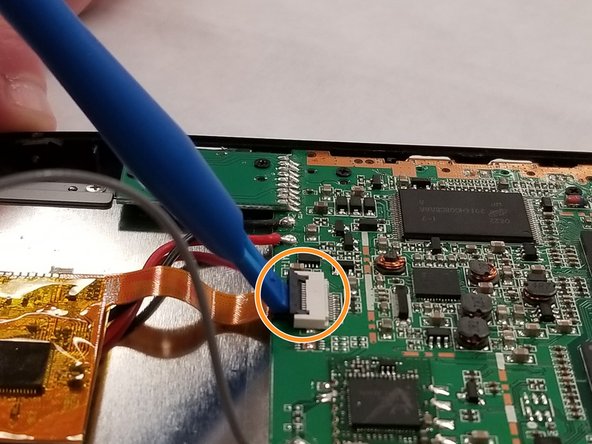
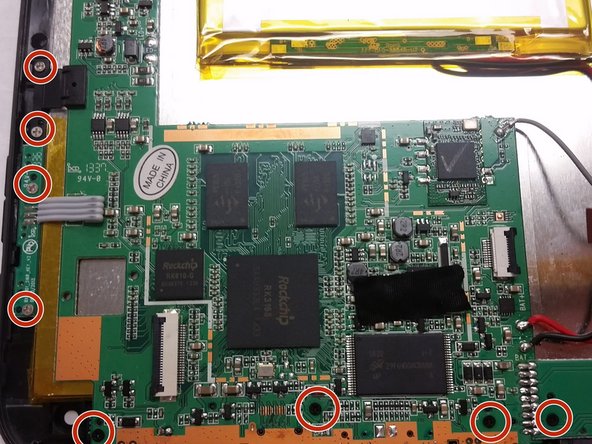
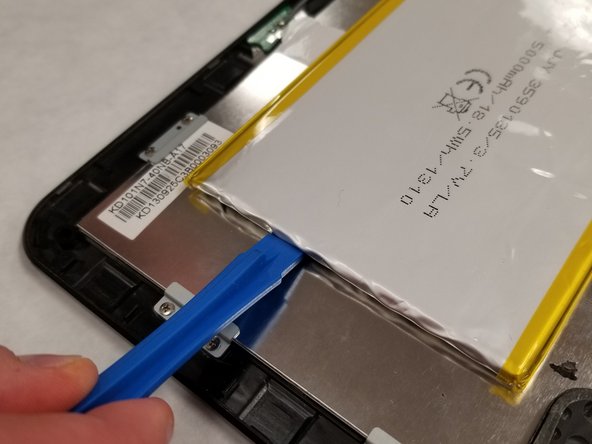
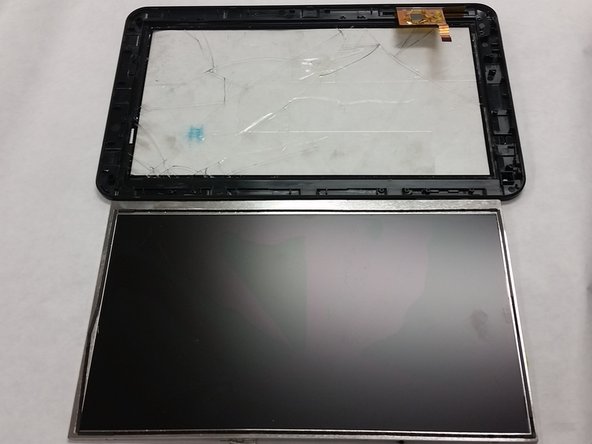
跳转到主内容

iDea USA CT 1020 Screen Replacement

你所需要的

  1. iDea USA CT 1020 Screen Replacement, Screen: 步骤 1 中的图像 1,1
    • Start by powering off the device.

    • Place the device on a clean surface with the screen facing down.

  2. iDea USA CT 1020 Screen Replacement: 步骤 2 中的图像 1,2 iDea USA CT 1020 Screen Replacement: 步骤 2 中的图像 2,2
    • Gently apply pressure to the back of the device where the backing case and screen meet.

  3. iDea USA CT 1020 Screen Replacement: 步骤 3 中的图像 1,2 iDea USA CT 1020 Screen Replacement: 步骤 3 中的图像 2,2
    • Using a spudger or an iFixit opening tool, lift and release the camera assembly ZIF tabs.

    • Gently pull the ribbon cable free.

    • Repeat this for the other tab.

  4. iDea USA CT 1020 Screen Replacement: 步骤 4 中的图像 1,3 iDea USA CT 1020 Screen Replacement: 步骤 4 中的图像 2,3 iDea USA CT 1020 Screen Replacement: 步骤 4 中的图像 3,3
    • Remove the disconnected camera by simply pulling it out of its socket.

    • Remove eight 25mm JIS #00 screws securing the motherboard.

    • The battery is glued to the back of the screen. Gently pry the battery off the screen, being careful not the bend the battery.

  5. iDea USA CT 1020 Screen Replacement: 步骤 5 中的图像 1,1
    • Remove ten 25mm JIS #00 screws securing the screen.

  6. iDea USA CT 1020 Screen Replacement: 步骤 6 中的图像 1,2 iDea USA CT 1020 Screen Replacement: 步骤 6 中的图像 2,2
    • Wedge the edges of the opening tools into the gap between the screen and the screen casing.

    • Be very careful while prying the screen from its casing to avoid damage.

结论

To reassemble your device, follow these instructions in reverse order.

另外一个人完成了本指南。

Nathanael Carlson

于01/08/18注册

183 声望

撰写一个指南

团队

IUPUI, Team S1-G3, Freund Spring 2018 IUPUI, Team S1-G3, Freund Spring 2018 的会员

IUPUI-FREUND-S18S1G3

3 名成员

创作了4篇指南

一条评论

SOOOOO GOOD , Well done

Nathanael Carlson - 回复

添加评论

浏览统计数据:

过去 24 小时: 0

过去 7 天: 1

过去 30 天: 8

总计 151