跳转到主内容

iBUYPOWER Trace 4 9310 M.2 NVMe Drive Replacement

你所需要的

  1. iBUYPOWER Trace 4 9310 M.2 NVMe Drive Replacement, M.2 NVMe Drive: 步骤 1 中的图像 1,2 iBUYPOWER Trace 4 9310 M.2 NVMe Drive Replacement, M.2 NVMe Drive: 步骤 1 中的图像 2,2
    • Lay the desktop on its side with the glass panel facing up.

    • Remove the single screw.

  2. iBUYPOWER Trace 4 9310 M.2 NVMe Drive Replacement: 步骤 2 中的图像 1,2 iBUYPOWER Trace 4 9310 M.2 NVMe Drive Replacement: 步骤 2 中的图像 2,2
    • Remove the glass side by pivoting it up with the bottom side still seated in the notches.

    • Lift the glass side out of the notches and set it to the side.

  3. iBUYPOWER Trace 4 9310 M.2 NVMe Drive Replacement: 步骤 3 中的图像 1,3 iBUYPOWER Trace 4 9310 M.2 NVMe Drive Replacement: 步骤 3 中的图像 2,3 iBUYPOWER Trace 4 9310 M.2 NVMe Drive Replacement: 步骤 3 中的图像 3,3
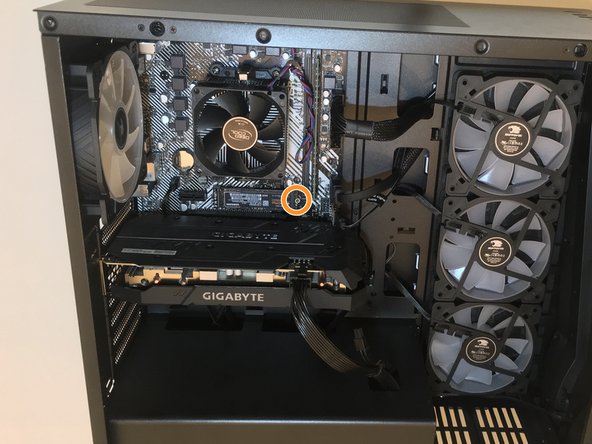
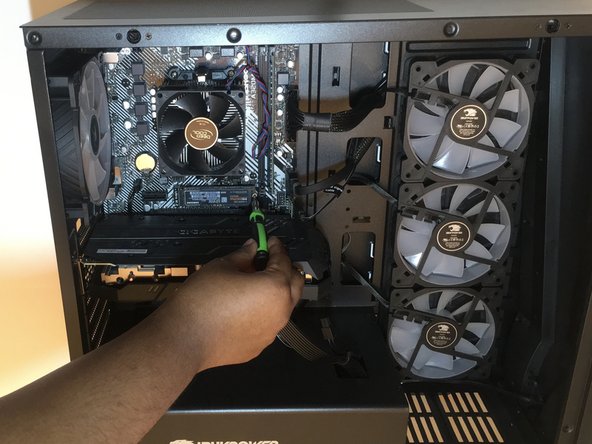
    • Locate the M.2 drive that is right above the CPU.

    • Remove the screw on the edge of the drive.

  4. iBUYPOWER Trace 4 9310 M.2 NVMe Drive Replacement: 步骤 4 中的图像 1,2 iBUYPOWER Trace 4 9310 M.2 NVMe Drive Replacement: 步骤 4 中的图像 2,2
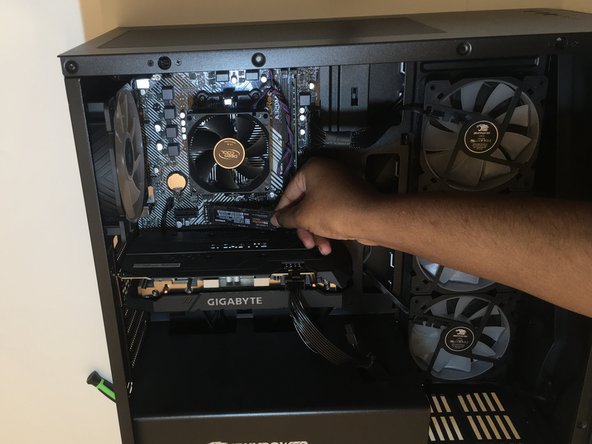
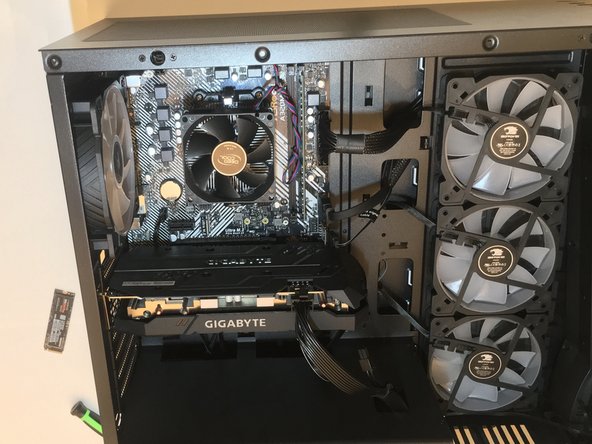
    • The drive should lift up on the edge where the screw was.

    • Pull the drive out at an angle from the motherboard.

  5. iBUYPOWER Trace 4 9310 M.2 NVMe Drive Replacement: 步骤 5 中的图像 1,2 iBUYPOWER Trace 4 9310 M.2 NVMe Drive Replacement: 步骤 5 中的图像 2,2
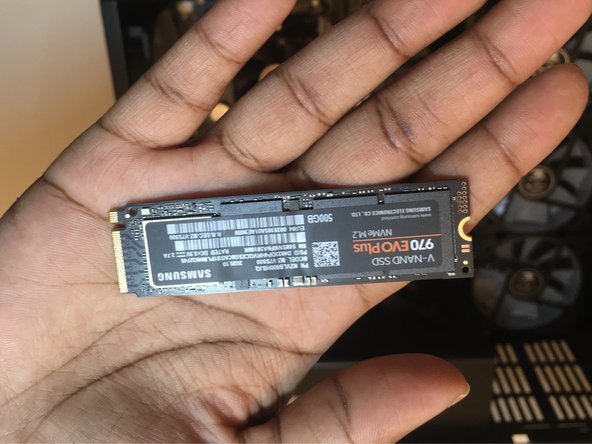
    • Line the new drive up with the slot and gently slide it in.

    • Use one finger to hold the drive down while you screw it back in.

结论

To reassemble your device, follow these instructions in reverse order.

2等其他人完成本指南。

一条评论

Thank you, Kilie, for the clear step-by-step instructions, together with pictures, for NVMe SSD installation.

George

George Meier - 回复

添加评论

浏览统计数据:

过去 24 小时: 5

过去 7 天: 34

过去 30 天: 123

总计 2,555