注:你正在编辑的一份前提条件指南。你所做的任何更改将影响包括此步骤的9指南。
正翻译步骤 1
步骤 1

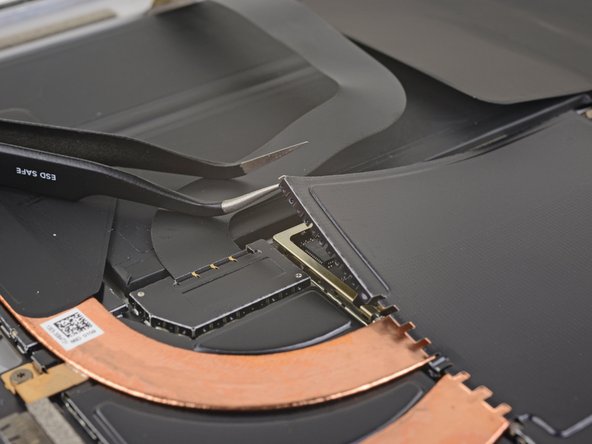


Remove the heat sink shield
-
Insert one point of a pair of pointed tweezers into a gap in the corner of the EMI shield covering the heat sink.
-
Use the tweezers to pry the EMI shield away from the motherboard as much as you can without bending it. Do not remove it yet.
| [title] Remove the heat sink shield | |
| - | [* black] Insert one point of a pair of pointed tweezers into a gap in the corner of the EMI shield covering the heat sink. |
| + | [* black] Insert one point of a pair of [product|IF145-020-2|pointed tweezers] into a gap in the corner of the EMI shield covering the heat sink. |
| [* black] Use the tweezers to pry the EMI shield away from the motherboard as much as you can without bending it. Do not remove it yet. | |
| [* icon_caution] Try not to deform the shield too much—you will need to reinstall it during reassembly. | |
| [* icon_caution] Take care not to puncture the battery with the tweezers while working on this shield. |
您的所有投稿皆享有基于开源创作共享许可协议(CC BY-NC-SA)的著作权利。