跳转到主内容

Zoomer Meowzies Speaker Replacement

你所需要的

  1. Zoomer Meowzies Speaker Replacement, Legs: 步骤 1 中的图像 1,3 Zoomer Meowzies Speaker Replacement, Legs: 步骤 1 中的图像 2,3 Zoomer Meowzies Speaker Replacement, Legs: 步骤 1 中的图像 3,3
    • Using the Triangle driver remove the four 7.5 mm screws.

    • The two front screws are deeper than the two on the back legs which may cause difficulties. These can be reached by putting the bit in first then carefully putting the driver on slightly (not all the way)

  2. Zoomer Meowzies Speaker Replacement: 步骤 2 中的图像 1,2 Zoomer Meowzies Speaker Replacement: 步骤 2 中的图像 2,2
    • Turn the device so that the the device is on its side.

    • Hold the back and belly on the device and gently pull apart.

    • Pulling with too much force might damage a few cables inside, so caution is needed.

  3. Zoomer Meowzies Speaker Replacement: 步骤 3 中的图像 1,3 Zoomer Meowzies Speaker Replacement: 步骤 3 中的图像 2,3 Zoomer Meowzies Speaker Replacement: 步骤 3 中的图像 3,3
    • With insides exposed, grab leg and gently pull up and away from the body to detach them. Repeat for all legs needed.

  4. Zoomer Meowzies Speaker Replacement, Head (Bottom): 步骤 4 中的图像 1,2 Zoomer Meowzies Speaker Replacement, Head (Bottom): 步骤 4 中的图像 2,2
    • Gently pry the ribbon cable from the connector.

  5. Zoomer Meowzies Speaker Replacement: 步骤 5 中的图像 1,3 Zoomer Meowzies Speaker Replacement: 步骤 5 中的图像 2,3 Zoomer Meowzies Speaker Replacement: 步骤 5 中的图像 3,3
    • Using a soldering Iron, carefully heat the solder point around the silver wire and pull gently until the wire lifts free.

    • The soldering iron and solder get very hot, so caution is advised to avoid touching either directly.

    • This step may be skipped but if so care must be taken to not accidentally pull the wire from the contact. Skipping this step will limit the amount or room that is available to work with.

  6. Zoomer Meowzies Speaker Replacement: 步骤 6 中的图像 1,3 Zoomer Meowzies Speaker Replacement: 步骤 6 中的图像 2,3 Zoomer Meowzies Speaker Replacement: 步骤 6 中的图像 3,3
    • Take the upper half of the device in hand.

    • Using the Philips #1 driver remove the two 9.5mm screws.

    • Remove the purple square collar around the neck of the device.

    • The wires can prove difficult to get through the opening in the collar. Move wires through the opening carefully.

  7. Zoomer Meowzies Speaker Replacement: 步骤 7 中的图像 1,2 Zoomer Meowzies Speaker Replacement: 步骤 7 中的图像 2,2
    • Turn the device so that it is on its side.

    • Holding the device's head and back in each hand, pull apart to separate the head from the body.

    • Pull the wires through and manipulate carefully as needed to get them through and completely detach head.

  8. Zoomer Meowzies Speaker Replacement: 步骤 8 中的图像 1,2 Zoomer Meowzies Speaker Replacement: 步骤 8 中的图像 2,2
    • Turn the head upside-down so that ears are facing down, and locate the four screws around the underside of the device's head.

    • Use the Triangle screwdriver to remove the four 7.5mm screws.

  9. Zoomer Meowzies Speaker Replacement: 步骤 9 中的图像 1,3 Zoomer Meowzies Speaker Replacement: 步骤 9 中的图像 2,3 Zoomer Meowzies Speaker Replacement: 步骤 9 中的图像 3,3
    • Hold the top and bottom halves of the head in each hand separately and gently pull away from each other to separate both halves.

  10. Zoomer Meowzies Speaker Replacement, Speaker: 步骤 10 中的图像 1,3 Zoomer Meowzies Speaker Replacement, Speaker: 步骤 10 中的图像 2,3 Zoomer Meowzies Speaker Replacement, Speaker: 步骤 10 中的图像 3,3
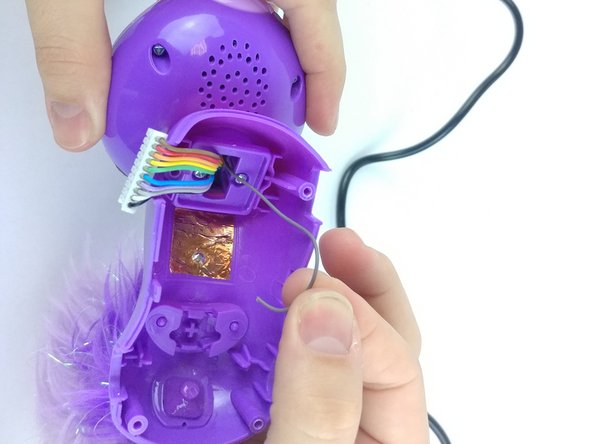
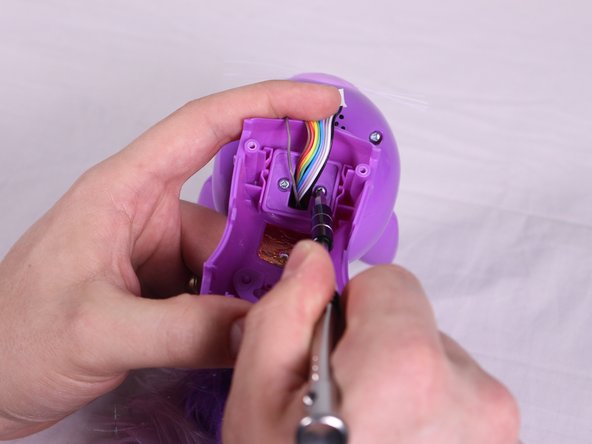
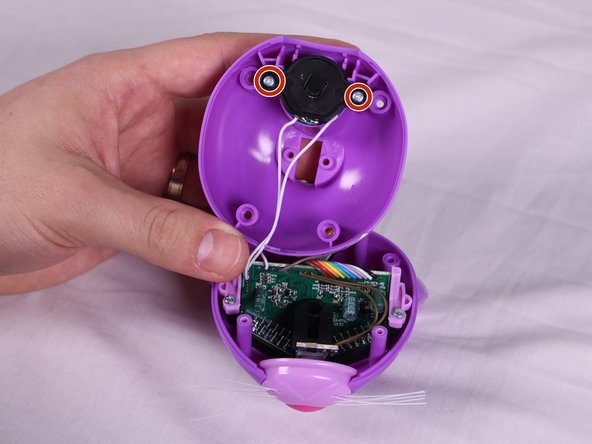
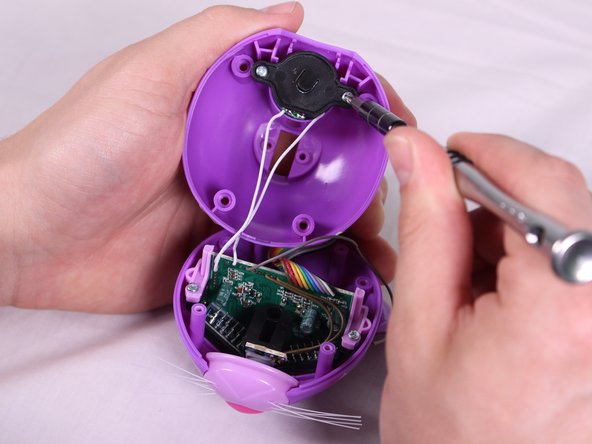
    • On the bottom half of the device's head, locate the two screws on each side of the speaker. Using the Phillips #1 driver remove the two 7mm screws.

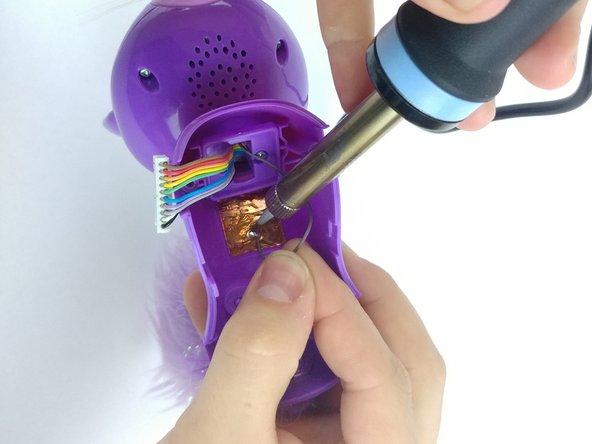
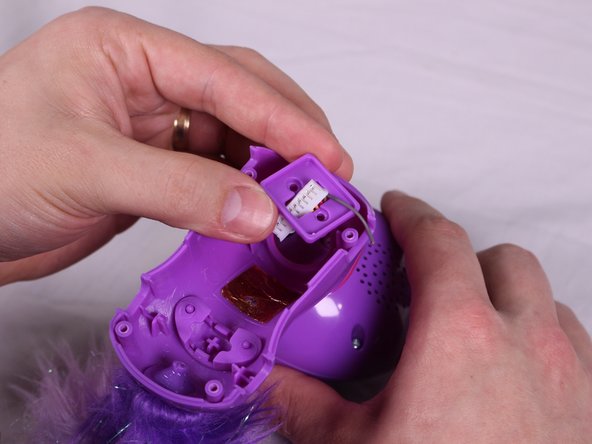
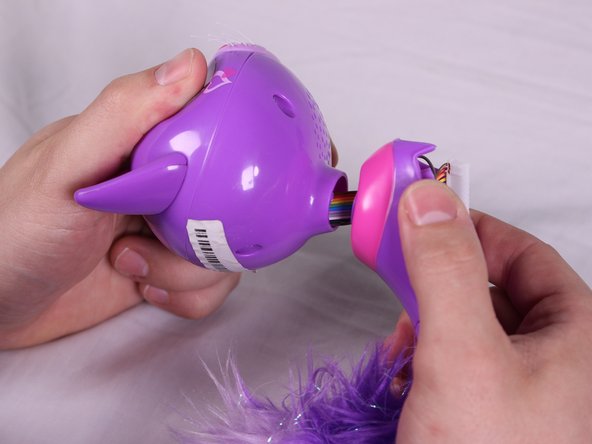
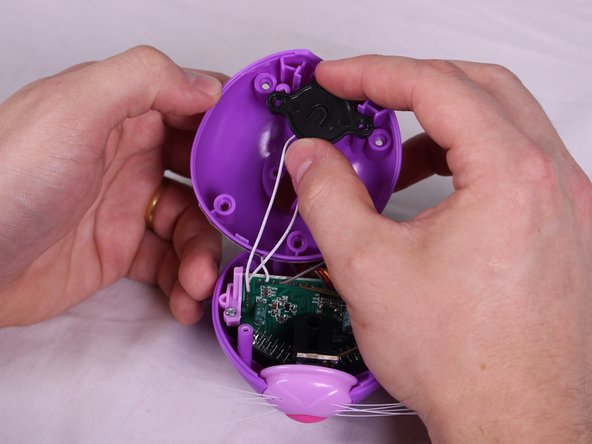
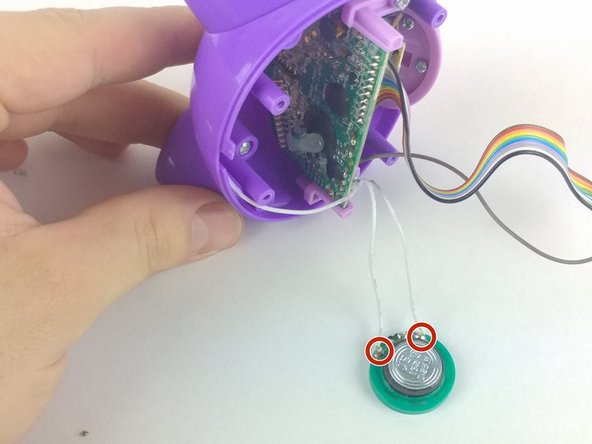
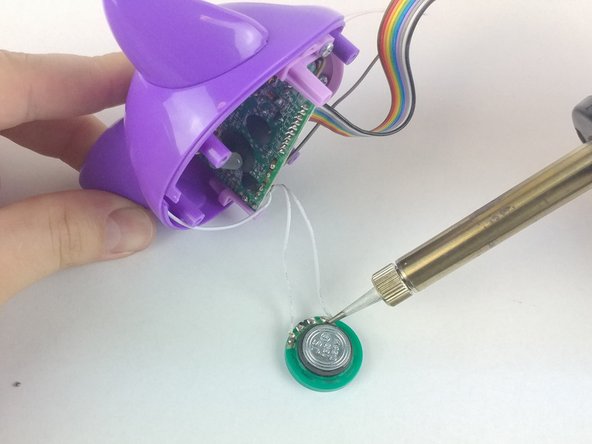
    • Remove the black brace holding the speaker by gently pulling on it. The speaker will likely fall out after lifting the black brace.

  11. Zoomer Meowzies Speaker Replacement: 步骤 11 中的图像 1,3 Zoomer Meowzies Speaker Replacement: 步骤 11 中的图像 2,3 Zoomer Meowzies Speaker Replacement: 步骤 11 中的图像 3,3
    • Remove the speaker and place down on a flat surface. The speaker will remain attached by two white wires.

    • Using the soldering iron, heat the soldering points and carefully pull the two wires away from the speaker to completely detach.

    • The soldering iron is very hot, so take caution not to touch it directly in order to avoid any burns to the body.

结论

To reassemble your device, follow these instructions in reverse order.

另外一个人完成了本指南。

Mitchell Gentry

于02/14/18注册

675 声望

创作了6篇指南

团队

USF Tampa, Team S6-G2, Eyestone Spring 2018 USF Tampa, Team S6-G2, Eyestone Spring 2018 的会员

USFT-EYESTONE-S18S6G2

3 名成员

创作了16篇指南

一条评论

Thank you very much for these instructions, Lucky now has a voice again!

Tony - 回复

添加评论

浏览统计数据:

过去 24 小时: 1

过去 7 天: 2

过去 30 天: 9

总计 1,358