简介
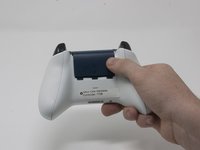
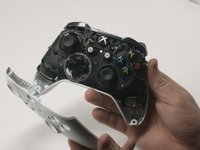
Xbox 手柄的摇杆键帽可能失灵或者手感粘滞,此时您可能需要拆下键帽以便清洁或更换。本指南将展示如何取出更换Xbox One 1708型无线手柄的键帽。
你所需要的


需要复原您的设备?倒序执行本指南即可。
154等其他人完成本指南。

团队

Cal Poly, Team S18-G3, Forte Fall 2017 Cal Poly, Team S18-G3, Forte Fall 2017 的会员
CPSU-FORTE-F17S18G3
4 名成员
创作了42篇指南
9指南评论
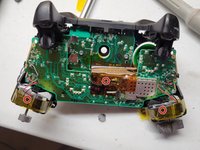
How about the square thing with the stick and hinges that the joystick is attached to? I think it’s called the Module. I have a joystick drift / drifting problem and that may help me out. Thanks.
Agreed. That’s actually the part I need to replace too. The module.
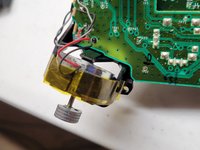
followed this guide to take the controller apart because I had a joystick that was sticking, my solution was to put some 3in1 oil on the module that was sticking and it seems to be working a lot better now.
John Jaggi - 回复 分享
@corytc and @tomchak I did replace the module, in general, you buy (Amazon or eBay) you will receive a module of 6 modules you need a multimeter and test each module interface, measure both resistances and subtract them, the one nearest zero is the module you will use since is the one with least drift from the factory.
Just disassemble it, turn upside down uses a solder remover and unsolder the old one, place the new one solder back, boom you are done.
Like you will need an iron solder with medium and thin tips, I used lead-free solder, so is a patience test, be careful with the wires from the rumbles, try not to unsolder them since is a thin wire and is difficult, like I have big hands so took me a while to solder back.
Just want to say the hardest part is carefully prying off the plastic covers on the handles. It’s also not necessary to remove the back cover for simply replacing the joysticks. Other than that, it’s very easy. I would guess this is rated at moderate difficulty simply due to the plastic covers.