跳转到主内容

Xbox One Afterglow Prismatic Wired Controller Button and Trigger Replacement

你所需要的

  1. Xbox One Afterglow Prismatic Wired Controller Button and Trigger Replacement, Controller Button and Trigger: 步骤 1 中的图像 1,2 Xbox One Afterglow Prismatic Wired Controller Button and Trigger Replacement, Controller Button and Trigger: 步骤 1 中的图像 2,2
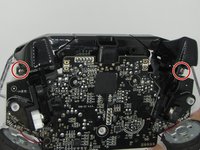
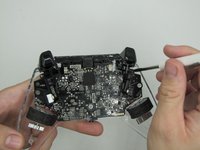
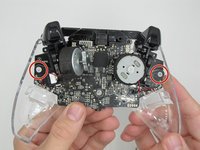
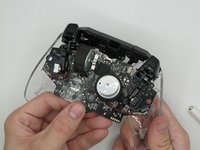
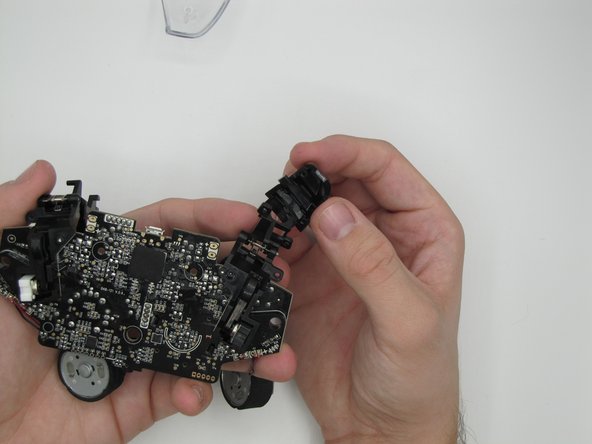
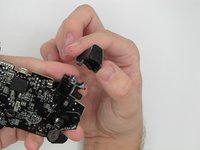
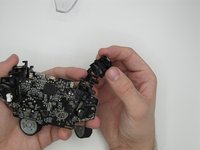
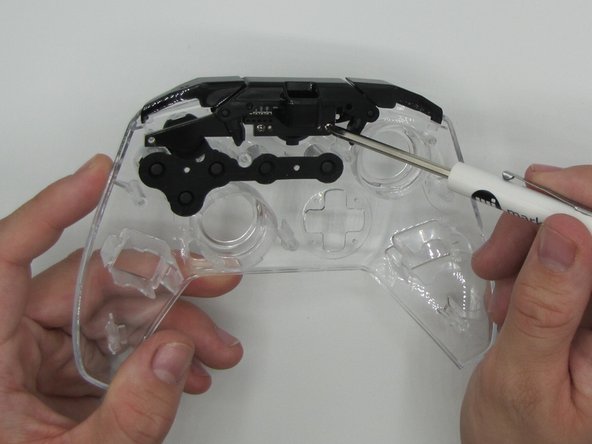
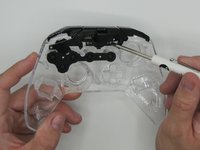
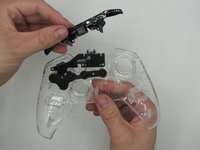
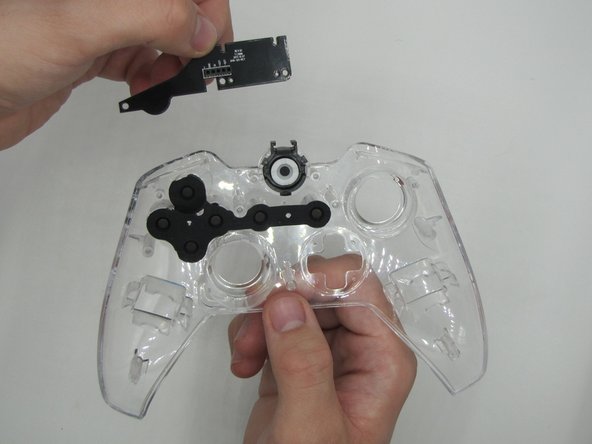
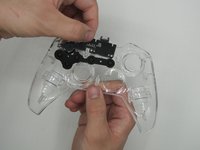
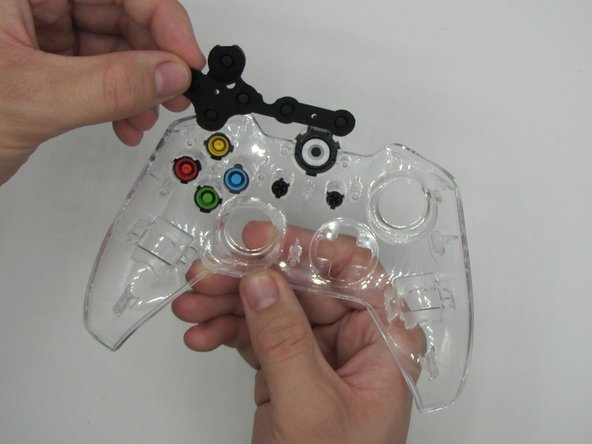
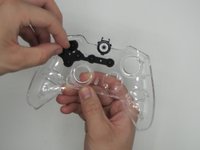
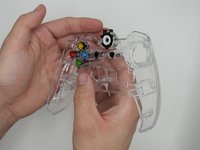
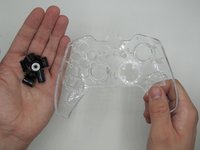
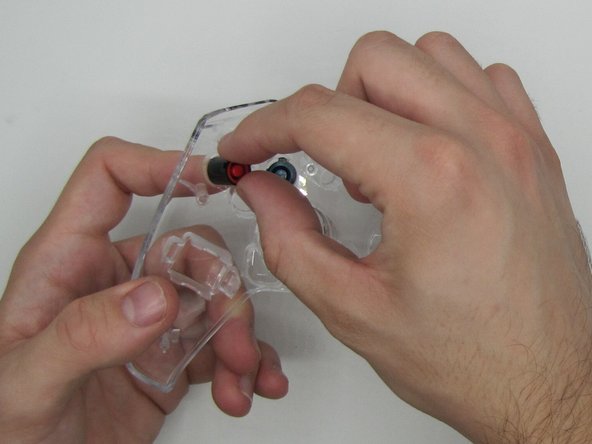
    • Remove the seven screws from the back of the controller using a Phillips #1 screwdriver.

  2. Xbox One Afterglow Prismatic Wired Controller Button and Trigger Replacement: 步骤 2 中的图像 1,3 Xbox One Afterglow Prismatic Wired Controller Button and Trigger Replacement: 步骤 2 中的图像 2,3 Xbox One Afterglow Prismatic Wired Controller Button and Trigger Replacement: 步骤 2 中的图像 3,3
    • Place an opening tool between the front and rear controller panels at the bottom of the controller.

    • Pry the bottom of the controller open around the audio port.

    • The controller might make a loud click; that is okay.

  3. Xbox One Afterglow Prismatic Wired Controller Button and Trigger Replacement: 步骤 3 中的图像 1,2 Xbox One Afterglow Prismatic Wired Controller Button and Trigger Replacement: 步骤 3 中的图像 2,2
    • Remove both screws on the back of the motherboard under the triggers using a Phillips #1 screwdriver.

  4. Xbox One Afterglow Prismatic Wired Controller Button and Trigger Replacement: 步骤 4 中的图像 1,3 Xbox One Afterglow Prismatic Wired Controller Button and Trigger Replacement: 步骤 4 中的图像 2,3 Xbox One Afterglow Prismatic Wired Controller Button and Trigger Replacement: 步骤 4 中的图像 3,3
    • Place your left hand at the base of the motherboard and your right hand on the frame.

    • Lift the motherboard up from the pegs that hold it in place.

    • The motherboard will still be connected to the controller once off the pegs.

    • Do not try to force the motherboard out after getting it off the pegs.

    • Pull down gently to remove the motherboard.

  5. Xbox One Afterglow Prismatic Wired Controller Button and Trigger Replacement: 步骤 5 中的图像 1,2 Xbox One Afterglow Prismatic Wired Controller Button and Trigger Replacement: 步骤 5 中的图像 2,2
    • Under each trigger is a small guard rail that needs to be pushed in order to get to the screws for the trigger.

    • Push the rail towards the motherboard to free the triggers to get to the screws.

  6. Xbox One Afterglow Prismatic Wired Controller Button and Trigger Replacement: 步骤 6 中的图像 1,1
    • Remove the two screws from each of the triggers (four total) using a Phillips #1 screwdriver.

    • The triggers will fall out when unscrewed.

  7. Xbox One Afterglow Prismatic Wired Controller Button and Trigger Replacement: 步骤 7 中的图像 1,3 Xbox One Afterglow Prismatic Wired Controller Button and Trigger Replacement: 步骤 7 中的图像 2,3 Xbox One Afterglow Prismatic Wired Controller Button and Trigger Replacement: 步骤 7 中的图像 3,3
    • Replace each of the triggers by screwing them back together.

    • Push the rail back onto the trigger peg.

    • The motherboard is done until reassembly.

  8. Xbox One Afterglow Prismatic Wired Controller Button and Trigger Replacement: 步骤 8 中的图像 1,2 Xbox One Afterglow Prismatic Wired Controller Button and Trigger Replacement: 步骤 8 中的图像 2,2
    • Remove the two screws from the top bumper board using a Phillips #1 screwdriver.

  9. Xbox One Afterglow Prismatic Wired Controller Button and Trigger Replacement: 步骤 9 中的图像 1,2 Xbox One Afterglow Prismatic Wired Controller Button and Trigger Replacement: 步骤 9 中的图像 2,2
    • Pull up on the bumper board to remove it.

  10. Xbox One Afterglow Prismatic Wired Controller Button and Trigger Replacement: 步骤 10 中的图像 1,2 Xbox One Afterglow Prismatic Wired Controller Button and Trigger Replacement: 步骤 10 中的图像 2,2
    • Pick up the circuit board to remove it from the base.

    • The circuit board is loose and might fall out in Step 9.

  11. Xbox One Afterglow Prismatic Wired Controller Button and Trigger Replacement: 步骤 11 中的图像 1,2 Xbox One Afterglow Prismatic Wired Controller Button and Trigger Replacement: 步骤 11 中的图像 2,2
    • Remove the rubber button cover.

  12. Xbox One Afterglow Prismatic Wired Controller Button and Trigger Replacement: 步骤 12 中的图像 1,2 Xbox One Afterglow Prismatic Wired Controller Button and Trigger Replacement: 步骤 12 中的图像 2,2
    • Remove the inner buttons.

  13. Xbox One Afterglow Prismatic Wired Controller Button and Trigger Replacement: 步骤 13 中的图像 1,2 Xbox One Afterglow Prismatic Wired Controller Button and Trigger Replacement: 步骤 13 中的图像 2,2
    • Replace each of the buttons.

    • Each of the buttons have pegs that will help you line them up in the correct location and orientation.

结论

To reassemble your device, follow these instructions in reverse order.

3等其他人完成本指南。

2条评论

Can you tell me where i can get the exact same circuit board for this controller i would greatly appreciate it if you respond!

ismaeel - 回复

I took my controller apart up to step 4 in order to reseat the analog stick sensors to help with stick drift and this guide helped me check my work to make sure I hadn't missed anything and was doing it properly. The pictures were quite handy.

.

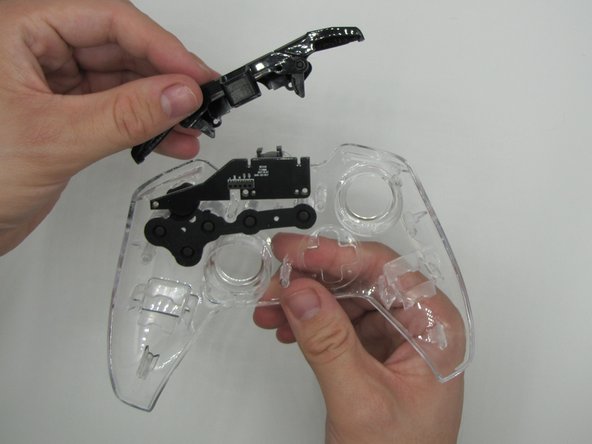
I think it would be good to add that there's a pin array attached to the second circuit board with the bumpers that you need to re socket when putting the controller back together. The controller mostly works even without the pins in place, but the Y button is connected to one of these pins and will not work unless the pins are properly socketed, I had to disassemble and reassemble my controller a second time after realising this, but once I got it done with the pins in the right place it worked as desired. It's entirely possible and maybe even likely you'll bend the pins on the secondary board during initial disassembly (I had), but it's easy to simply set them back upright, just don't lose the pin guide!

Jay Denney - 回复

添加评论

浏览统计数据:

过去 24 小时: 2

过去 7 天: 31

过去 30 天: 65

总计 3,375