你所需要的
-
-
Remove the two screws holding the battery in place.
-
Slip your finger into the finger hole provided at the top of the battery and lift to remove it.
-
-
-
Remove the five Phillips screws securing the bottom to the case.
-
Slide the cover up slightly to release the catches holding it in place. This is the view on the right. The mark on the cover should now line up with the second mark on the case of the computer.
-
-
-
-
This is the view on the left before and after sliding the cover. The mark on the cover should now line up with the second mark on the case of the computer.
-
Lift the bottom cover to remove it.
-
-
-
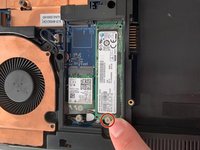
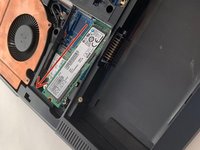
Remove the Phillips screw securing the M.2 SSD drive in place. The end of the drive will pop up by a small amount.
-
Slide the drive out from the connector in a straight line. If you feel resistance, try raising it slightly.
-
To reassemble your device, follow the instructions in reverse order.
由衷感谢以下译者:
80%
Jerry Wheeler正在帮助我们修复这个世界! 您也想加入吗?
开始翻译 ›


