跳转到主内容

Welch Allyn Connex Vital Signs Monitor 6000 LCD Replacement

医疗设备
ifixit 或本维修指南均未获得医疗设备制造商的认可或与任何制造商存在附属关系。

你所需要的

  1. Welch Allyn Connex Vital Signs Monitor 6000 LCD Replacement, Stand: 步骤 1 中的图像 1,2 Welch Allyn Connex Vital Signs Monitor 6000 LCD Replacement, Stand: 步骤 1 中的图像 2,2
    • Unplug the AC power connection cable.

  2. Welch Allyn Connex Vital Signs Monitor 6000 LCD Replacement: 步骤 2 中的图像 1,3 Welch Allyn Connex Vital Signs Monitor 6000 LCD Replacement: 步骤 2 中的图像 2,3 Welch Allyn Connex Vital Signs Monitor 6000 LCD Replacement: 步骤 2 中的图像 3,3
    • Place your thumb and forefinger on the blood pressure (NIBP) hose connector. Squeeze the side tabs until the connector releases.

    • Always grasp the hose by the connector. Do not pull on the hose itself.

    • Pull the connector away from the connector port.

  3. Welch Allyn Connex Vital Signs Monitor 6000 LCD Replacement: 步骤 3 中的图像 1,3 Welch Allyn Connex Vital Signs Monitor 6000 LCD Replacement: 步骤 3 中的图像 2,3 Welch Allyn Connex Vital Signs Monitor 6000 LCD Replacement: 步骤 3 中的图像 3,3
    • Place your thumb and forefinger on the Pulse oximetry (SpO2 or combined SpO2/SpHb) cable connector. Squeeze the side tabs until the connector releases.

    • Always grasp the cable by the connector. Do not pull on the cable itself.

    • Pull the connector away from the connector port.

  4. Welch Allyn Connex Vital Signs Monitor 6000 LCD Replacement: 步骤 4 中的图像 1,2 Welch Allyn Connex Vital Signs Monitor 6000 LCD Replacement: 步骤 4 中的图像 2,2
    • Grasp the temperature probe and pull it up to remove it from the monitor.

  5. Welch Allyn Connex Vital Signs Monitor 6000 LCD Replacement: 步骤 5 中的图像 1,3 Welch Allyn Connex Vital Signs Monitor 6000 LCD Replacement: 步骤 5 中的图像 2,3 Welch Allyn Connex Vital Signs Monitor 6000 LCD Replacement: 步骤 5 中的图像 3,3
    • Remove the cover of the temperature module by pressing the tab and sliding the cover to the right.

  6. Welch Allyn Connex Vital Signs Monitor 6000 LCD Replacement: 步骤 6 中的图像 1,3 Welch Allyn Connex Vital Signs Monitor 6000 LCD Replacement: 步骤 6 中的图像 2,3 Welch Allyn Connex Vital Signs Monitor 6000 LCD Replacement: 步骤 6 中的图像 3,3
    • Depress the spring tab on the temperature probe cable connector and withdraw it from the probe port.

  7. Welch Allyn Connex Vital Signs Monitor 6000 LCD Replacement: 步骤 7 中的图像 1,1
    • Remove the flathead screw on the USB networking door.

    • Loosen the captive Phillips #2 screw securing the monitor to the stand.

  8. Welch Allyn Connex Vital Signs Monitor 6000 LCD Replacement: 步骤 8 中的图像 1,1
    • Holding the monitor securely, open the USB networking door.

    • You may have to lift the monitor slightly to allow the door to swing out from the stand mount.

  9. Welch Allyn Connex Vital Signs Monitor 6000 LCD Replacement: 步骤 9 中的图像 1,2 Welch Allyn Connex Vital Signs Monitor 6000 LCD Replacement: 步骤 9 中的图像 2,2
    • Detach any accessory USB cables from USB ports on the monitor.

  10. Welch Allyn Connex Vital Signs Monitor 6000 LCD Replacement: 步骤 10 中的图像 1,3 Welch Allyn Connex Vital Signs Monitor 6000 LCD Replacement: 步骤 10 中的图像 2,3 Welch Allyn Connex Vital Signs Monitor 6000 LCD Replacement: 步骤 10 中的图像 3,3
    • Slide the monitor off of the stand tray.

  11. Welch Allyn Connex Vital Signs Monitor 6000 LCD Replacement, Battery: 步骤 11 中的图像 1,3 Welch Allyn Connex Vital Signs Monitor 6000 LCD Replacement, Battery: 步骤 11 中的图像 2,3 Welch Allyn Connex Vital Signs Monitor 6000 LCD Replacement, Battery: 步骤 11 中的图像 3,3
    • Place the monitor upside down on a clean surface.

    • Insert a coin into the slot and push to open.

    • Choose a coin that fits comfortably into the slot.

    • Remove the battery cover.

  12. Welch Allyn Connex Vital Signs Monitor 6000 LCD Replacement: 步骤 12 中的图像 1,3 Welch Allyn Connex Vital Signs Monitor 6000 LCD Replacement: 步骤 12 中的图像 2,3 Welch Allyn Connex Vital Signs Monitor 6000 LCD Replacement: 步骤 12 中的图像 3,3
    • Use the plastic label to remove the battery from its recess.

  13. Welch Allyn Connex Vital Signs Monitor 6000 LCD Replacement, Rear Housing: 步骤 13 中的图像 1,2 Welch Allyn Connex Vital Signs Monitor 6000 LCD Replacement, Rear Housing: 步骤 13 中的图像 2,2
    • Open the communications door to access the lower left-hand rear housing screw.

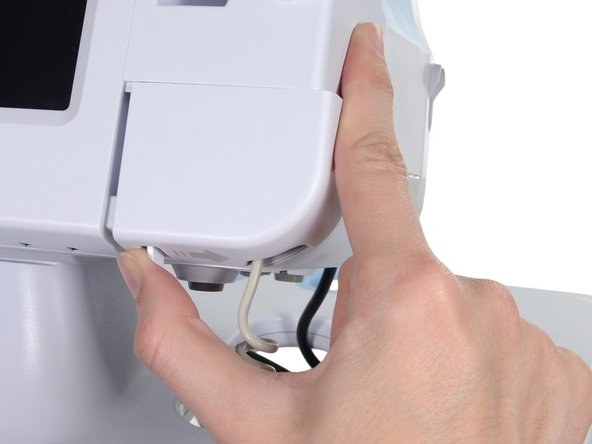
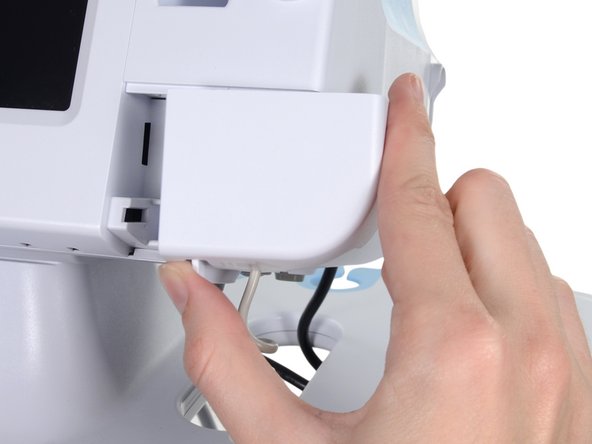
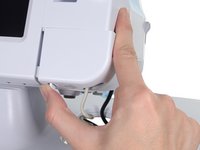
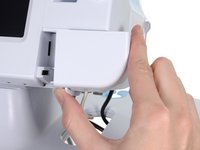
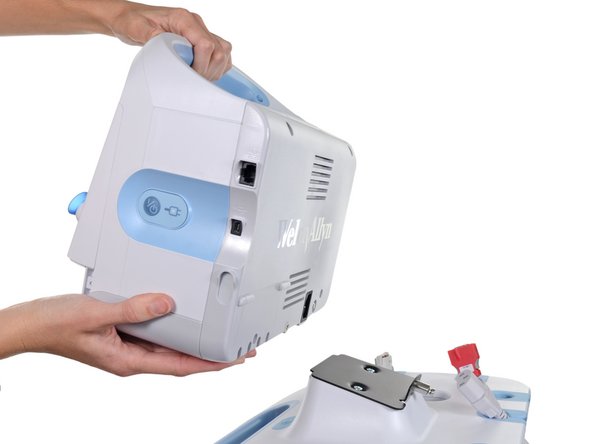
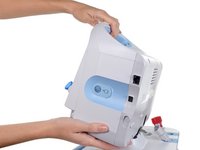
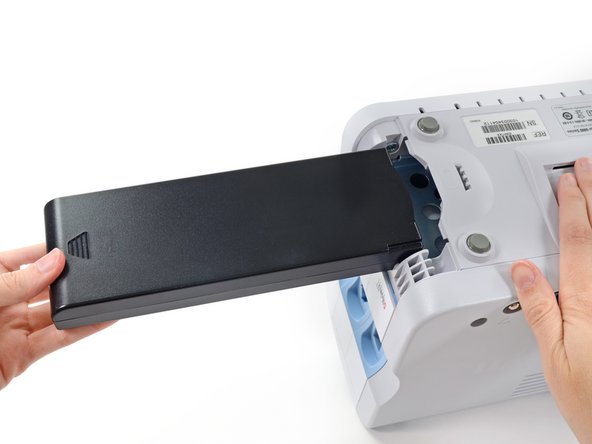
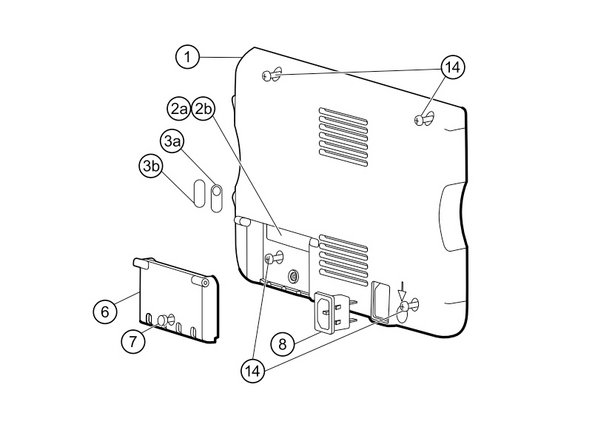
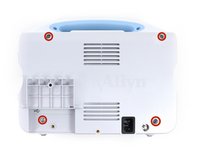
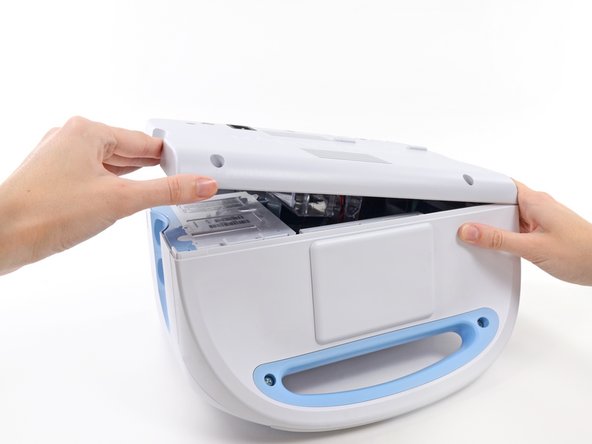
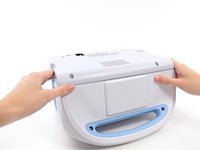
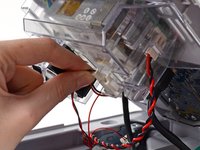
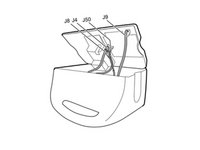
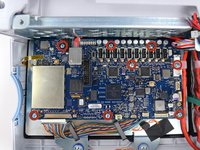
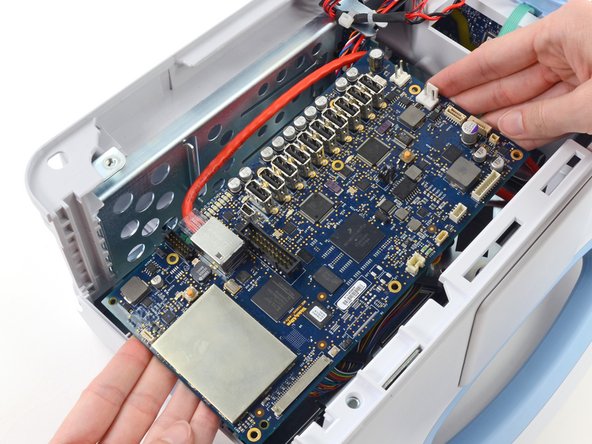
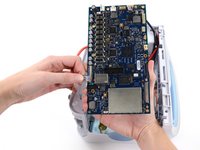
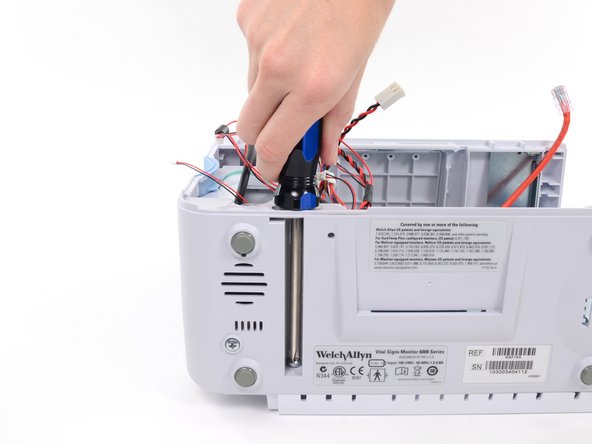
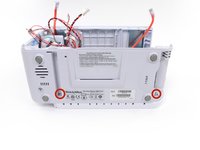
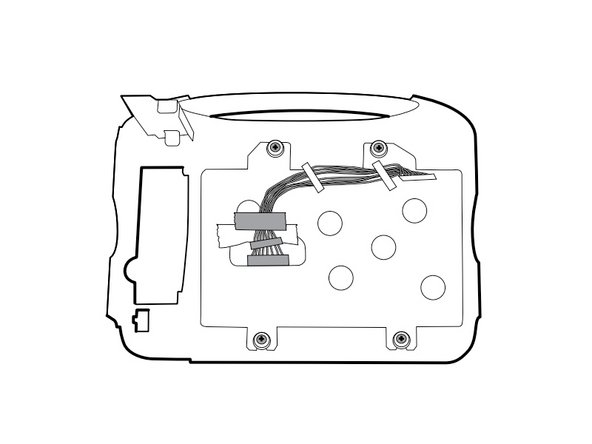
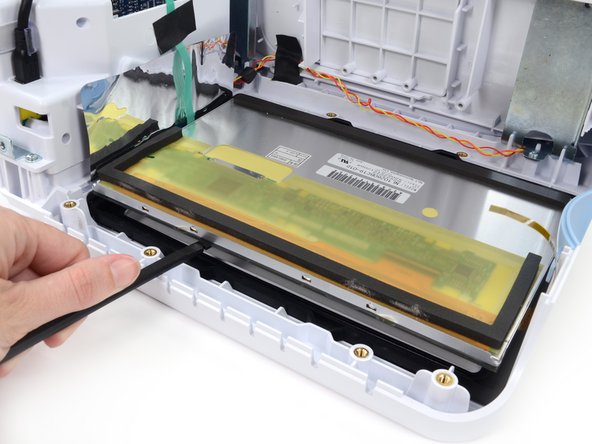
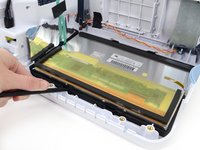
    • Remove the four Phillips #2 screws (labeled 14 in the service manual) from the rear housing.

  14. Welch Allyn Connex Vital Signs Monitor 6000 LCD Replacement: 步骤 14 中的图像 1,2 Welch Allyn Connex Vital Signs Monitor 6000 LCD Replacement: 步骤 14 中的图像 2,2
    • With the handle/alert bar facing you, begin to lift the rear housing from the left side, holding the right side securely.

    • Do not attempt to separate the rear housing from the monitor, it is still attached with several cables.

  15. Welch Allyn Connex Vital Signs Monitor 6000 LCD Replacement: 步骤 15 中的图像 1,1
    • Support the rear housing while you disconnect the cables in the following steps.

  16. Welch Allyn Connex Vital Signs Monitor 6000 LCD Replacement: 步骤 16 中的图像 1,3 Welch Allyn Connex Vital Signs Monitor 6000 LCD Replacement: 步骤 16 中的图像 2,3 Welch Allyn Connex Vital Signs Monitor 6000 LCD Replacement: 步骤 16 中的图像 3,3
    • Disconnect the fan cable (labeled connector A in the service manual) from its socket in the power supply.

  17. Welch Allyn Connex Vital Signs Monitor 6000 LCD Replacement: 步骤 17 中的图像 1,3 Welch Allyn Connex Vital Signs Monitor 6000 LCD Replacement: 步骤 17 中的图像 2,3 Welch Allyn Connex Vital Signs Monitor 6000 LCD Replacement: 步骤 17 中的图像 3,3
    • Unplug the small USB connector from its socket (labeled J4 in the service manual).

  18. Welch Allyn Connex Vital Signs Monitor 6000 LCD Replacement: 步骤 18 中的图像 1,3 Welch Allyn Connex Vital Signs Monitor 6000 LCD Replacement: 步骤 18 中的图像 2,3 Welch Allyn Connex Vital Signs Monitor 6000 LCD Replacement: 步骤 18 中的图像 3,3
    • Disconnect the communications power cable from its socket (labeled J50 in the service manual).

    • Only pull on the connector itself and not the socket. This connection is very tight, work the connector slowly and gently.

  19. Welch Allyn Connex Vital Signs Monitor 6000 LCD Replacement: 步骤 19 中的图像 1,3 Welch Allyn Connex Vital Signs Monitor 6000 LCD Replacement: 步骤 19 中的图像 2,3 Welch Allyn Connex Vital Signs Monitor 6000 LCD Replacement: 步骤 19 中的图像 3,3
    • Unplug the large USB connector from its socket (labeled J8 in the service manual).

  20. Welch Allyn Connex Vital Signs Monitor 6000 LCD Replacement: 步骤 20 中的图像 1,3 Welch Allyn Connex Vital Signs Monitor 6000 LCD Replacement: 步骤 20 中的图像 2,3 Welch Allyn Connex Vital Signs Monitor 6000 LCD Replacement: 步骤 20 中的图像 3,3
    • Press the tab on the ethernet cable and unplug it from its socket (labeled J9 in the service manual).

  21. Welch Allyn Connex Vital Signs Monitor 6000 LCD Replacement: 步骤 21 中的图像 1,1
    • The following connector requires two hands to disconnect. Flip the rear case over, and lay it on its back to gain access to the power supply cable.

  22. Welch Allyn Connex Vital Signs Monitor 6000 LCD Replacement: 步骤 22 中的图像 1,3 Welch Allyn Connex Vital Signs Monitor 6000 LCD Replacement: 步骤 22 中的图像 2,3 Welch Allyn Connex Vital Signs Monitor 6000 LCD Replacement: 步骤 22 中的图像 3,3
    • The power supply cable is secured by an interlocking connector that must be held open to unplug the connector.

    • Insert the flat end of a spudger down into the power supply cover between the socket clip and the power supply connector.

  23. Welch Allyn Connex Vital Signs Monitor 6000 LCD Replacement: 步骤 23 中的图像 1,3 Welch Allyn Connex Vital Signs Monitor 6000 LCD Replacement: 步骤 23 中的图像 2,3 Welch Allyn Connex Vital Signs Monitor 6000 LCD Replacement: 步骤 23 中的图像 3,3
    • Grasp the power supply cable firmly and lift both it and the spudger from the channel in the power supply housing to unplug the connector.

  24. Welch Allyn Connex Vital Signs Monitor 6000 LCD Replacement, Motherboard: 步骤 24 中的图像 1,3 Welch Allyn Connex Vital Signs Monitor 6000 LCD Replacement, Motherboard: 步骤 24 中的图像 2,3 Welch Allyn Connex Vital Signs Monitor 6000 LCD Replacement, Motherboard: 步骤 24 中的图像 3,3
    • Remove all USB connectors from their ports on the motherboard.

    • Note the USB locations before removal for ease of reassembly. The locations of the USB as seen in the manual are shown in the third image. Your unit may differ depending on options.

  25. Welch Allyn Connex Vital Signs Monitor 6000 LCD Replacement: 步骤 25 中的图像 1,2 Welch Allyn Connex Vital Signs Monitor 6000 LCD Replacement: 步骤 25 中的图像 2,2
    • Fold the USB cable bundle out of the way.

    • When reassembling, position each cable to extend approximately 1.5 inches past the separator as shown.

  26. Welch Allyn Connex Vital Signs Monitor 6000 LCD Replacement: 步骤 26 中的图像 1,3 Welch Allyn Connex Vital Signs Monitor 6000 LCD Replacement: 步骤 26 中的图像 2,3 Welch Allyn Connex Vital Signs Monitor 6000 LCD Replacement: 步骤 26 中的图像 3,3
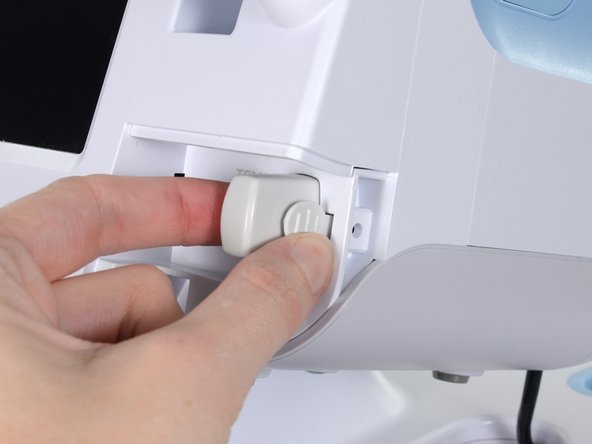
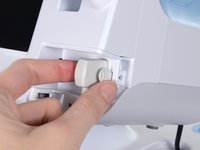
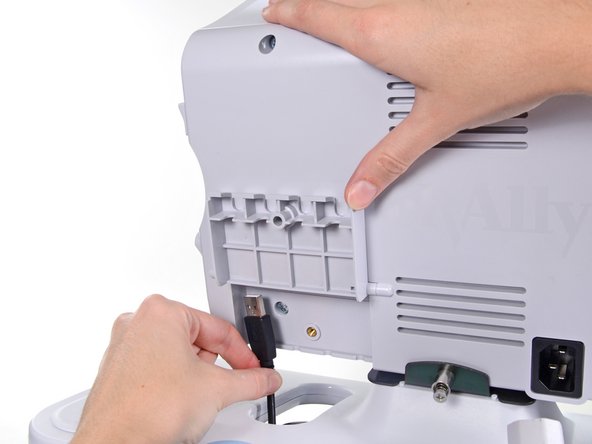
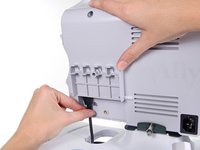
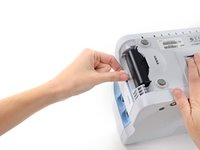
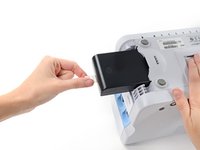
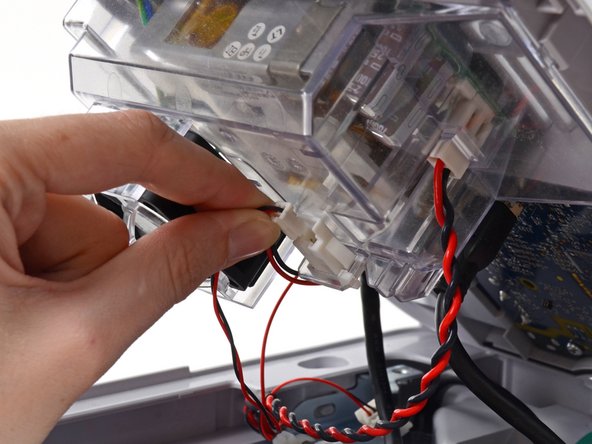
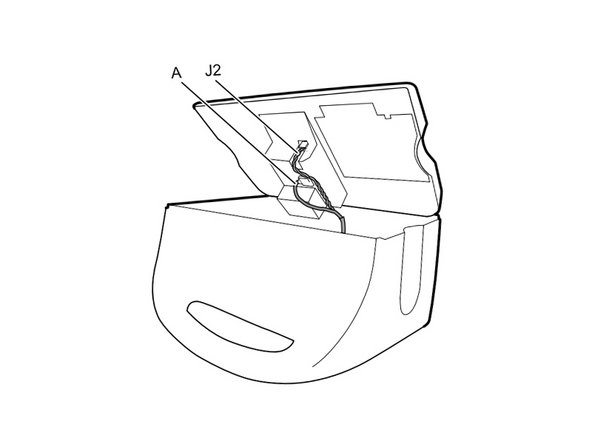
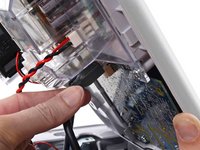
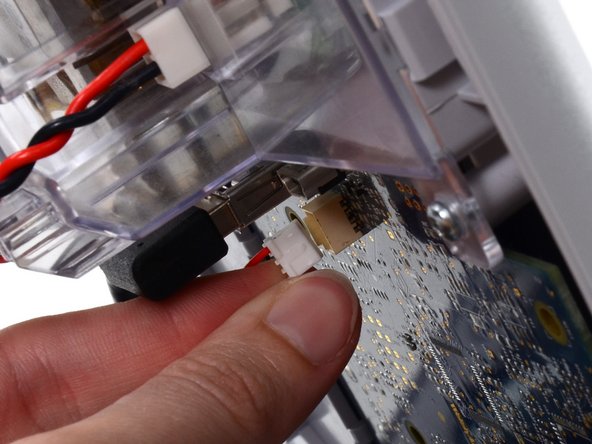
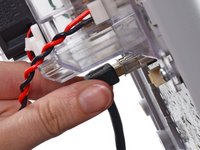
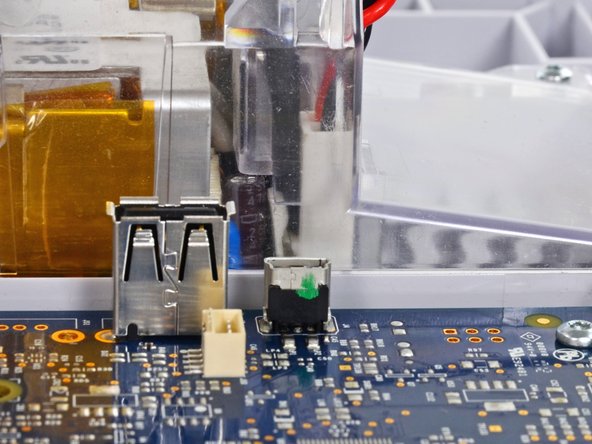
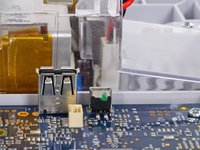
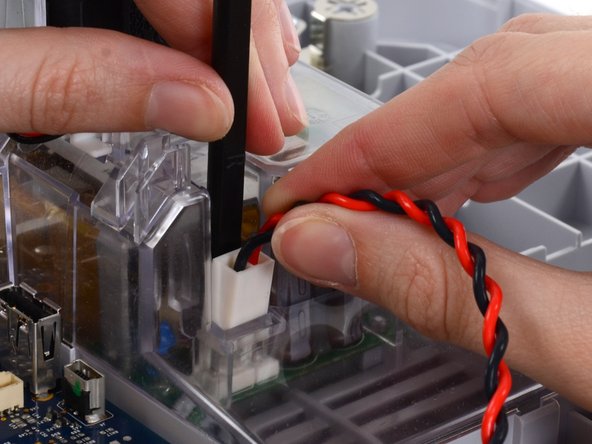
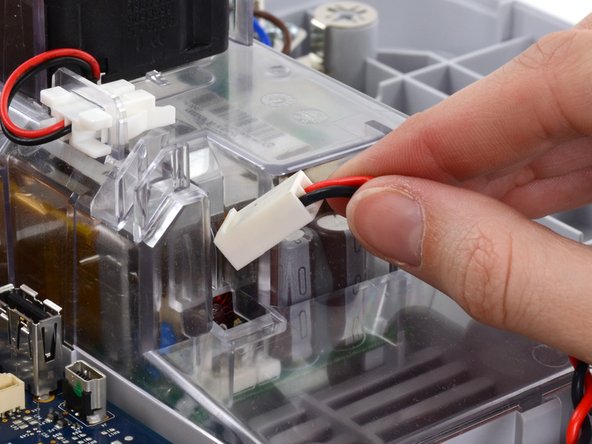
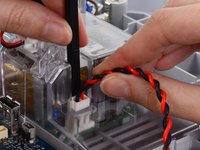
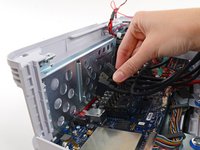
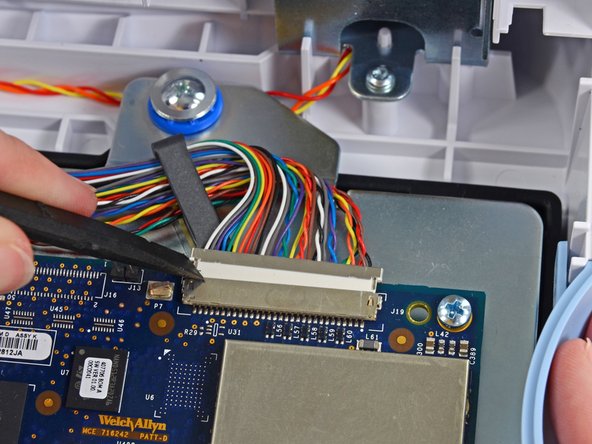
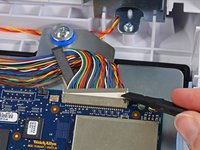
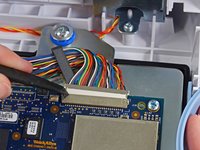
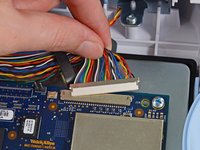
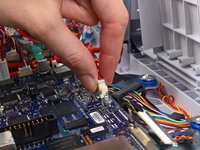
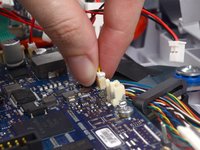
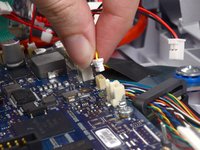
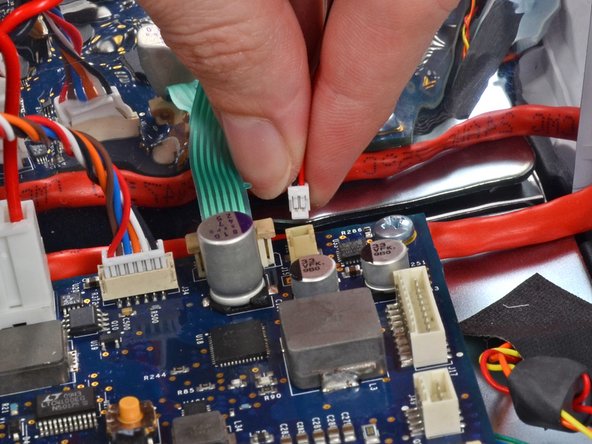
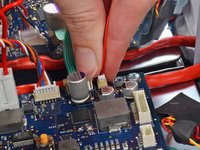
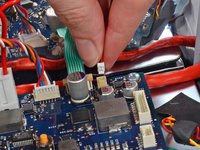
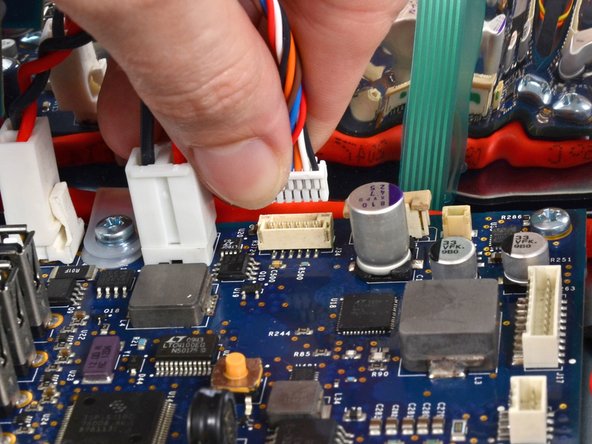
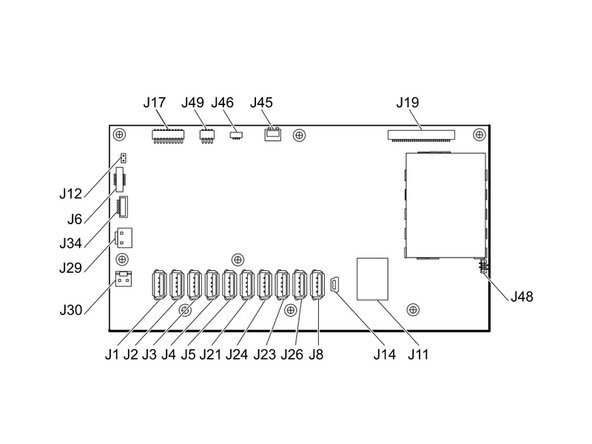
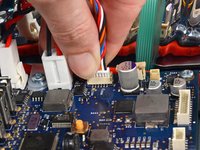
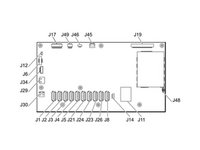
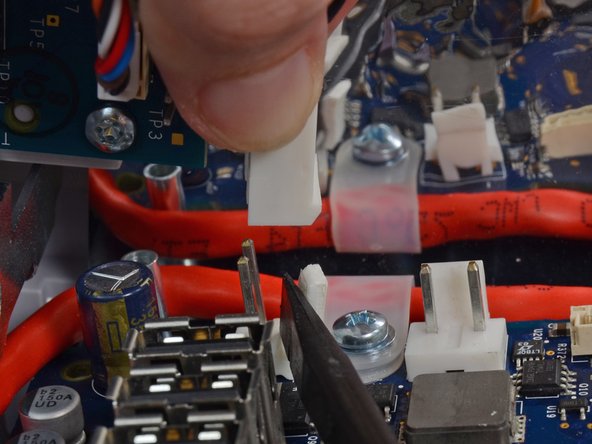
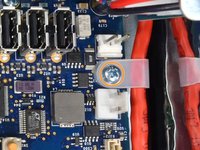
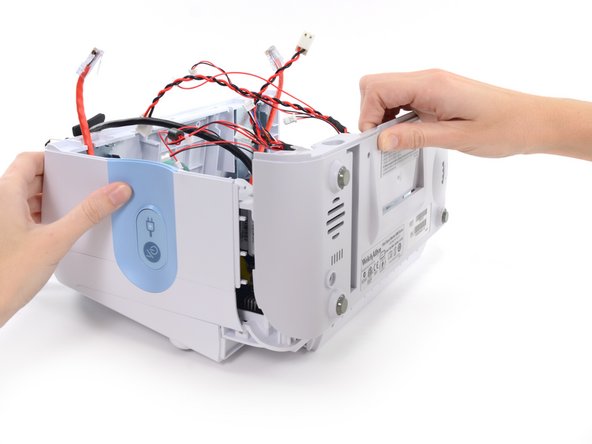
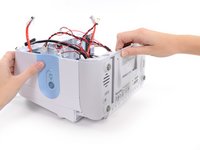
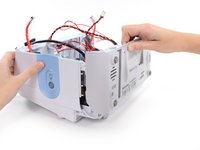
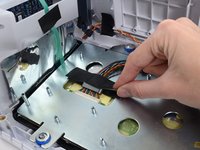
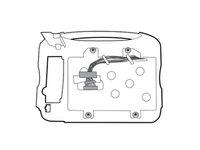
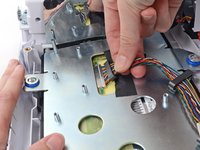
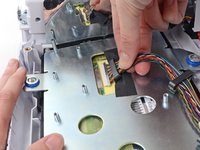
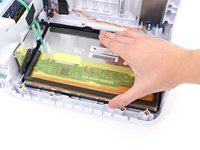
    • Use the flat end of a spudger to "walk" the LCD cable connector (labeled J19 in the service manual) out of its socket.

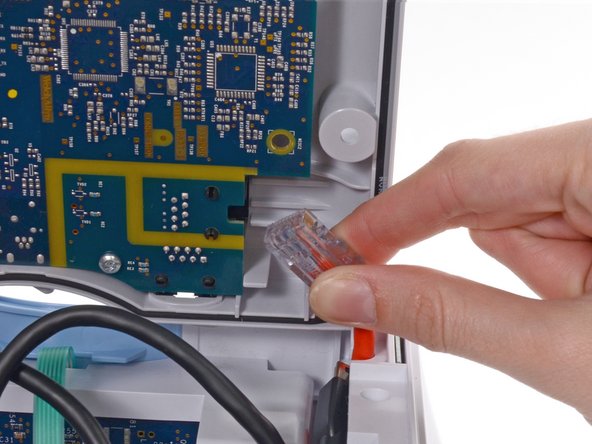
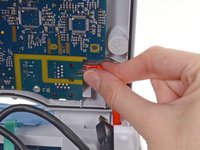
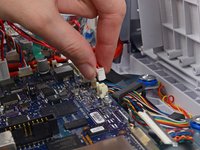
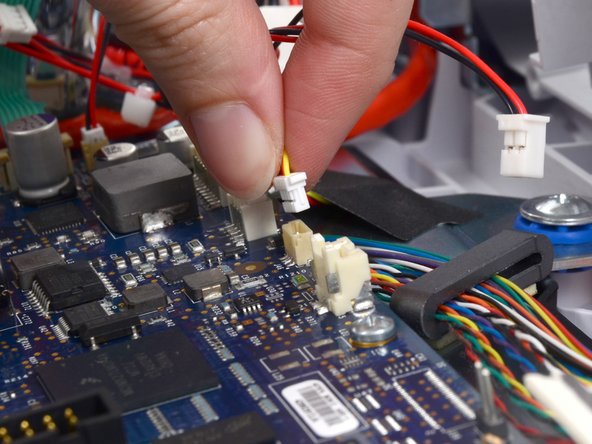
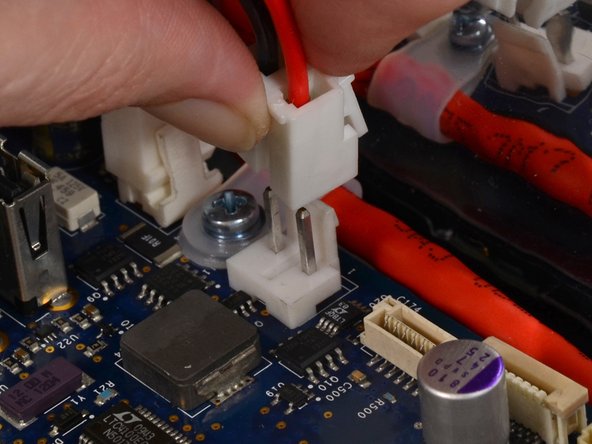
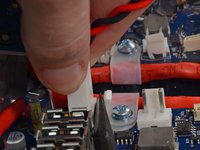
    • Press first on one side of the connector, then the other to push it free. Be sure to press the connector itself, not the socket on the motherboard.

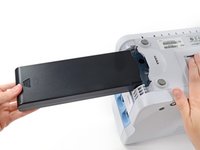
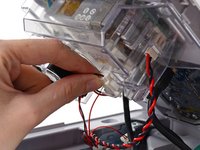
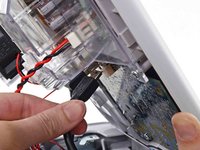
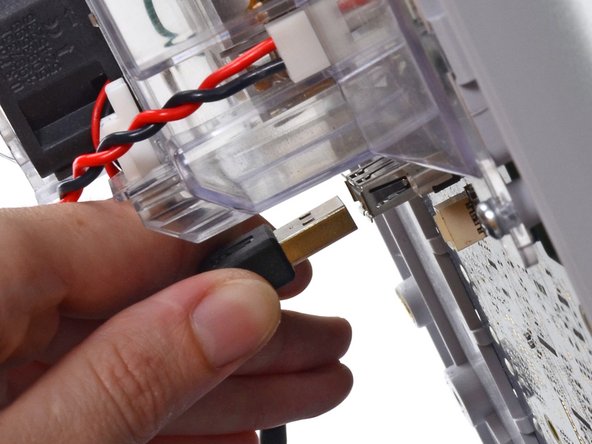
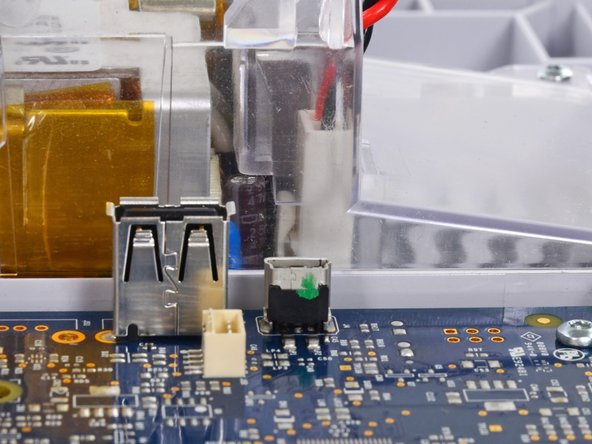
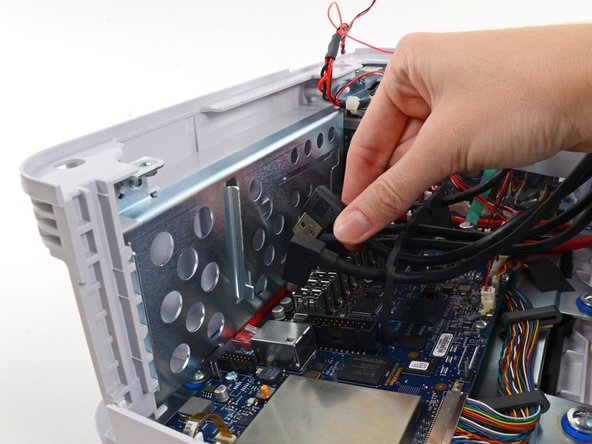
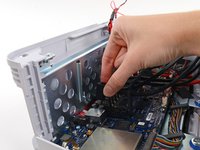
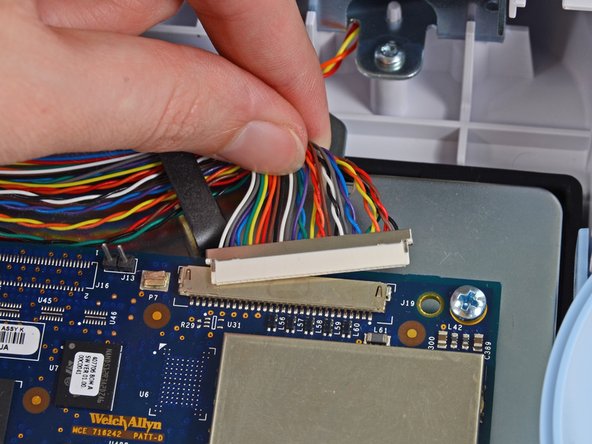
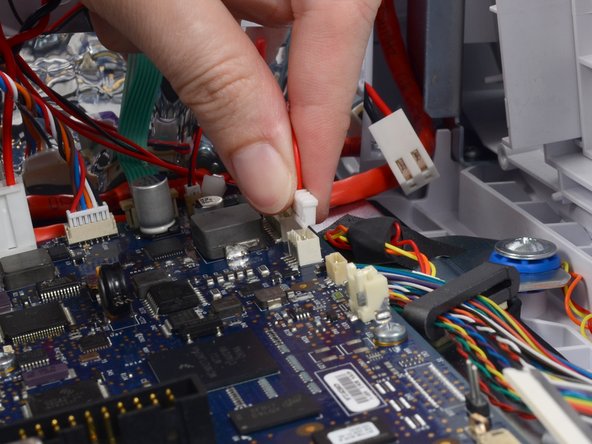
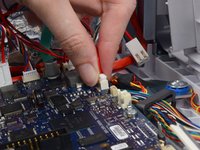
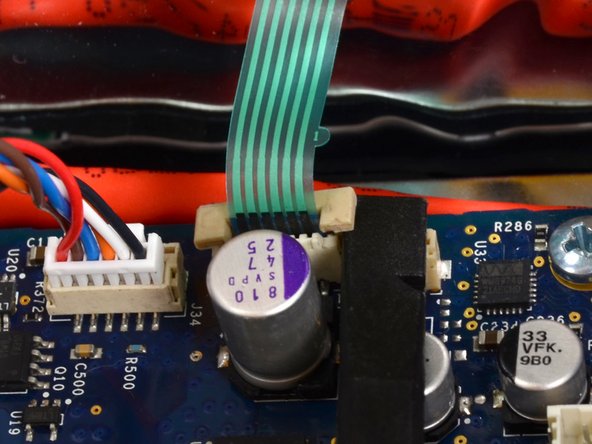
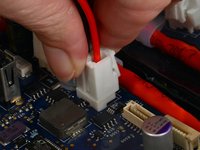
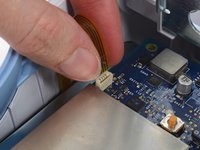
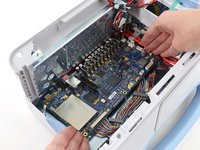
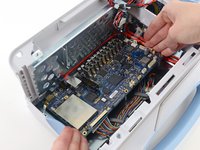
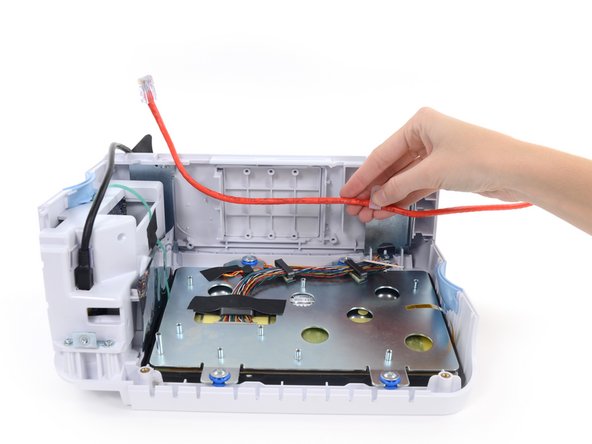
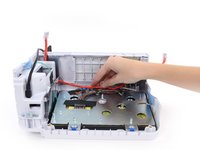
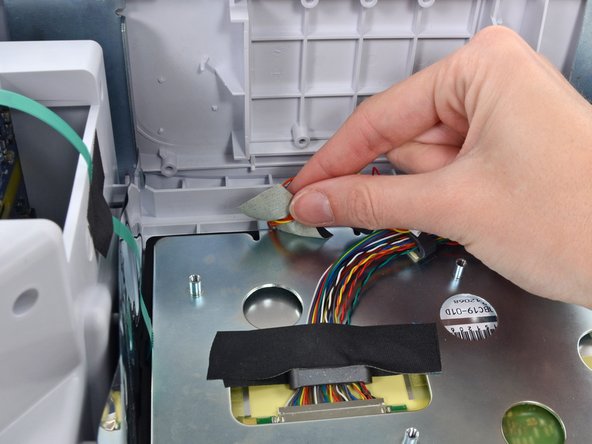
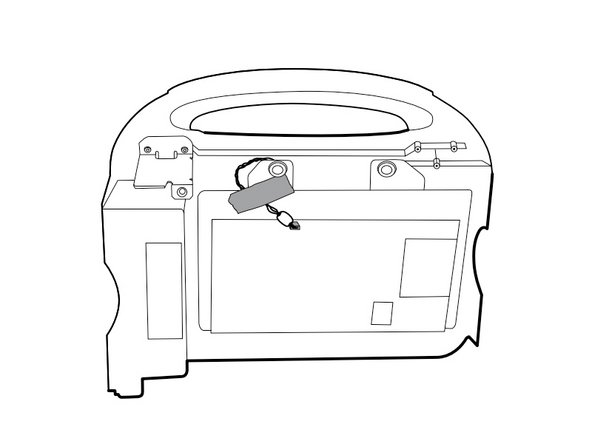
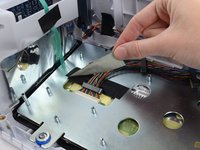
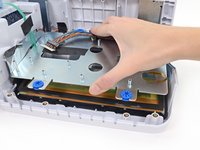
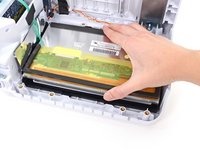
    • Pull the cable straight out of its socket.

  27. Welch Allyn Connex Vital Signs Monitor 6000 LCD Replacement: 步骤 27 中的图像 1,3 Welch Allyn Connex Vital Signs Monitor 6000 LCD Replacement: 步骤 27 中的图像 2,3 Welch Allyn Connex Vital Signs Monitor 6000 LCD Replacement: 步骤 27 中的图像 3,3
    • Pinch the fan cable connector (labeled J45 in the service manual) and pull straight up to remove it from its socket.

    • Be sure to pull only on the connector itself, not the socket on the motherboard.

  28. Welch Allyn Connex Vital Signs Monitor 6000 LCD Replacement: 步骤 28 中的图像 1,3 Welch Allyn Connex Vital Signs Monitor 6000 LCD Replacement: 步骤 28 中的图像 2,3 Welch Allyn Connex Vital Signs Monitor 6000 LCD Replacement: 步骤 28 中的图像 3,3
    • Pull the light bar cable connector (labeled J46 in the service manual) straight up out of its socket.

  29. Welch Allyn Connex Vital Signs Monitor 6000 LCD Replacement: 步骤 29 中的图像 1,3 Welch Allyn Connex Vital Signs Monitor 6000 LCD Replacement: 步骤 29 中的图像 2,3 Welch Allyn Connex Vital Signs Monitor 6000 LCD Replacement: 步骤 29 中的图像 3,3
    • Remove the communications board cable connector from its socket (labeled J49 in the service manual).

    • If you have a printer unit in your model, remove the printer power cable at this time, it is labeled J17 in the service manual.

  30. Welch Allyn Connex Vital Signs Monitor 6000 LCD Replacement: 步骤 30 中的图像 1,3 Welch Allyn Connex Vital Signs Monitor 6000 LCD Replacement: 步骤 30 中的图像 2,3 Welch Allyn Connex Vital Signs Monitor 6000 LCD Replacement: 步骤 30 中的图像 3,3
    • Carefully remove the speaker cable connector (labeled J12 in the service manual) from the motherboard.

  31. Welch Allyn Connex Vital Signs Monitor 6000 LCD Replacement: 步骤 31 中的图像 1,3 Welch Allyn Connex Vital Signs Monitor 6000 LCD Replacement: 步骤 31 中的图像 2,3 Welch Allyn Connex Vital Signs Monitor 6000 LCD Replacement: 步骤 31 中的图像 3,3
    • Lift the ZIF collar securing the power button cable (labeled J6 in the service manual) with the flat end of a spudger to loosen its grip.

    • Pull the power button cable straight up from its socket.

  32. Welch Allyn Connex Vital Signs Monitor 6000 LCD Replacement: 步骤 32 中的图像 1,3 Welch Allyn Connex Vital Signs Monitor 6000 LCD Replacement: 步骤 32 中的图像 2,3 Welch Allyn Connex Vital Signs Monitor 6000 LCD Replacement: 步骤 32 中的图像 3,3
    • Remove the smart-battery cable connector from its socket (labeled J34 in the service manual).

  33. Welch Allyn Connex Vital Signs Monitor 6000 LCD Replacement: 步骤 33 中的图像 1,3 Welch Allyn Connex Vital Signs Monitor 6000 LCD Replacement: 步骤 33 中的图像 2,3 Welch Allyn Connex Vital Signs Monitor 6000 LCD Replacement: 步骤 33 中的图像 3,3
    • Pinch the battery power connector and lift straight up to unclip it from its socket on the motherboard (labeled J29 in the service manual).

  34. Welch Allyn Connex Vital Signs Monitor 6000 LCD Replacement: 步骤 34 中的图像 1,2 Welch Allyn Connex Vital Signs Monitor 6000 LCD Replacement: 步骤 34 中的图像 2,2
    • Use the flat end of a spudger to separate the battery supply cable connector bracket from the socket (labeled J30 in the service manual).

    • Pull the battery supply cable connector straight up from the board.

  35. Welch Allyn Connex Vital Signs Monitor 6000 LCD Replacement: 步骤 35 中的图像 1,2 Welch Allyn Connex Vital Signs Monitor 6000 LCD Replacement: 步骤 35 中的图像 2,2
    • Carefully pull the LCD flex cable straight up from its socket in the motherboard (labeled J48 in the service manual).

  36. Welch Allyn Connex Vital Signs Monitor 6000 LCD Replacement: 步骤 36 中的图像 1,2 Welch Allyn Connex Vital Signs Monitor 6000 LCD Replacement: 步骤 36 中的图像 2,2
    • Remove the eight Phillips #1 screws from the motherboard.

    • The screw securing the ethernet cable bracket has a washer between it and the bracket. Take care not to lose it.

  37. Welch Allyn Connex Vital Signs Monitor 6000 LCD Replacement: 步骤 37 中的图像 1,3 Welch Allyn Connex Vital Signs Monitor 6000 LCD Replacement: 步骤 37 中的图像 2,3 Welch Allyn Connex Vital Signs Monitor 6000 LCD Replacement: 步骤 37 中的图像 3,3
    • Lift the motherboard from the light-bar side and pull it toward the edge of the case to free the ethernet cable connector from under the case.

    • Lift the motherboard out of the case to gain access to the ethernet cable connector.

    • Do not attempt to remove the board entirely as it is still connected to the monitor.

  38. Welch Allyn Connex Vital Signs Monitor 6000 LCD Replacement: 步骤 38 中的图像 1,2 Welch Allyn Connex Vital Signs Monitor 6000 LCD Replacement: 步骤 38 中的图像 2,2
    • Remove the ethernet cable connector (labeled J11 in the service manual) from the mother board.

  39. Welch Allyn Connex Vital Signs Monitor 6000 LCD Replacement, LCD: 步骤 39 中的图像 1,2 Welch Allyn Connex Vital Signs Monitor 6000 LCD Replacement, LCD: 步骤 39 中的图像 2,2
    • Remove the two Phillips #2 side housing screws from the bottom housing.

    • There are holes above the screws into which you may insert a standard size screwdriver to unscrew them.

  40. Welch Allyn Connex Vital Signs Monitor 6000 LCD Replacement: 步骤 40 中的图像 1,1
    • Remove the single Phillips #2 screw from the bottom housing near the speaker grille.

  41. Welch Allyn Connex Vital Signs Monitor 6000 LCD Replacement: 步骤 41 中的图像 1,2 Welch Allyn Connex Vital Signs Monitor 6000 LCD Replacement: 步骤 41 中的图像 2,2
    • Remove the bottom housing.

  42. Welch Allyn Connex Vital Signs Monitor 6000 LCD Replacement: 步骤 42 中的图像 1,2 Welch Allyn Connex Vital Signs Monitor 6000 LCD Replacement: 步骤 42 中的图像 2,2
    • Remove the ethernet cable, or simply tuck it out of the way.

  43. Welch Allyn Connex Vital Signs Monitor 6000 LCD Replacement: 步骤 43 中的图像 1,3 Welch Allyn Connex Vital Signs Monitor 6000 LCD Replacement: 步骤 43 中的图像 2,3 Welch Allyn Connex Vital Signs Monitor 6000 LCD Replacement: 步骤 43 中的图像 3,3
    • Remove the light-bar cable from the LCD bracket and move it out of the way.

    • During reassembly, refer to the third image for tape and cable replacement.

  44. Welch Allyn Connex Vital Signs Monitor 6000 LCD Replacement: 步骤 44 中的图像 1,3 Welch Allyn Connex Vital Signs Monitor 6000 LCD Replacement: 步骤 44 中的图像 2,3 Welch Allyn Connex Vital Signs Monitor 6000 LCD Replacement: 步骤 44 中的图像 3,3
    • Remove any tape from the LCD cable connector.

    • For reassembly, refer to the third image for tape and cable replacement.

  45. Welch Allyn Connex Vital Signs Monitor 6000 LCD Replacement: 步骤 45 中的图像 1,2 Welch Allyn Connex Vital Signs Monitor 6000 LCD Replacement: 步骤 45 中的图像 2,2
    • Pull the LCD cable connector, firmly and evenly, straight out of its socket.

  46. Welch Allyn Connex Vital Signs Monitor 6000 LCD Replacement: 步骤 46 中的图像 1,1
    • Remove the four Phillips #2 screws from the LCD bracket.

  47. Welch Allyn Connex Vital Signs Monitor 6000 LCD Replacement: 步骤 47 中的图像 1,2 Welch Allyn Connex Vital Signs Monitor 6000 LCD Replacement: 步骤 47 中的图像 2,2
    • Remove the LCD bracket.

  48. Welch Allyn Connex Vital Signs Monitor 6000 LCD Replacement: 步骤 48 中的图像 1,2 Welch Allyn Connex Vital Signs Monitor 6000 LCD Replacement: 步骤 48 中的图像 2,2
    • Use the flat end of a spudger to lift the LCD out of the rubber gasket frame.

  49. Welch Allyn Connex Vital Signs Monitor 6000 LCD Replacement: 步骤 49 中的图像 1,2 Welch Allyn Connex Vital Signs Monitor 6000 LCD Replacement: 步骤 49 中的图像 2,2
    • Remove the LCD from the front housing.

结论

To reassemble your device, follow these instructions in reverse order.

另外一个人完成了本指南。

Sam Goldheart

于10/18/12注册

465,738 声望

创作了538篇指南

团队

iFixit iFixit 的会员

Staff

135 名成员

创作了16,766篇指南

0条评论

添加评论

浏览统计数据:

过去 24 小时: 0

过去 7 天: 2

过去 30 天: 5

总计 1,201