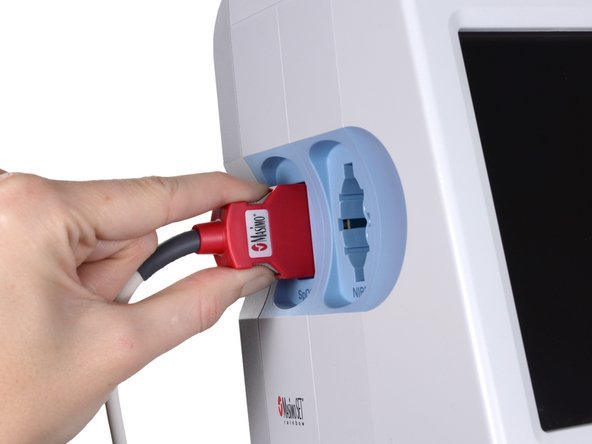
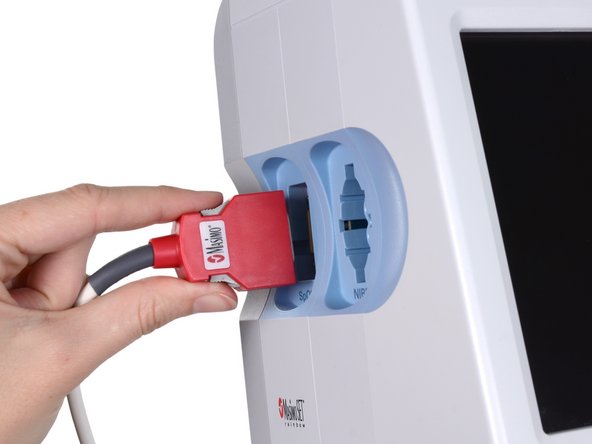
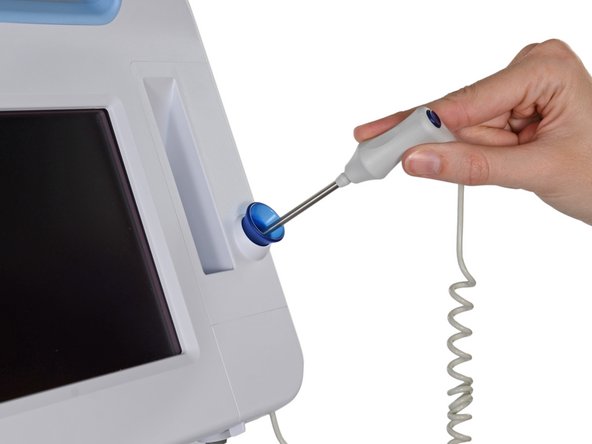
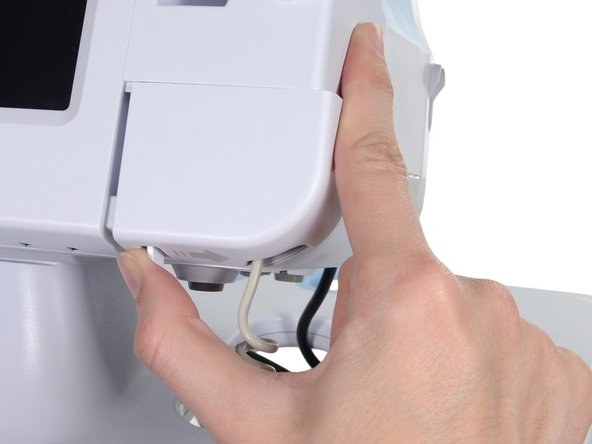
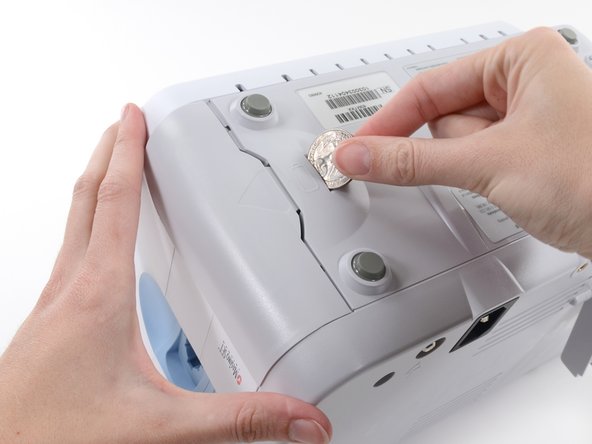
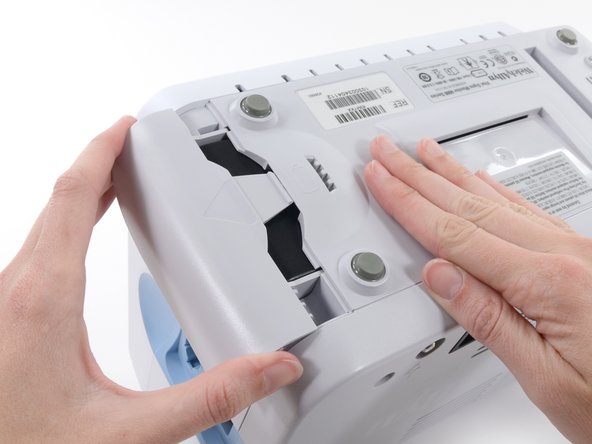
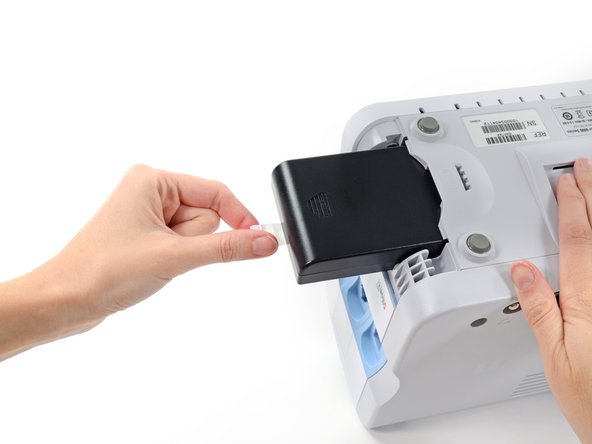
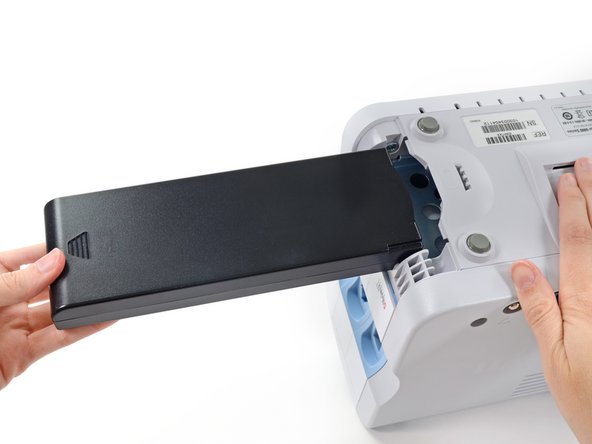
跳转到主内容

Welch Allyn Connex Vital Signs Monitor 6000 Battery Replacement

医疗设备
ifixit 或本维修指南均未获得医疗设备制造商的认可或与任何制造商存在附属关系。

你所需要的

  1. Welch Allyn Connex Vital Signs Monitor 6000 Battery Replacement, Stand: 步骤 1 中的图像 1,2 Welch Allyn Connex Vital Signs Monitor 6000 Battery Replacement, Stand: 步骤 1 中的图像 2,2
    • Unplug the AC power connection cable.

  2. Welch Allyn Connex Vital Signs Monitor 6000 Battery Replacement: 步骤 2 中的图像 1,3 Welch Allyn Connex Vital Signs Monitor 6000 Battery Replacement: 步骤 2 中的图像 2,3 Welch Allyn Connex Vital Signs Monitor 6000 Battery Replacement: 步骤 2 中的图像 3,3
    • Place your thumb and forefinger on the blood pressure (NIBP) hose connector. Squeeze the side tabs until the connector releases.

    • Always grasp the hose by the connector. Do not pull on the hose itself.

    • Pull the connector away from the connector port.

  3. Welch Allyn Connex Vital Signs Monitor 6000 Battery Replacement: 步骤 3 中的图像 1,3 Welch Allyn Connex Vital Signs Monitor 6000 Battery Replacement: 步骤 3 中的图像 2,3 Welch Allyn Connex Vital Signs Monitor 6000 Battery Replacement: 步骤 3 中的图像 3,3
    • Place your thumb and forefinger on the Pulse oximetry (SpO2 or combined SpO2/SpHb) cable connector. Squeeze the side tabs until the connector releases.

    • Always grasp the cable by the connector. Do not pull on the cable itself.

    • Pull the connector away from the connector port.

  4. Welch Allyn Connex Vital Signs Monitor 6000 Battery Replacement: 步骤 4 中的图像 1,2 Welch Allyn Connex Vital Signs Monitor 6000 Battery Replacement: 步骤 4 中的图像 2,2
    • Grasp the temperature probe and pull it up to remove it from the monitor.

  5. Welch Allyn Connex Vital Signs Monitor 6000 Battery Replacement: 步骤 5 中的图像 1,3 Welch Allyn Connex Vital Signs Monitor 6000 Battery Replacement: 步骤 5 中的图像 2,3 Welch Allyn Connex Vital Signs Monitor 6000 Battery Replacement: 步骤 5 中的图像 3,3
    • Remove the cover of the temperature module by pressing the tab and sliding the cover to the right.

  6. Welch Allyn Connex Vital Signs Monitor 6000 Battery Replacement: 步骤 6 中的图像 1,3 Welch Allyn Connex Vital Signs Monitor 6000 Battery Replacement: 步骤 6 中的图像 2,3 Welch Allyn Connex Vital Signs Monitor 6000 Battery Replacement: 步骤 6 中的图像 3,3
    • Depress the spring tab on the temperature probe cable connector and withdraw it from the probe port.

  7. Welch Allyn Connex Vital Signs Monitor 6000 Battery Replacement: 步骤 7 中的图像 1,1
    • Remove the flathead screw on the USB networking door.

    • Loosen the captive Phillips #2 screw securing the monitor to the stand.

  8. Welch Allyn Connex Vital Signs Monitor 6000 Battery Replacement: 步骤 8 中的图像 1,1
    • Holding the monitor securely, open the USB networking door.

    • You may have to lift the monitor slightly to allow the door to swing out from the stand mount.

  9. Welch Allyn Connex Vital Signs Monitor 6000 Battery Replacement: 步骤 9 中的图像 1,2 Welch Allyn Connex Vital Signs Monitor 6000 Battery Replacement: 步骤 9 中的图像 2,2
    • Detach any accessory USB cables from USB ports on the monitor.

  10. Welch Allyn Connex Vital Signs Monitor 6000 Battery Replacement: 步骤 10 中的图像 1,3 Welch Allyn Connex Vital Signs Monitor 6000 Battery Replacement: 步骤 10 中的图像 2,3 Welch Allyn Connex Vital Signs Monitor 6000 Battery Replacement: 步骤 10 中的图像 3,3
    • Slide the monitor off of the stand tray.

  11. Welch Allyn Connex Vital Signs Monitor 6000 Battery Replacement, Battery: 步骤 11 中的图像 1,3 Welch Allyn Connex Vital Signs Monitor 6000 Battery Replacement, Battery: 步骤 11 中的图像 2,3 Welch Allyn Connex Vital Signs Monitor 6000 Battery Replacement, Battery: 步骤 11 中的图像 3,3
    • Place the monitor upside down on a clean surface.

    • Insert a coin into the slot and push to open.

    • Choose a coin that fits comfortably into the slot.

    • Remove the battery cover.

  12. Welch Allyn Connex Vital Signs Monitor 6000 Battery Replacement: 步骤 12 中的图像 1,3 Welch Allyn Connex Vital Signs Monitor 6000 Battery Replacement: 步骤 12 中的图像 2,3 Welch Allyn Connex Vital Signs Monitor 6000 Battery Replacement: 步骤 12 中的图像 3,3
    • Use the plastic label to remove the battery from its recess.

结论

To reassemble your device, follow these instructions in reverse order.

4等其他人完成本指南。

kyle2

于06/03/10注册

101 声望

撰写一个指南

团队

Team Freedom Team Freedom 的会员

Community

1 名成员

创作了3篇指南

0条评论

添加评论

浏览统计数据:

过去 24 小时: 2

过去 7 天: 3

过去 30 天: 30

总计 2,760