跳转到主内容

Vtech InnoTab 3S Screen Replacement

你所需要的

  1. Vtech InnoTab 3S Screen Replacement, Rear Panel: 步骤 1 中的图像 1,3 Vtech InnoTab 3S Screen Replacement, Rear Panel: 步骤 1 中的图像 2,3 Vtech InnoTab 3S Screen Replacement, Rear Panel: 步骤 1 中的图像 3,3
    • While holding the battery compartment locks down, slide the two battery doors outwards from the sides of the device.

    • Remove the batteries from the device.

  2. Vtech InnoTab 3S Screen Replacement: 步骤 2 中的图像 1,2 Vtech InnoTab 3S Screen Replacement: 步骤 2 中的图像 2,2
    • Remove six 7 mm screws from the interior of the battery compartment using a Phillips #1 screwdriver.

  3. Vtech InnoTab 3S Screen Replacement: 步骤 3 中的图像 1,3 Vtech InnoTab 3S Screen Replacement: 步骤 3 中的图像 2,3 Vtech InnoTab 3S Screen Replacement: 步骤 3 中的图像 3,3
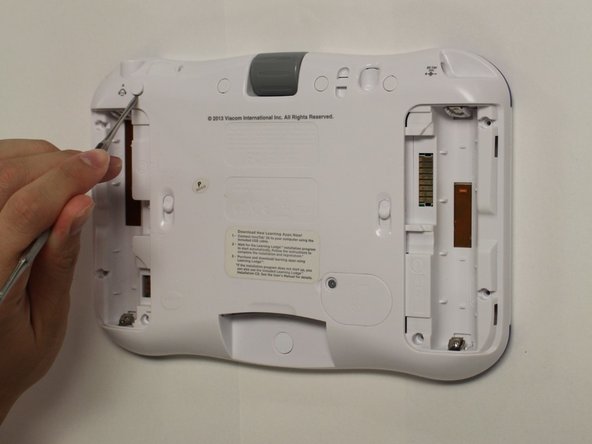
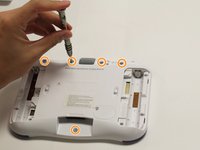
    • Using a nylon spudger, remove the five caps that hide the screws.

    • Potential for device damage: Be careful not to scrape the plastic from the device using the spudger.

    • When removing the caps, hold the spudger vertical to the board to make removal easier. Also try to push in with your spudger pointing towards the bottom of the device.

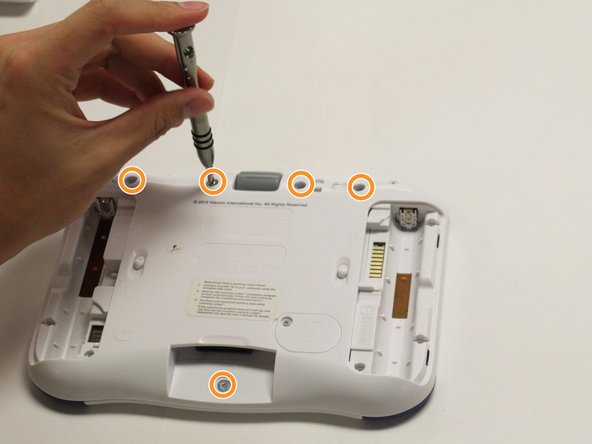
    • Remove the five 5 mm Phillips #1 screws from the rear panel of the device.

  4. Vtech InnoTab 3S Screen Replacement: 步骤 4 中的图像 1,1
    • Carefully remove the rear panel from the front panel of the device.

    • Once the rear panel is removed, you'll be able to see the motherboard and other components within the Vtech InnoTab 3s.

  5. Vtech InnoTab 3S Screen Replacement, Motherboard: 步骤 5 中的图像 1,2 Vtech InnoTab 3S Screen Replacement, Motherboard: 步骤 5 中的图像 2,2
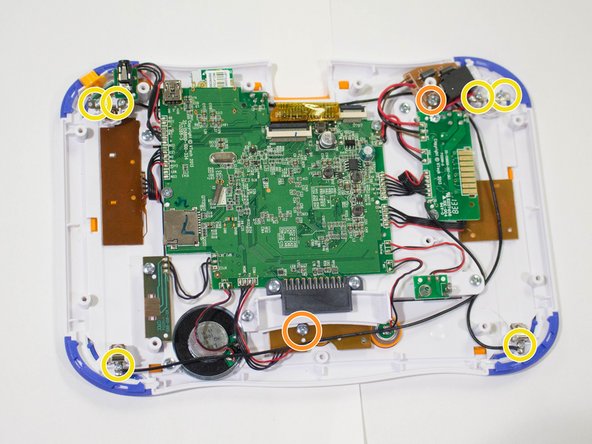
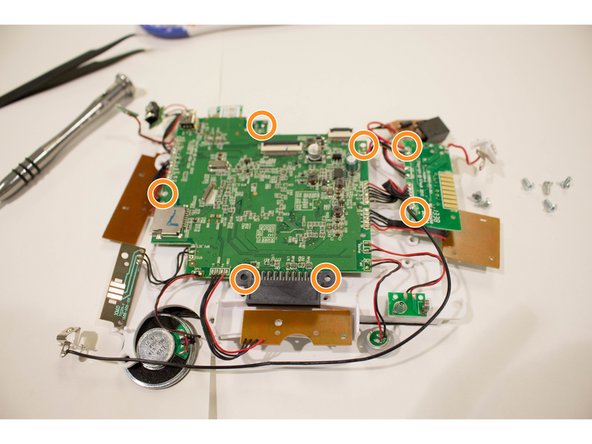
    • Remove the six screws that secure the motherboard to the front panel of the device using a Phillips #1 screwdriver.

    • Remove the other 5mm screws that secure the charger port and the buttons to the inside of the front panel.

    • Remove the six 3 mm screws securing the battery clip.

  6. Vtech InnoTab 3S Screen Replacement: 步骤 6 中的图像 1,1
    在这个步骤中使用的工具:
    Tweezers
    $4.99
    购买
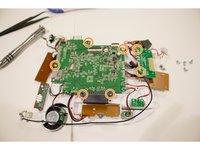
    • Using the tweezers, remove one battery clip from each corner (four total) of the Vtech InnoTab 3s.

    • With the tweezers, unsecure the charging port, headphone port, and the light switch button from the front panel of the device.

    • Potential for device damage: Avoid forceful movements when removing the motherboard to prevent damage of device components.

  7. Vtech InnoTab 3S Screen Replacement, Screen: 步骤 7 中的图像 1,3 Vtech InnoTab 3S Screen Replacement, Screen: 步骤 7 中的图像 2,3 Vtech InnoTab 3S Screen Replacement, Screen: 步骤 7 中的图像 3,3
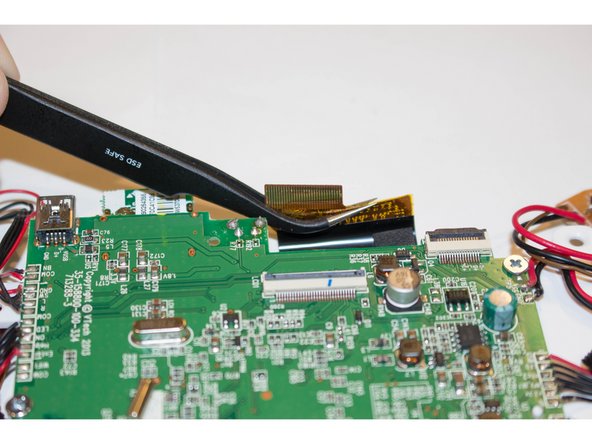
    • Open the clip holding the screen plug with the yellow film.

    • The clip securing the screen is located at the top of the motherboard.

    • Remove all seven of the 5mm screws on the motherboard to separate the motherboard from the screen.

  8. Vtech InnoTab 3S Screen Replacement: 步骤 8 中的图像 1,2 Vtech InnoTab 3S Screen Replacement: 步骤 8 中的图像 2,2
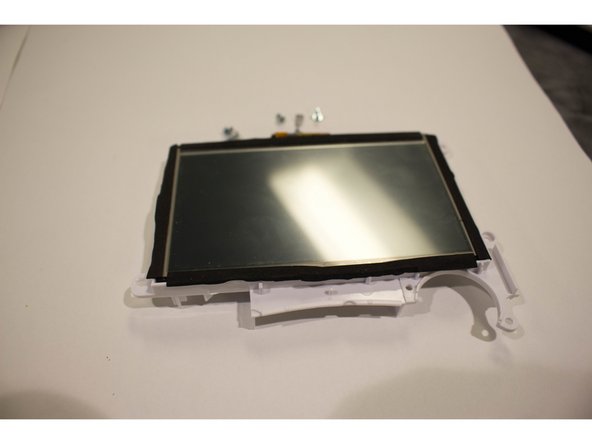
    • Avoid forceful movements when separating the screen from the motherboard.

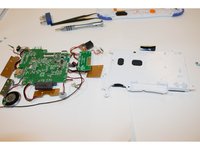
    • Carefully separate the motherboard from the device screen. Replace the damaged screen with an operational one.

结论

To reassemble your device, follow these instructions in reverse order.

Karina Garcia

于08/30/15注册

824 声望

创作了6篇指南

团队

USF Tampa, Team 8-2, Eyestone Fall 2015 USF Tampa, Team 8-2, Eyestone Fall 2015 的会员

USFT-EYESTONE-F15S8G2

4 名成员

创作了9篇指南

4条评论

What is the part number for the screen. Where can I buy one. Thank you.

david goodwin - 回复

what is the size of the screen

Adrienne Dooms - 回复

My grandson dropped his innotab 3 and now the screen is all scrambled. Can this be fixed? It did not crack the screen.

charma1963 - 回复

Where can I buy the replacement screen for the Vtech innotab 3S

Michael Kurrus - 回复

添加评论

浏览统计数据:

过去 24 小时: 0

过去 7 天: 0

过去 30 天: 11

总计 2,217