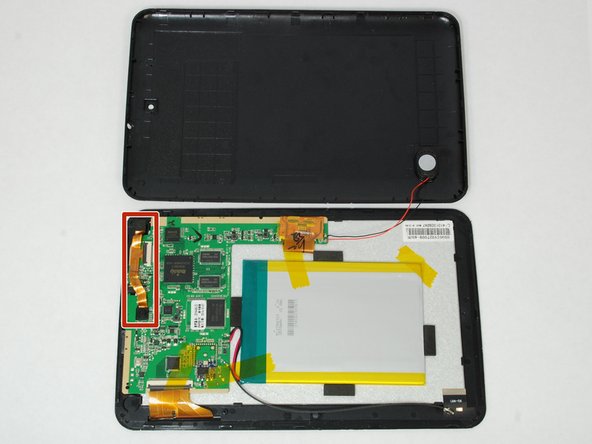
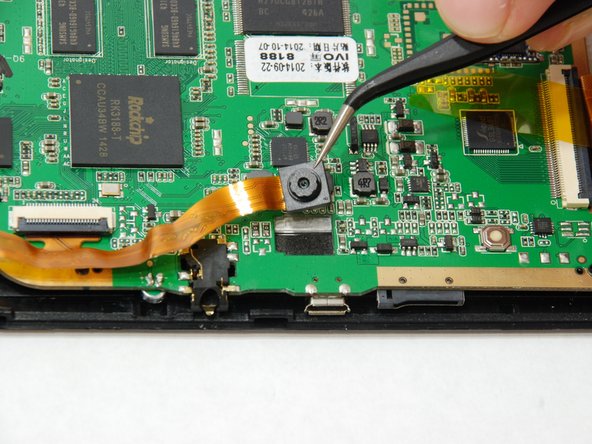
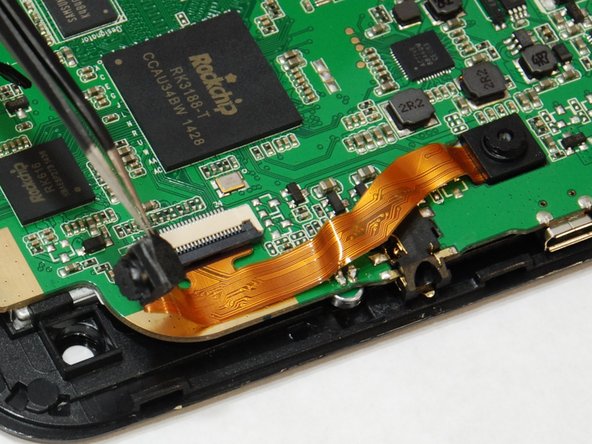
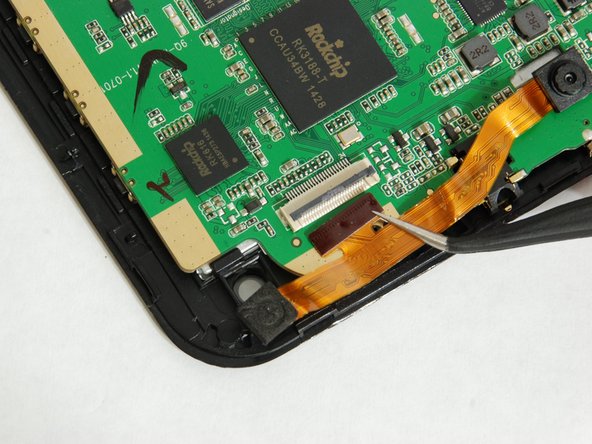
跳转到主内容

Visual Land Prestige Elite 9Q Front and Rear Facing Camera Replacement

你所需要的

  1. Visual Land Prestige Elite 9Q Front and Rear Facing Camera Replacement, Front and Rear Facing Camera: 步骤 1 中的图像 1,1
    • Using the large plastic opening tool, start along a side of the device and apply light pressure in the seam between the top and bottom outer covers.

    • Maneuver the smaller plastic opening tool at the spot of the large opening tool and slowly slide along the edge.

    • You should feel each plastic connections begin to loosen.

  2. Visual Land Prestige Elite 9Q Front and Rear Facing Camera Replacement: 步骤 2 中的图像 1,1
    • Move tool around each connection, and continue around the device until all connections have been loosened.

    • The user risks damaging the connections if tool is slid to fast

  3. Visual Land Prestige Elite 9Q Front and Rear Facing Camera Replacement: 步骤 3 中的图像 1,2 Visual Land Prestige Elite 9Q Front and Rear Facing Camera Replacement: 步骤 3 中的图像 2,2
    • Once all connections have been loosened and using a soft surface, place the device onto its screen.

    • Open the casing and lay as shown keeping the speaker wire loose, and the camera component is highlighted in red.

  4. Visual Land Prestige Elite 9Q Front and Rear Facing Camera Replacement: 步骤 4 中的图像 1,3 Visual Land Prestige Elite 9Q Front and Rear Facing Camera Replacement: 步骤 4 中的图像 2,3 Visual Land Prestige Elite 9Q Front and Rear Facing Camera Replacement: 步骤 4 中的图像 3,3
    在这个步骤中使用的工具:
    Tweezers
    $4.99
    购买
    • Using hook tweezers, gently separate the glued cameras away from the circuit board.

    • Allow each camera to rest on circuit board while proceeding to the ZIF (zero insertion force) on the circuit board.

    • Avoid touching camera lens with the tweezers.

  5. Visual Land Prestige Elite 9Q Front and Rear Facing Camera Replacement: 步骤 5 中的图像 1,2 Visual Land Prestige Elite 9Q Front and Rear Facing Camera Replacement: 步骤 5 中的图像 2,2
    • Maneuver the hook tweezers to flip up the black hinged ZIF connector to disconnect camera module.

    • After ZIF connector is flipped up, the camera module may be removed.

结论

To reassemble your device, follow these instructions in reverse order.

Aaron

于07/19/16注册

316 声望

创作了2篇指南

团队

0条评论

添加评论

浏览统计数据:

过去 24 小时: 2

过去 7 天: 3

过去 30 天: 7

总计 300