跳转到主内容

VENSTAR Taco Speaker Replacement Replacement

你所需要的

  1. VENSTAR Taco Speaker Replacement Replacement, VENSTAR Taco Disassembly: 步骤 1 中的图像 1,3 VENSTAR Taco Speaker Replacement Replacement, VENSTAR Taco Disassembly: 步骤 1 中的图像 2,3 VENSTAR Taco Speaker Replacement Replacement, VENSTAR Taco Disassembly: 步骤 1 中的图像 3,3
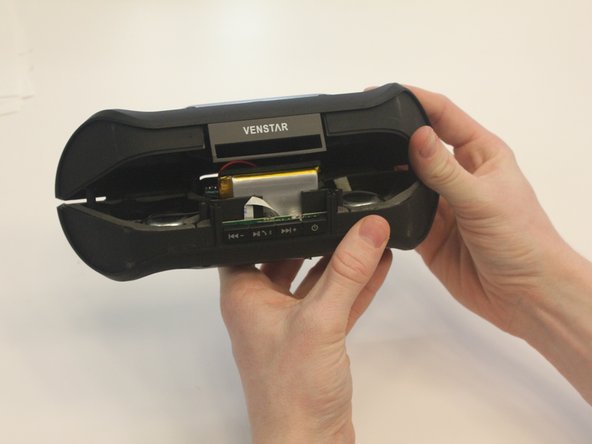
    • Starting with the Taco on its side, use the plastic opening tool to pop off the outer casing near the base.

    • The base labeled "VENSTAR TACO" is glued. Be careful separating the two sides of the device.

  2. VENSTAR Taco Speaker Replacement Replacement: 步骤 2 中的图像 1,2 VENSTAR Taco Speaker Replacement Replacement: 步骤 2 中的图像 2,2
    • Repeat the previous step on the opposite side to remove the other outer casing.

  3. VENSTAR Taco Speaker Replacement Replacement: 步骤 3 中的图像 1,2 VENSTAR Taco Speaker Replacement Replacement: 步骤 3 中的图像 2,2
    在这个步骤中使用的工具:
    Phillips #0 Screwdriver
    $5.49
    购买
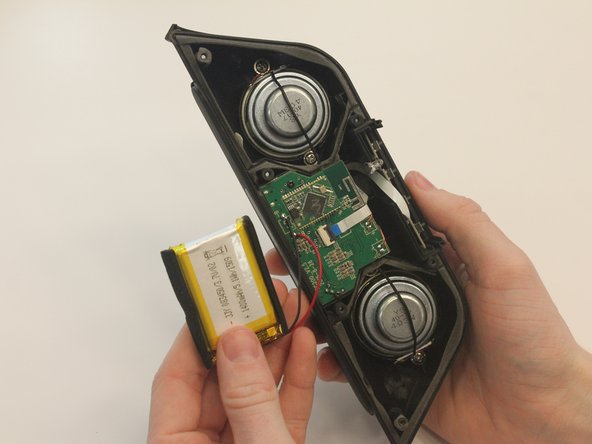
    • Using a Phillips PH0 3 mm-bit screwdriver, remove the six screws on the inner layer of the Taco.

    • The screws are small and can get stuck. Use tweezers to pull them out if you are having trouble.

  4. VENSTAR Taco Speaker Replacement Replacement: 步骤 4 中的图像 1,2 VENSTAR Taco Speaker Replacement Replacement: 步骤 4 中的图像 2,2
    • From the same side you just unscrewed, use a plastic opening tool to unwedge the inner cover on both sides of the base.

  5. VENSTAR Taco Speaker Replacement Replacement: 步骤 5 中的图像 1,2 VENSTAR Taco Speaker Replacement Replacement: 步骤 5 中的图像 2,2
    • Slide off the inner cover. It pulls apart and is held on by a small amount of glue.

  6. VENSTAR Taco Speaker Replacement Replacement, Logic Board Replacement: 步骤 6 中的图像 1,1
    • Remove the rubber covering from the buttons.

  7. VENSTAR Taco Speaker Replacement Replacement: 步骤 7 中的图像 1,3 VENSTAR Taco Speaker Replacement Replacement: 步骤 7 中的图像 2,3 VENSTAR Taco Speaker Replacement Replacement: 步骤 7 中的图像 3,3
    • Remove the black fabric covering the logic board.

  8. VENSTAR Taco Speaker Replacement Replacement: 步骤 8 中的图像 1,2 VENSTAR Taco Speaker Replacement Replacement: 步骤 8 中的图像 2,2
    • Move the battery out of the way of the connector.

  9. VENSTAR Taco Speaker Replacement Replacement: 步骤 9 中的图像 1,2 VENSTAR Taco Speaker Replacement Replacement: 步骤 9 中的图像 2,2
    • Undo the connector of the flat white ribbon between the switches and the logic board.

  10. VENSTAR Taco Speaker Replacement Replacement: 步骤 10 中的图像 1,1
    • Undo the two black 3mm screws on the logic board using the PH0 screwdriver.

  11. VENSTAR Taco Speaker Replacement Replacement: 步骤 11 中的图像 1,3 VENSTAR Taco Speaker Replacement Replacement: 步骤 11 中的图像 2,3 VENSTAR Taco Speaker Replacement Replacement: 步骤 11 中的图像 3,3
    • Gently pull out the logic board.

    • Note that the battery and the logic board are connected and must be removed together.

  12. VENSTAR Taco Speaker Replacement Replacement, Speaker Replacement: 步骤 12 中的图像 1,2 VENSTAR Taco Speaker Replacement Replacement, Speaker Replacement: 步骤 12 中的图像 2,2
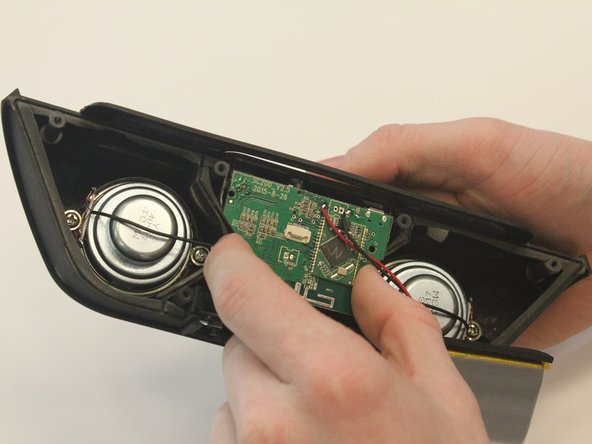
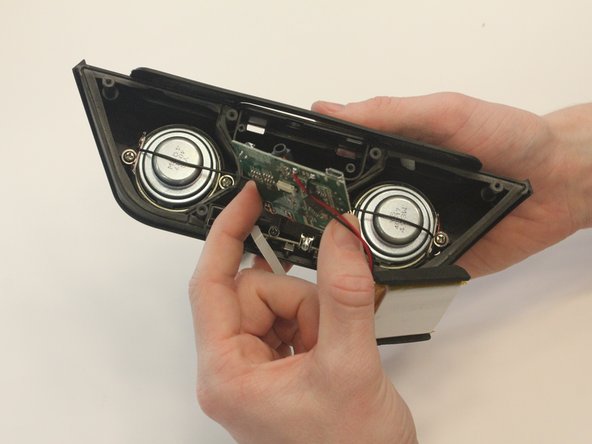
    • Using the Ph1 screwdriver, unscrew both of the 2.5mm screws on either side of the speakers.

    • The screws are glued in and may require the curved tweezers to pull all the way out.

  13. VENSTAR Taco Speaker Replacement Replacement: 步骤 13 中的图像 1,1
    • Using a metal spudger, carefully wedge out the speakers from the casing.

    • Repeat this step for the removal of the other speaker.

    • Speakers are glued into the casing beyond being screwed and require some care to remove.

  14. VENSTAR Taco Speaker Replacement Replacement: 步骤 14 中的图像 1,1
    • Using a portable soldering iron, melt the solder on the black speaker wires on the logic board.

    • Soldering uses hot metal and can burn you!

结论

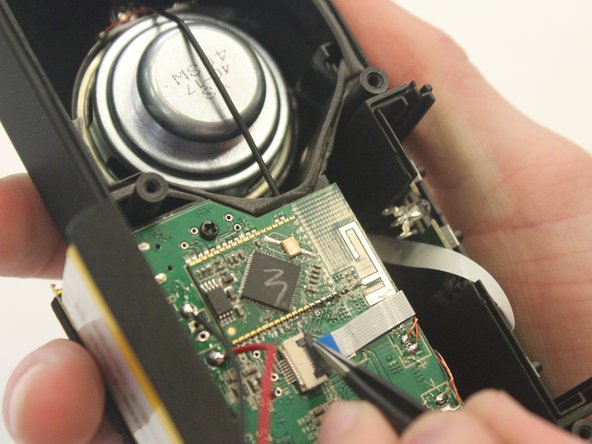
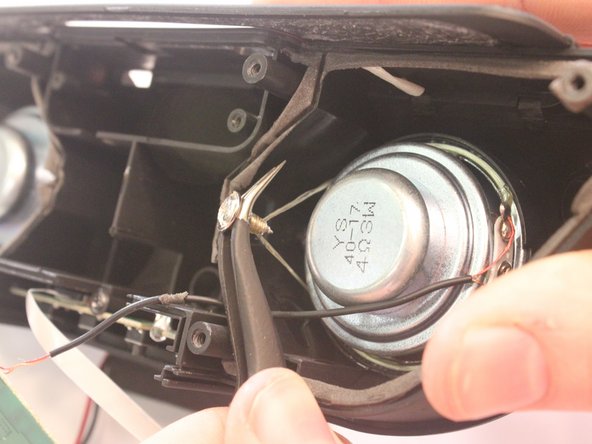
Solder your replacement speakers back to mother board, then to reassemble your device, follow these instructions in reverse order.

2等其他人完成本指南。

0条评论

添加评论

浏览统计数据:

过去 24 小时: 0

过去 7 天: 1

过去 30 天: 2

总计 336