当前版本的文档还未经巡查,您可以查看最新的已查核版本 。
Make sure that the laptop is off and unplugged.
Turn the laptop over.
Slide back the left lock, and you should hear a click when it is successfully locked back in.
Situate the laptop so that it is open and the display is facing you.
Use the plastic opening tool to pry the black plastic insert upward. The insert can be found at the top of the keyboard.
Once the insert is loose, carefully remove it from the device.
Use the plastic opening tool to begin removing the keys off of the device.
Once the keys are off, gently remove the keyboard. Be careful of the ribbon cable that still connects the keyboard to motherboard.
With the keyboard removed, locate the marked screws.
Remove the marked, 5mm screws using the #1 Phillips Screwdriver.
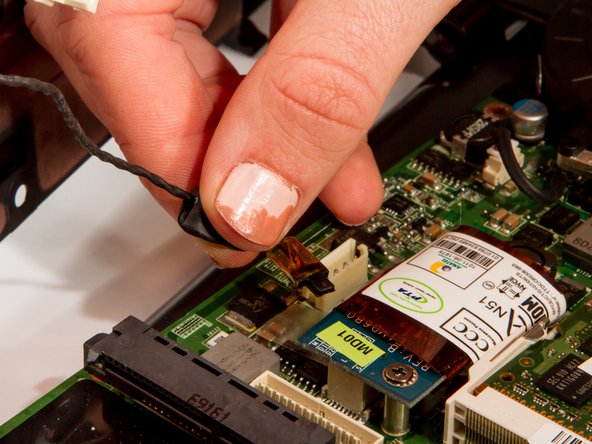
In the opening above the mouse pad, use the plastic opening tool to push up the black gate of the ZIF socket.
Remove the ribbon from the ZIF socket.
After removing the screw in step 3, carefully close the laptop and put it face down. Locate the center panel.
Remove the three, 3 mm screws using the #1 Phillips Screwdriver.
Remove screws for back assembly.
11 x F5 (5 mm #1 Phillips)
6 x F2 (2 mm #0 Phillips)
4 x F8 (8 mm #1 Phillips)
1 x F3 (3 mm #1 Phillips
Use the plastic opening tool to release the back panel from the laptop.
If all of the screws are removed it should come off with very little effort. Do not force it. If it still feels attached, check that you didn't miss a screw or two.
Use the plastic opening tool to separate the top faceplate.
The faceplate is the plastic surface and the metal piece under the keyboard.
Carefully lift the faceplate off of the base by sliding the plastic opening tool around the outside of the device. You'll hear clicks as you do this.
Prying apart the faceplate will be a little hard, but try not to bend it too much - you do not want to crack it.
嵌入本指南
选择一个尺寸并复制下面的代码,将本指南作为一个小插件嵌入到你的网站/论坛中。
单个步骤
完整指南
小——600像素
中——800像素
大——1200像素
预览