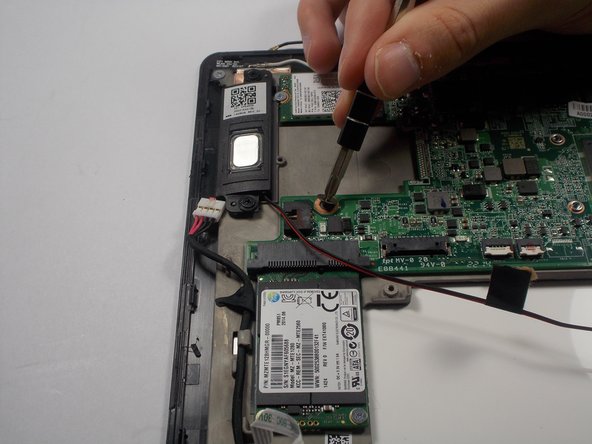
跳转到主内容

Toshiba Satellite Click 2 Pro Motherboard Replacement

你所需要的

  1. Toshiba Satellite Click 2 Pro Motherboard Replacement, Battery: 步骤 1 中的图像 1,2 Toshiba Satellite Click 2 Pro Motherboard Replacement, Battery: 步骤 1 中的图像 2,2
    • Working on your device while it is turned on may result in electric shock. Make sure to shut down and unplug your device before you begin.

    • Push down on the tablet sides until you feel a click, then pull up.

    • This will separate the tablet from the detachable base, make sure to hold down the keyboard for easier detachment.

  2. Toshiba Satellite Click 2 Pro Motherboard Replacement: 步骤 2 中的图像 1,3 Toshiba Satellite Click 2 Pro Motherboard Replacement: 步骤 2 中的图像 2,3 Toshiba Satellite Click 2 Pro Motherboard Replacement: 步骤 2 中的图像 3,3
    • Remove the base of the tablet from the screen using a plastic opening tool.

    • Make sure to separate the base evenly on both sides when removing it from the screen.

  3. Toshiba Satellite Click 2 Pro Motherboard Replacement: 步骤 3 中的图像 1,2 Toshiba Satellite Click 2 Pro Motherboard Replacement: 步骤 3 中的图像 2,2
    • Remove the battery power connector using ESD safe tweezers.

  4. Toshiba Satellite Click 2 Pro Motherboard Replacement: 步骤 4 中的图像 1,2 Toshiba Satellite Click 2 Pro Motherboard Replacement: 步骤 4 中的图像 2,2
    • Remove the LED ribbon cable using ESD safe tweezers.

    • Remove the SIM card ribbon cable using ESD safe tweezers.

    • Remove the Docking connector ribbon cable using plastic opening tool.

    • The ribbons may be stuck to the battery so make sure to peel off gently to prevent damage.

    • Make sure to flip up the white connector attached to the LED and Sim Card ribbons before removing them .

  5. Toshiba Satellite Click 2 Pro Motherboard Replacement: 步骤 5 中的图像 1,3 Toshiba Satellite Click 2 Pro Motherboard Replacement: 步骤 5 中的图像 2,3 Toshiba Satellite Click 2 Pro Motherboard Replacement: 步骤 5 中的图像 3,3
    • Remove the LCD Display ribbon cable using a plastic opening tool.

    • Remove the I/O ribbon cable using a plastic opening tool.

    • The ribbons may be stuck to the battery so make sure to peel them off gently to prevent damage.

  6. Toshiba Satellite Click 2 Pro Motherboard Replacement: 步骤 6 中的图像 1,2 Toshiba Satellite Click 2 Pro Motherboard Replacement: 步骤 6 中的图像 2,2
    • Remove five 3.5mm Phillips J0 screws using a Phillips screw driver.

  7. Toshiba Satellite Click 2 Pro Motherboard Replacement: 步骤 7 中的图像 1,1
    • Remove the battery from its holding position.

  8. Toshiba Satellite Click 2 Pro Motherboard Replacement, Heat Sync Fan: 步骤 8 中的图像 1,1
    • Remove the power connector from the fan using a pair of tweezers.

  9. Toshiba Satellite Click 2 Pro Motherboard Replacement: 步骤 9 中的图像 1,1
    • Remove two 3.0mm Phillips J0 screws using a Phillips screw driver.

  10. Toshiba Satellite Click 2 Pro Motherboard Replacement: 步骤 10 中的图像 1,1
    • Remove four 3.5mm Phillips J0 screws from the heat sink.

  11. Toshiba Satellite Click 2 Pro Motherboard Replacement: 步骤 11 中的图像 1,1
    • Remove the heat sink fan.

    • The heat sink cover may be hard to peel off the first time due to the adhesive.

  12. Toshiba Satellite Click 2 Pro Motherboard Replacement, Wifi Card: 步骤 12 中的图像 1,1
    • Remove the 3mm screw J0 Phillips screw with the Philips screw driver.

  13. Toshiba Satellite Click 2 Pro Motherboard Replacement: 步骤 13 中的图像 1,1
    • Remove the black and white cables attached using ESD safe tweezers.

  14. Toshiba Satellite Click 2 Pro Motherboard Replacement: 步骤 14 中的图像 1,1
    • Remove wifi card.

  15. Toshiba Satellite Click 2 Pro Motherboard Replacement, Motherboard: 步骤 15 中的图像 1,1
    • Locate and remove the five connectors using ESD safe tweezers.

  16. Toshiba Satellite Click 2 Pro Motherboard Replacement: 步骤 16 中的图像 1,2 Toshiba Satellite Click 2 Pro Motherboard Replacement: 步骤 16 中的图像 2,2
    • Remove the four 3.0mm Phillips J0 screws using a Phillips screw driver.

  17. Toshiba Satellite Click 2 Pro Motherboard Replacement: 步骤 17 中的图像 1,1
    • Remove the motherboard.

结论

To reassemble your device, follow these instructions in reverse order.

3等其他人完成本指南。

Paul DeOrsey

于03/10/16注册

893 声望

创作了5篇指南

团队

UMass Dartmouth, Team 4-3, Catania Spring 2016 UMass Dartmouth, Team 4-3, Catania Spring 2016 的会员

UMASSD-CATANIA-S16S4G3

3 名成员

创作了10篇指南

0条评论

添加评论

浏览统计数据:

过去 24 小时: 0

过去 7 天: 0

过去 30 天: 10

总计 1,175