当前版本的文档还未经巡查,您可以查看最新的已查核版本。
-
-
Make sure your computer is turned off and the computer is not plugged in.
-
Turn your laptop upside down, and slide the right release tab outward.
-
Using you left hand, hold the left release tab towards the left side and then pull the battery out.
-
-
-
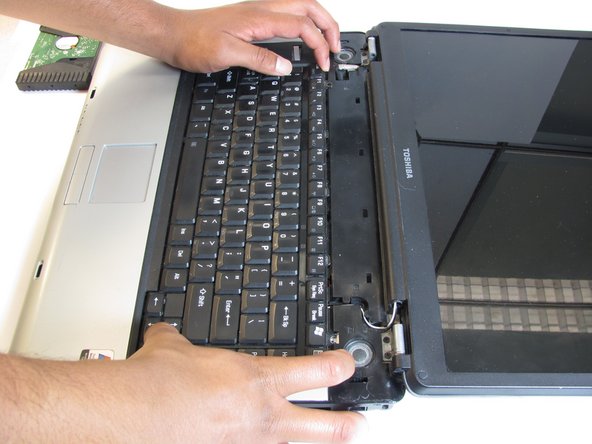
Using the plastic opening tool, pry off the panel above the keyboard, starting near the right front speaker.
-
Use the plastic opening tool to pop off tabs along the length of this panel.
-
This may feel like you're about to break something, but as long as you work your way down the panel and don't yank it out, the laptop will be fine.
-
-
-
-
-
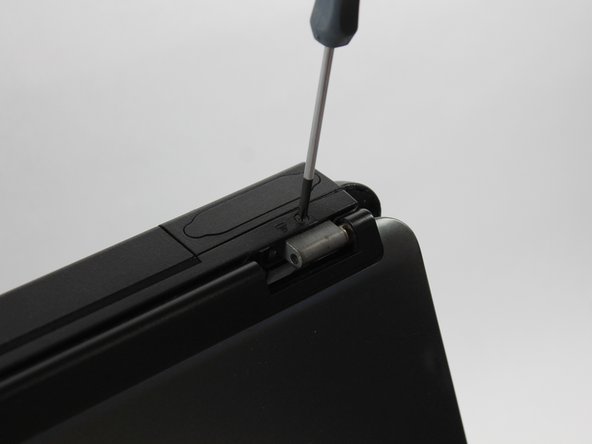
Disconnect wire attaching LCD to motherboard
-
Using the Phillips screwdriver remove the two 4.0mm screws from each hinge above speakers
-
Partially close the lid and remove the last two 4.0mm screws from the back of the laptop.
-
-
Remove the seventeen 4.5mm phillips screws on the bottom of the laptop.
-
Using the pry tool separate the two halves of the laptop base.
-
Use caution when separating the laptop halves as they are still connected by two ribbon cables.
-
-
-
Remove the upper half of laptop and place bottom half in the center of your workspace.
-
Remove the one 2.00mm phillips screw.
-
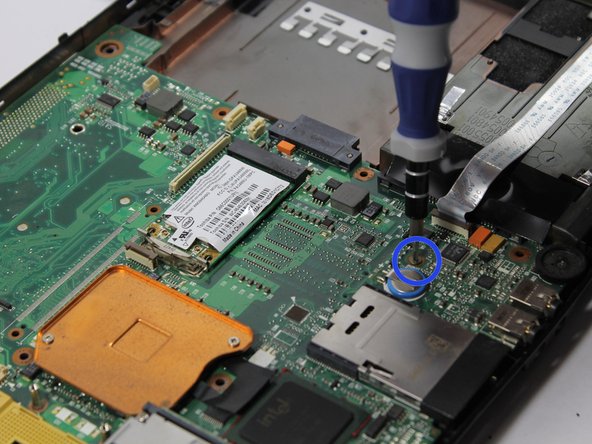
Remove the ribbon cable connecting the USB ports to the motherboard.
-
-
Remove the two 2.5mm phillips screws holding the spring retainer for the heat sink.
-
Remove the two 4.0mm phillips screws holding the fan in place.
-
Remove the fan power connector.
-
-
-
嵌入本指南
选择一个尺寸并复制下面的代码,将本指南作为一个小插件嵌入到你的网站/论坛中。
预览