简介
This video shows you how to replace the LCD screen in a Toshiba Chromebook 2 laptop computer.
你所需要的
视频概述
-
-
Remove the two screws which are located at the bottom corners of the screen.
-
The screws are underneath little covers which can be removed with a craft knife.
-
-
-
Carefully slide your plastic spudger tool into the crack between the outer edge of the bezel and the back of the display assembly.
-
Slide it all the way along all edges, carefully unclipping the bezel from the back assembly.
-
Be very careful and take your time - it's easy to snap the bezel or to break the clips, making reassembly less secure.
-
Once everything is released you should be able to lift up the bezel and it freely come away.
-
-
-
-
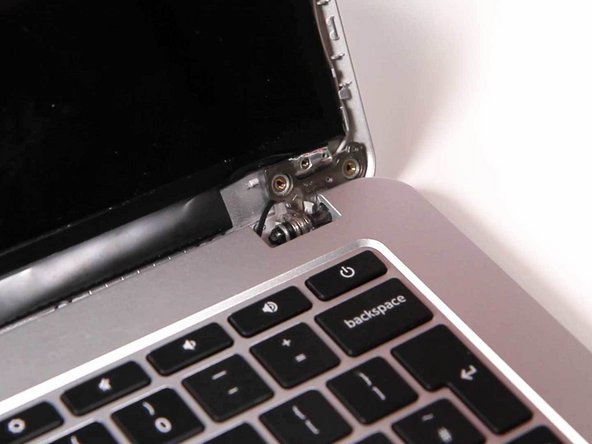
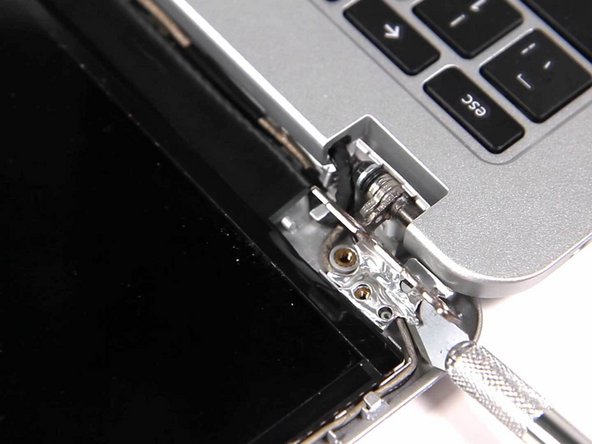
Remove the two screws holding the back assembly to the hinge mechanism.
-
Be careful as you're unscrewing these! Support the display assembly with your other hand.
-
Lay the loose display assembly down and then fold the metal foil tabs up and out of the way.
-
Some models' screens are held down by adhesive; if this is the case with yours, carefully pry the screen away from the back being careful not to damage any cables.
-
If your display is screwed down, there will be extra screws to remove and it should then come away freely.
-
-
-
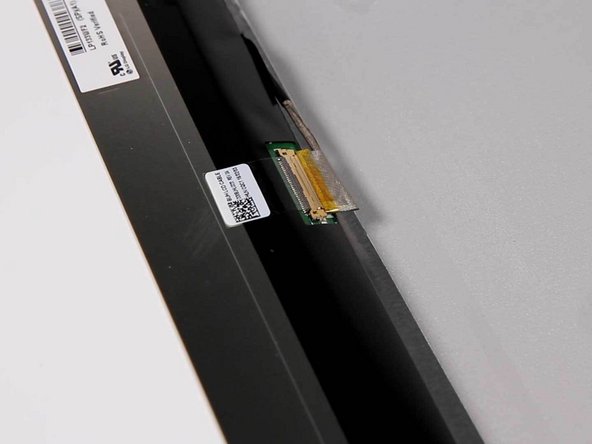
Fold the loose screen down onto the laptop's keyboard, as if you were closing the laptop, with the rear of the display assembly still open.
-
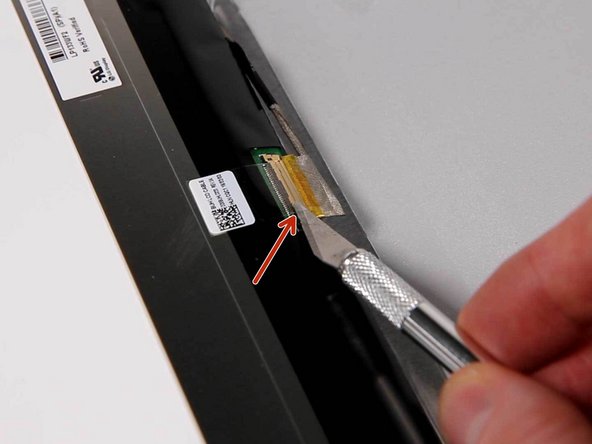
Carefully remove the connecting ribbon cable as shown in the picture.
-
You may need to remove the sticky adhesive tape which holds the connector in place before you can remove it.
-
When reassembling, replace this with some fresh sticky table to help prevent it coming loose over time.
-


To reassemble your device, follow these instructions in reverse order.
To reassemble your device, follow these instructions in reverse order.

3条评论
Thanks for this guide!
After seeing how easy this little project would be I immediately ordered a new screen.
Canyou tell me where you did buy the new screen & the price
Kind regards
Peter
Pete -
Dear Sir
I have replace my Chromebook LCD panel same to same your as shown on pictures but when i closed all fitting of LCD panel then i start but laptop goes to on but display is not coming . No back light no data LCD panel . I have check the LCD panel first before fitting I have checked complete any braked jack or cables or LCD panel but everything is see to clear . Can you help me .
Thanks
Waseem Hassan
Waseem.eng@hotmail.com
Lahore Pakistan