跳转到主内容

当前版本的文档还未经巡查,您可以查看最新的已查核版本

你所需要的

  1. 这个步骤还没有翻译 帮忙翻译一下

    : 步骤 1 中的图像 1,1
    • First, lift the bottom part of the band to start removing the wristband from the button area of the watch.

  2. 这个步骤还没有翻译 帮忙翻译一下

    : 步骤 2 中的图像 1,2 : 步骤 2 中的图像 2,2
    • Continue to lift up on the band until the screen of the watch becomes loose from the band.

    • You may need to apply a small amount of force downward on the face of the screen.

    • Continue to pull up on the wristband until it is completely off the watch.

  3. 这个步骤还没有翻译 帮忙翻译一下

    : 步骤 3 中的图像 1,1
    • Grab the watch once it is separated from the wristband.

  4. 这个步骤还没有翻译 帮忙翻译一下

    : 步骤 4 中的图像 1,1
    • Flip over the watch and remove the four 3.0 mm Torx head screws with a T4 Torx head screwdriver.

  5. 这个步骤还没有翻译 帮忙翻译一下

    : 步骤 5 中的图像 1,2 : 步骤 5 中的图像 2,2
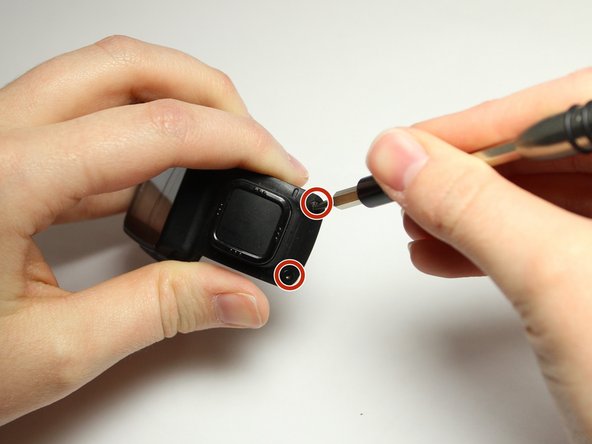
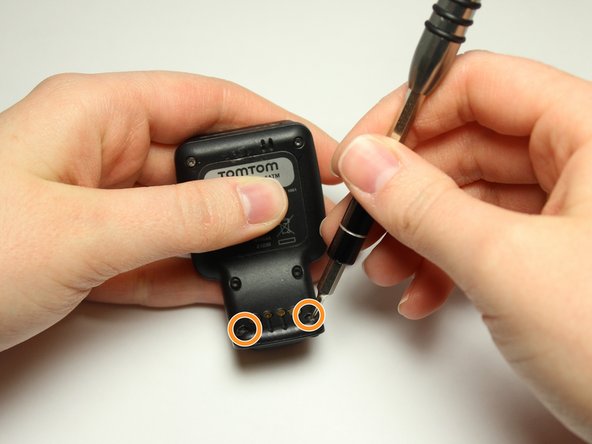
    • Remove the two 3.0 mm Torx screws from the front. Use a T4 Torx screwdriver to remove the screws.

    • The two 3.0 mm Torx screws are painted blue at the end. These screws have screw holders around them that will also need to be removed.

    • Unscrew the screws from the front of the watch casing and the screw holders fall out from the back of the watch casing.

  6. 这个步骤还没有翻译 帮忙翻译一下

    : 步骤 6 中的图像 1,2 : 步骤 6 中的图像 2,2
    • Gently pull the back panel away from the front panel.

    • Do not to pull too fast or too hard. There are red and black wires connected to the vibrator component that should not be ripped.

  7. 这个步骤还没有翻译 帮忙翻译一下

    : 步骤 7 中的图像 1,2 : 步骤 7 中的图像 2,2
    • Gently wiggle the black box vibrator component away from the back panel with your fingers or a Spudger tool.

    • Be gentle with the red and black wires. You do not want them to rip or pop out.

    • The vibrator component is the small black box with the silver metal part at end. The black box is glued down, so it will take a little force to free it and it will be sticky.

  8. 这个步骤还没有翻译 帮忙翻译一下

    : 步骤 8 中的图像 1,2 : 步骤 8 中的图像 2,2
    • Now lift the smaller square of copper off the front panel. Use the precision tweezers and slide it under the smaller square of copper lining then gently lift it up.

    • You will need to be gentle and pull the copper slowly so that it does not rip.

  9. 这个步骤还没有翻译 帮忙翻译一下

    : 步骤 9 中的图像 1,3 : 步骤 9 中的图像 2,3 : 步骤 9 中的图像 3,3
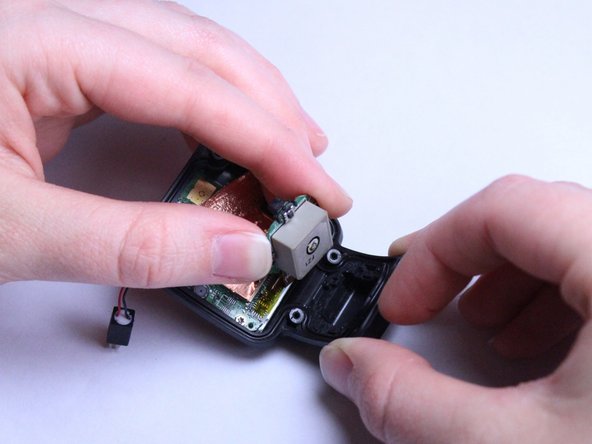
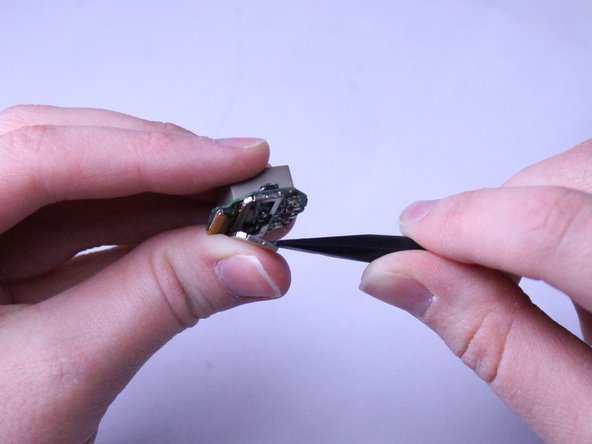
    • Use your fingers to gently grab and lift the small square piece to remove the GPS and button component competely from the casing.

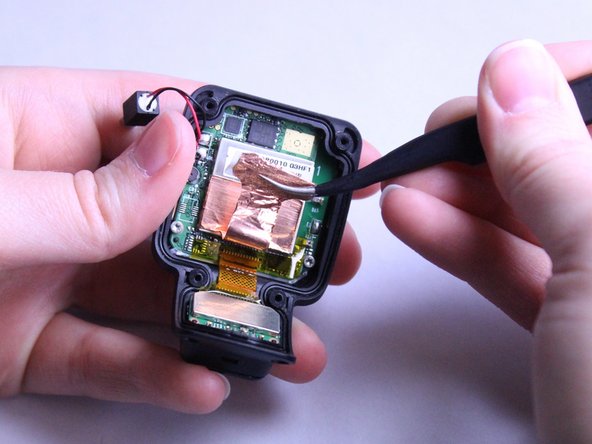
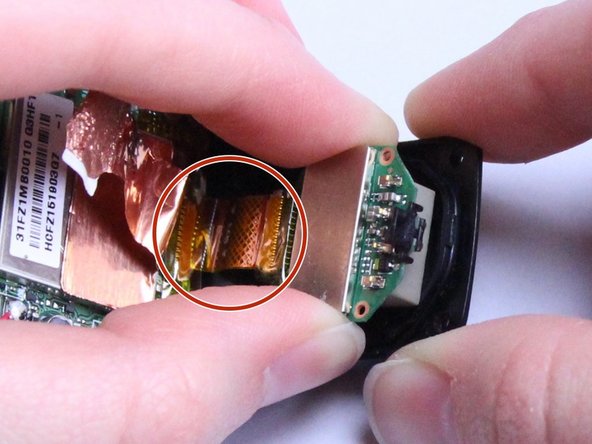
    • Disconnect the ZIF Connector from the larger green motherboard.

    • The ZIF Connector is the flat, orange cable connecting the small green motherboard to the larger motherboard. It is meant to come apart at the port located on the larger motherboard. You will feel like you have broken it when it is disconnected. That is okay!

  10. 这个步骤还没有翻译 帮忙翻译一下

    : 步骤 10 中的图像 1,3 : 步骤 10 中的图像 2,3 : 步骤 10 中的图像 3,3
    • Get the GPS/Button Component by itself and use the Spudger tool to lift the silver cover off the GPS Component. This will expose the GPS Component.

  11. 这个步骤还没有翻译 帮忙翻译一下

    : 步骤 11 中的图像 1,2 : 步骤 11 中的图像 2,2
    • Once the GPS Component cover is off and the GPS Component is exposed, you are ready to replace it.

    • The GPS Component is the entire square, grey box piece with the green motherboard attached to it.

终点

Amber Scarborough

于03/20/17注册

1,133 声望

创作了5篇指南

团队

Texas Tech, Team S8-G6, Bennett Spring 2017 Texas Tech, Team S8-G6, Bennett Spring 2017 的会员

TTU-BENNETT-S17S8G6

4 名成员

创作了15篇指南

2条评论

Where do i buy the GPS component for replacement?

tolstih.kirill - 回复

Hi,

Thanx so much for this guide. Now I’m looking for a new GPS component.Do you know where I can buy that?

Regards, Rein Kooijman (the Netherlands)

Rein Kooijman - 回复

添加评论

浏览统计数据:

过去 24 小时: 0

过去 7 天: 1

过去 30 天: 5

总计 1,520