你所需要的
-
-
Before you begin always ensure that you have a current back up of your data. Better safe than sorry.
-
Power off the laptop and unplug from AC power source.
-
Flip the laptop over and unscrew the 7 screws holding the keyboard cover in place. You can use the handy magnetic iFixit Project mat to hold the screws so you can recall the placement of the screws when reversing the process
-
-
-
-
Slide a spudger along the edge all the way around and gently lift the keyboard tray up.
-
The battery will be secured with a screw that will need to be removed. There can be up to three screws, mine only had one.
-
-
-
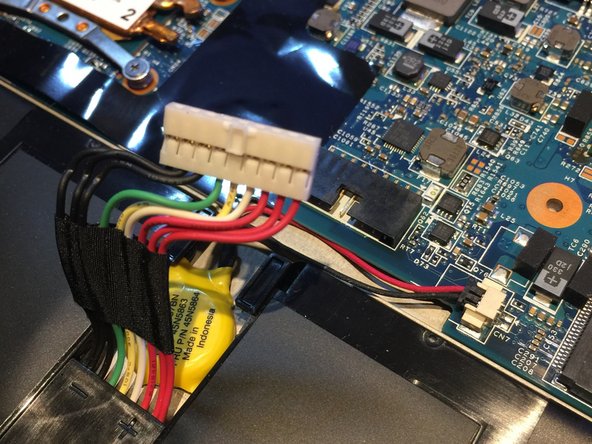
Once you have removed all the screws, carefully unplug the battery cable from the motherboard using the plastic pry tool.
-
Be very careful here as there are other cables that you need to slide out from under. The battery flexes in the middle to make it easier to remove, just go slow and ease it out gently.
-
Finally slide in the new battery taking care again as before to slide it under the exposed cables. Secure the screw(s) from earlier.
-


Replace the keyboard cover, gently snapping it back in place. Close the cover and flip it over and install the screws that were removed previously.
Finally power up your laptop and fully charge the battery as it is likely only partially charged. Fully discharge and recharge at least 3 to 4 times to fully sync the battery gage. Fully drain and recharge your battery at least once every 2-3 months for optimum battery health.
9等其他人完成本指南。
