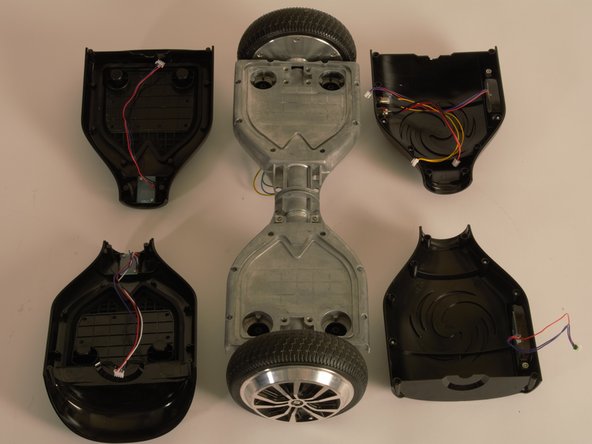
跳转到主内容

SwagTron T1 Outer Shell Replacement

你所需要的

  1. SwagTron T1 Outer Shell Replacement, Back Panels: 步骤 1 中的图像 1,1
    • Ensure that the SwagTron is off.

    • Turn the SwagTron upside down to see the underside.

  2. SwagTron T1 Outer Shell Replacement: 步骤 2 中的图像 1,3 SwagTron T1 Outer Shell Replacement: 步骤 2 中的图像 2,3 SwagTron T1 Outer Shell Replacement: 步骤 2 中的图像 3,3
    • Unscrew the eighteen 10mm screws that secure the back panels using a Phillips #2 screwdriver.

    • The screws are tightly in place. It will take effort to screw them out.

    • The panel is still attached to the SwagTron by wires that go to the motherboard.

    • Carefully lift the panels off

  3. SwagTron T1 Outer Shell Replacement: 步骤 3 中的图像 1,3 SwagTron T1 Outer Shell Replacement: 步骤 3 中的图像 2,3 SwagTron T1 Outer Shell Replacement: 步骤 3 中的图像 3,3
    • Follow the wires from the panels to the motherboard.

    • You may need to cut any zip ties that are holding the wires together.

    • There is one connection on the battery side and three on the other side that must be removed.

    • These connections may be difficult to remove. Try to securely press the connection and pull firmly.

    • Your back panels are now completely removed.

  4. SwagTron T1 Outer Shell Replacement, Outer Shell: 步骤 4 中的图像 1,2 SwagTron T1 Outer Shell Replacement, Outer Shell: 步骤 4 中的图像 2,2
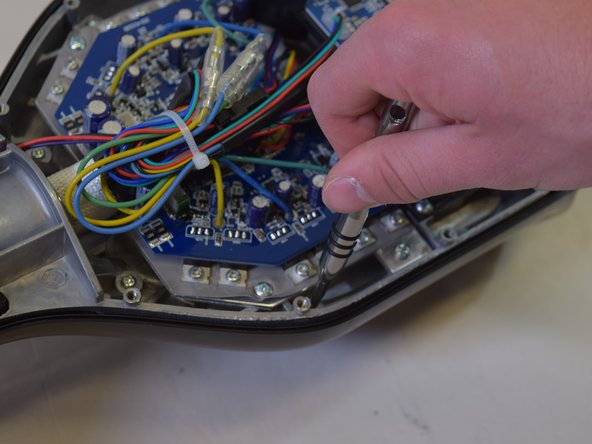
    • Unscrew the twelve 10mm screws that connect the metal chassis to the top plastic panel.

    • These screws will be low into the SwagTron.

  5. SwagTron T1 Outer Shell Replacement: 步骤 5 中的图像 1,1
    • Turn the SwagTron right side up and slightly lift up the panel.

    • Be careful to not pull too hard because the panel is still attached to the SwagTron by wires.

  6. SwagTron T1 Outer Shell Replacement: 步骤 6 中的图像 1,3 SwagTron T1 Outer Shell Replacement: 步骤 6 中的图像 2,3 SwagTron T1 Outer Shell Replacement: 步骤 6 中的图像 3,3
    • Turn the SwagTron over and disconnect the wires from the motherboard.

    • Follow the wires to the underside of the SwagTron.

    • Carefully remove the cord and the panel together.

    • All the panels are now free from the SwagTron.

结论

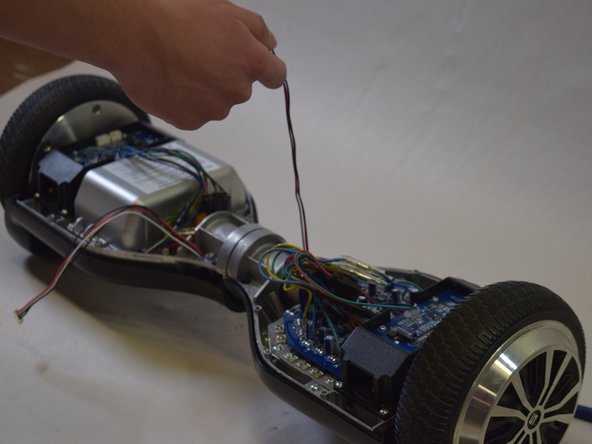
To reassemble your device, follow these instructions in reverse order.

另外一个人完成了本指南。

Gloria Whang

于04/13/17注册

179 声望

撰写一个指南

团队

Cal Poly, Team S17-G5, Banghart Spring 2017 Cal Poly, Team S17-G5, Banghart Spring 2017 的会员

CPSU-BANGHART-S17S17G5

4 名成员

创作了5篇指南

4条评论

Where did you ind a replacement shell for the Swagtron T1? I need to buy a new one, but can’t seem to find a place to buy it online.

Syd Jensen - 回复

Where can I buy a Swagtron T1 replacement shell?

Syd Jensen - 回复

Syd any luck finding a replacement shell?  I need to order the same kind and cannot find it online.

Craig -

Amazon.com Keyword: CertiCable

Jesse Griffis -

添加评论

浏览统计数据:

过去 24 小时: 1

过去 7 天: 2

过去 30 天: 2

总计 1,937