跳转到主内容

当前版本的文档还未经巡查,您可以查看最新的已查核版本

你所需要的

  1. 这个步骤还没有翻译 帮忙翻译一下

    : 步骤 1 中的图像 1,3 : 步骤 1 中的图像 2,3 : 步骤 1 中的图像 3,3
    • Press down the release button on the bottom left corner of the face plate.

    • Then remove the face plate carefully.

  2. 这个步骤还没有翻译 帮忙翻译一下

    : 步骤 2 中的图像 1,2 : 步骤 2 中的图像 2,2
    在这个步骤中使用的工具:
    Phillips #0 Screwdriver
    $5.49
    购买
  3. 这个步骤还没有翻译 帮忙翻译一下

    : 步骤 3 中的图像 1,3 : 步骤 3 中的图像 2,3 : 步骤 3 中的图像 3,3
    在这个步骤中使用的工具:
    Phillips #1 Screwdriver
    $5.49
    购买
    • Using the Phillips #1 Screwdriver, unscrew the 2 thick screws (length - 7.69mm) located on both sides of the stereo.

    • Remove side-metal plates gently.

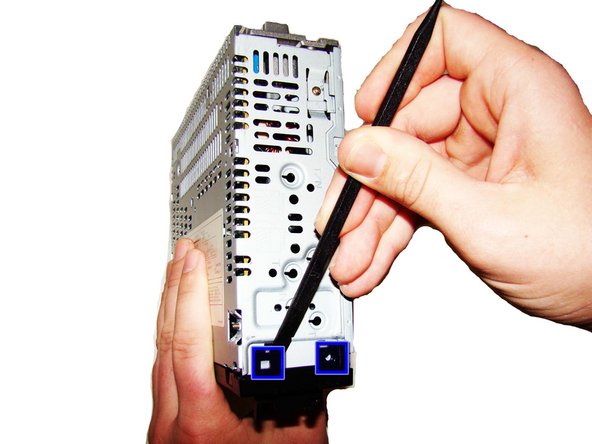
    • Use the Heavy-duty Spudger, insert the flat end under each of the black flaps indicated in the picture. Use leverage to pry and pop them loose.

  4. 这个步骤还没有翻译 帮忙翻译一下

    : 步骤 4 中的图像 1,1
    • Remove the black front plate of the stereo.

  5. 这个步骤还没有翻译 帮忙翻译一下

    : 步骤 5 中的图像 1,2 : 步骤 5 中的图像 2,2
    在这个步骤中使用的工具:
    Phillips #0 Screwdriver
    $5.49
    购买
    • Using the Phillips #0 Screwdriver, unscrew the 1 gold screw (height - 7.47mm) on the top of the stereo.

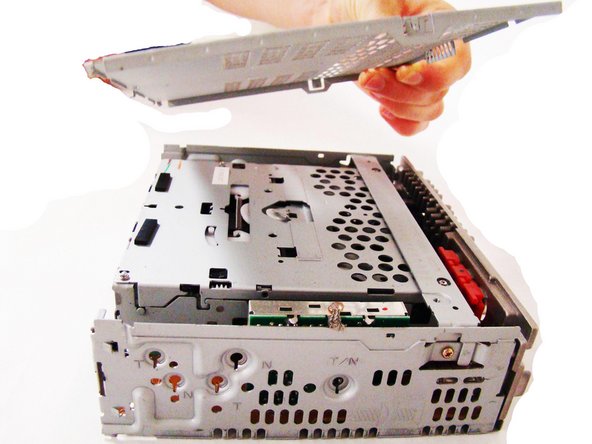
    • Lift off the top plate.

  6. 这个步骤还没有翻译 帮忙翻译一下

    : 步骤 6 中的图像 1,3 : 步骤 6 中的图像 2,3 : 步骤 6 中的图像 3,3
    在这个步骤中使用的工具:
    Phillips #0 Screwdriver
    $5.49
    购买
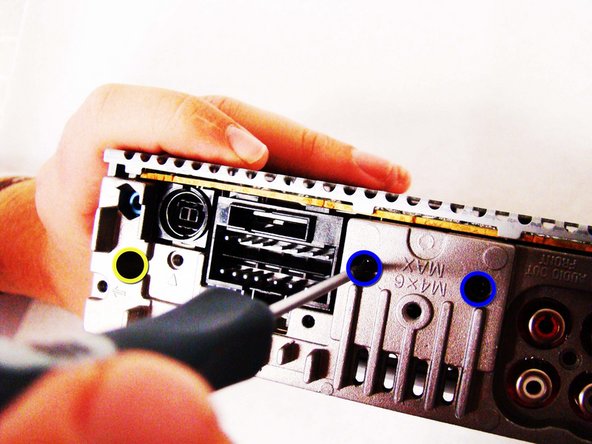
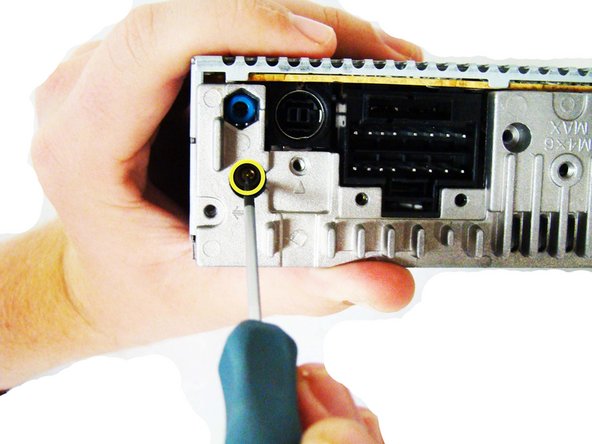
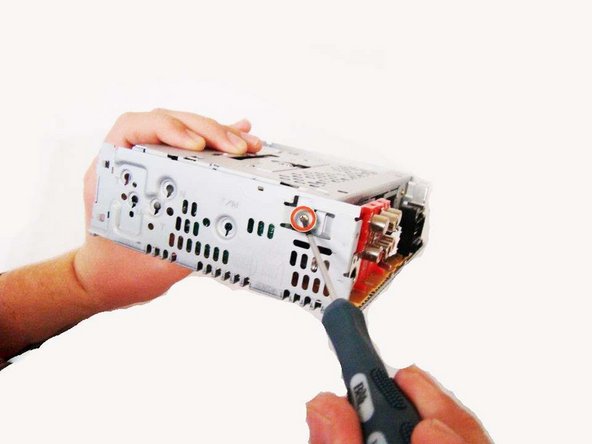
    • Using the Phillips #0 Screwdriver, unscrew the 8 gold screws (length - 9.26mm), located on the back side of the stereo.

    • Using the Phillips #0 Screwdriver, unscrew the 2 black screws (length - 13.27mm), also located on the back of the stereo.

    • Using the Phillips #0 Screwdriver, unscrew the 1 gold screw (length - 9.3mm), located on the bottom of a hole as noted in pictures (2) and (3).

  7. 这个步骤还没有翻译 帮忙翻译一下

    : 步骤 7 中的图像 1,3 : 步骤 7 中的图像 2,3 : 步骤 7 中的图像 3,3
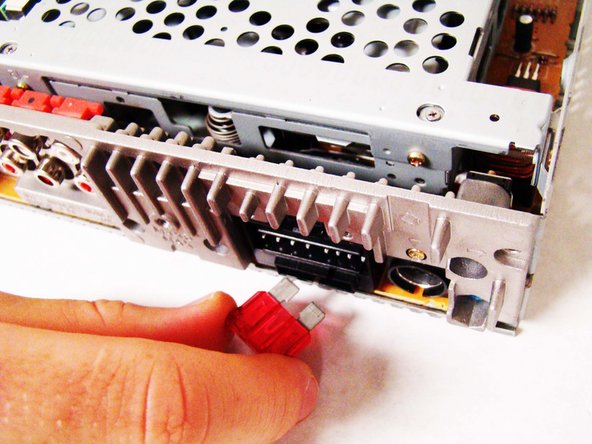
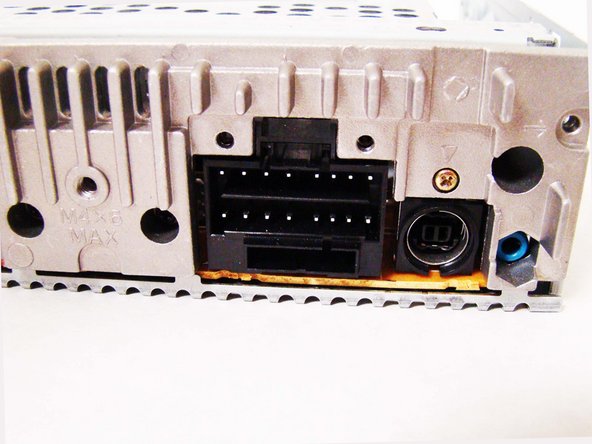
    • Carefully pull the fuse out of the back of the stereo.

  8. 这个步骤还没有翻译 帮忙翻译一下

    : 步骤 8 中的图像 1,2 : 步骤 8 中的图像 2,2
    • Firmly grip the body of the stereo and pull off the silver back plate.

  9. 这个步骤还没有翻译 帮忙翻译一下

    : 步骤 9 中的图像 1,1
    在这个步骤中使用的工具:
    Phillips #0 Screwdriver
    $5.49
    购买
  10. 这个步骤还没有翻译 帮忙翻译一下

    : 步骤 10 中的图像 1,2 : 步骤 10 中的图像 2,2
    在这个步骤中使用的工具:
    Phillips #0 Screwdriver
    $5.49
    购买
    • Using the Phillips #0 Screwdriver, unscrew the 2 gold screws (length - 7.34mm) found on both sides of the stereo.

  11. 这个步骤还没有翻译 帮忙翻译一下

    : 步骤 11 中的图像 1,3 : 步骤 11 中的图像 2,3 : 步骤 11 中的图像 3,3
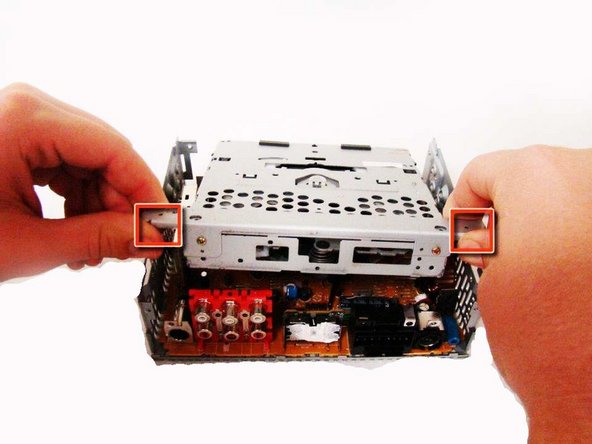
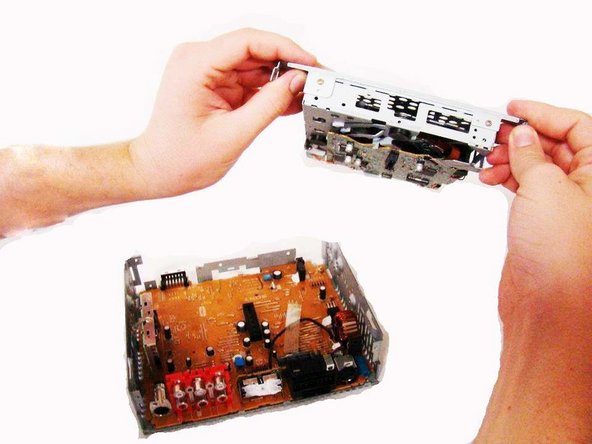
    • Grip the top portion of the stereo, where the CD-Drive is located, and gently pull up to release it, but you will not be able to lift it all the way out.

    • Grab the two tabs located near the back of the stereo, and gently pull the CD-drive front the rest of the device.

  12. 这个步骤还没有翻译 帮忙翻译一下

    : 步骤 12 中的图像 1,2 : 步骤 12 中的图像 2,2
    在这个步骤中使用的工具:
    Phillips #0 Screwdriver
    $5.49
    购买
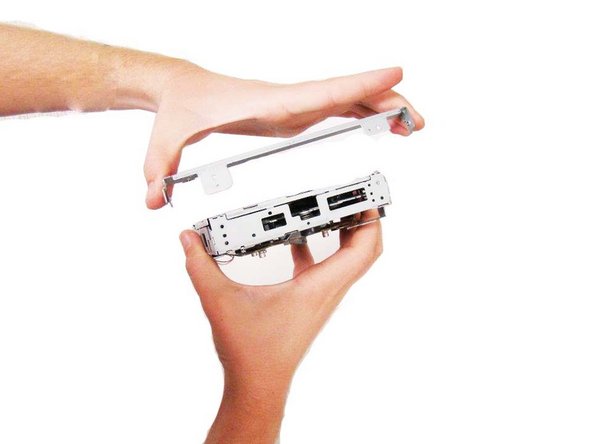
    • Using the Phillips #0 Screwdriver, unscrew the two gold screws (length - 7.37mm) found on top of the CD Tray.

    • Remove the top cover.

  13. 这个步骤还没有翻译 帮忙翻译一下

    : 步骤 13 中的图像 1,3 : 步骤 13 中的图像 2,3 : 步骤 13 中的图像 3,3
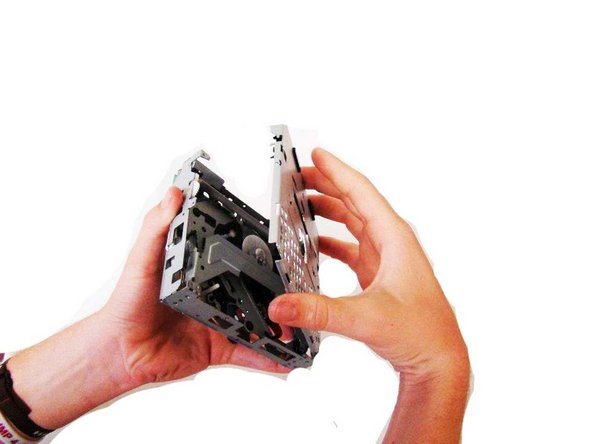
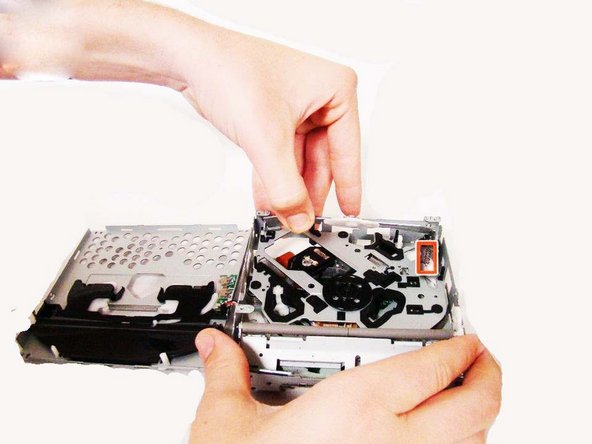
    • These two pieces will NOT separate completely. They are connected by small wires on one side. So make sure you follow the pictures carefully to know which side to pull up.

    • Grip the top of the CD-Drive and pull it up and over, as shown in the pictures.

    • Notice the wires that hold the two pieces together.

  14. 这个步骤还没有翻译 帮忙翻译一下

    : 步骤 14 中的图像 1,2 : 步骤 14 中的图像 2,2
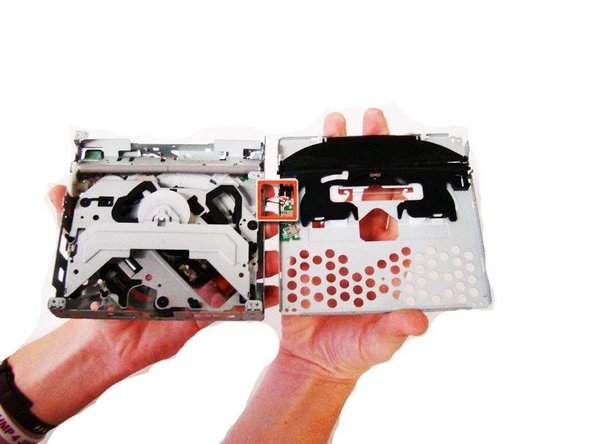
    • Pay extra attention to the spring inside the CD-Drive. This will be crucial for the next step.

    • Slowly pull up the side opposite the spring, but make sure not to over-stretch the spring. This could damage the device.

    • While the part is lifted, remove your jammed CD, and you are finished!

终点

Kyle

于10/10/11注册

114 声望

创作了2篇指南

团队

Cal Poly, Team 5-35, Amido Fall 2011 Cal Poly, Team 5-35, Amido Fall 2011 的会员

CPSU-AMIDO-F11S5G35

4 名成员

创作了8篇指南

0条评论

添加评论

浏览统计数据:

过去 24 小时: 1

过去 7 天: 4

过去 30 天: 6

总计 4,321