跳转到主内容

Sony Xperia M2 Logic Board Replacement

你所需要的

视频概述

  1. Sony Xperia M2 Logic Board Replacement, Rear Cover: 步骤 1 中的图像 1,3 Sony Xperia M2 Logic Board Replacement, Rear Cover: 步骤 1 中的图像 2,3 Sony Xperia M2 Logic Board Replacement, Rear Cover: 步骤 1 中的图像 3,3
    • Warm the Back Cover. You can use a hairdryer.

    • Be careful, the Cover is plastic.

    • Use a small suction cup and plastic tools for separating the Rear panel.

    • Before installing the new cover, you must clean the phone from the old adhesive tape and install a new one if your spare part has come without double sided adhesive tape.

  2. Sony Xperia M2 Logic Board Replacement, Battery: 步骤 2 中的图像 1,3 Sony Xperia M2 Logic Board Replacement, Battery: 步骤 2 中的图像 2,3 Sony Xperia M2 Logic Board Replacement, Battery: 步骤 2 中的图像 3,3
    • Disconnect the Battery Cable.

    • The battery is stuck to the phone fame. Use the white tape to remove it.

    • Li-Polymer Battery, 2230 mAh

    • Part number: LIS1551ERPC

    • Please SUBSCRIBE to my channel ツ

  3. Sony Xperia M2 Logic Board Replacement, Logic Board: 步骤 3 中的图像 1,2 Sony Xperia M2 Logic Board Replacement, Logic Board: 步骤 3 中的图像 2,2
    • Remove the SIM and the memory cards.

    • Remove x4 T5 Torx Corner screws & x2 T5 Torx Screws on the Board

  4. Sony Xperia M2 Logic Board Replacement: 步骤 4 中的图像 1,1
    • Disconnect one by one:

    • Touchscreen flex cable

    • Proximity sensor flex cable

    • Power on, Volume buttons cable

    • SIM & Micro SD flex cable

    • Coaxial antenna cable

  5. Sony Xperia M2 Logic Board Replacement: 步骤 5 中的图像 1,2 Sony Xperia M2 Logic Board Replacement: 步骤 5 中的图像 2,2
    • Disconnect the LCD Display flex cable. The connector is on the other side of the board, under the Power/Volume buttons flex cable connector.

    • Put one plastic spudger between the Logic board and the Main frame.

  6. Sony Xperia M2 Logic Board Replacement: 步骤 6 中的图像 1,3 Sony Xperia M2 Logic Board Replacement: 步骤 6 中的图像 2,3 Sony Xperia M2 Logic Board Replacement: 步骤 6 中的图像 3,3
    • Step one: move aside less the left side of the board - down.

    • Step two: the left side of the Logic board must go out of the main frame.

    • For this manipulation use only plastic tools.

    • Please SUBSCRIBE to my channel ツ

结论

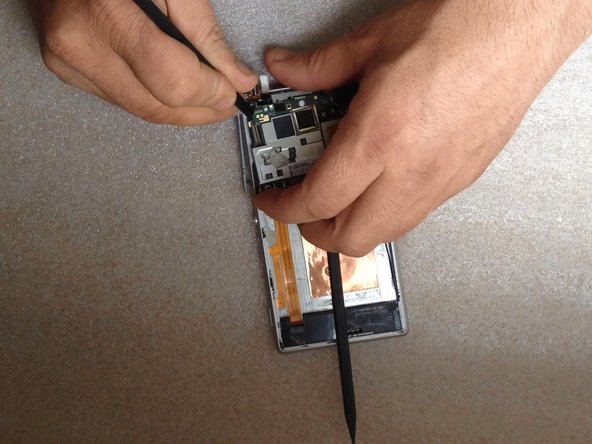
To reassemble your device, follow these instructions in reverse order.

16等其他人完成本指南。

ZFix

于12/09/13注册

191,182 声望

创作了330篇指南

团队

Master Techs Master Techs 的会员

Community

322 名成员

创作了2,520篇指南

2条评论

My mobile charge bin problem how to find that problem , no charged my mobile…

jeeva jeeva - 回复

Removing the motherboard is unnecessarily difficult on this model! Why make it like this? One would figure the screws would do a good enough job of securing it to the frame. I guess having to wiggle it out is just part of the fun, right?

Also, getting parts for this model (and it’s water-resistant twin) sucks. I’m currently in the market for a display+touch assembly and it seems I’ll have to resort to importing from AliExpress.

Luis Alejandro Araúz - 回复

添加评论

浏览统计数据:

过去 24 小时: 3

过去 7 天: 8

过去 30 天: 13

总计 14,389