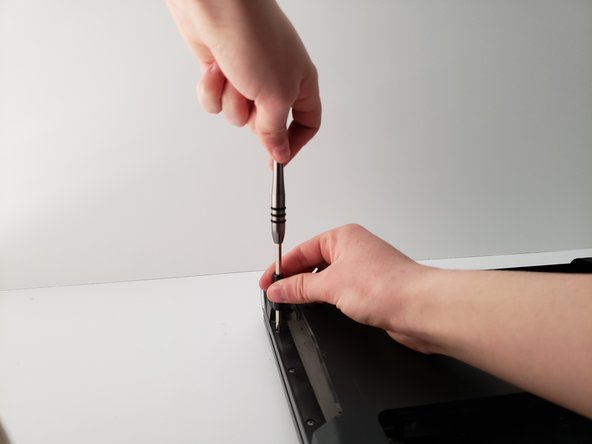
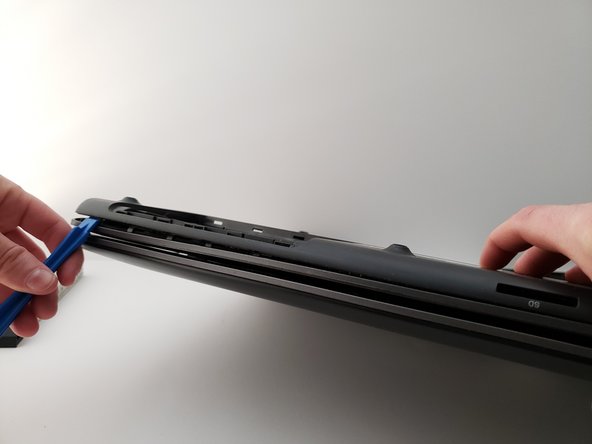
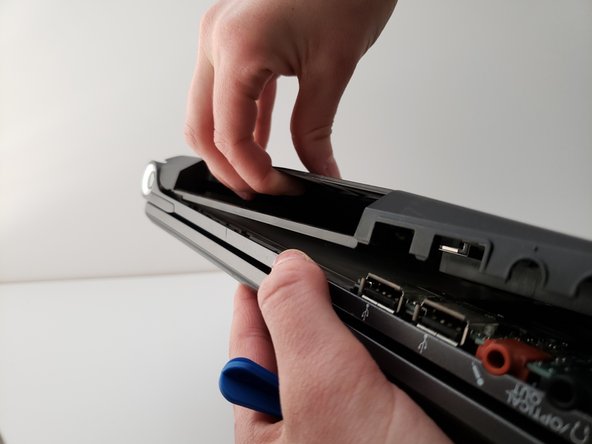
跳转到主内容

Sony Vaio VPCF115FM Back Panel Assembly Replacement

你所需要的

  1. Sony Vaio VPCF115FM Back Panel Assembly Replacement, Battery: 步骤 1 中的图像 1,2 Sony Vaio VPCF115FM Back Panel Assembly Replacement, Battery: 步骤 1 中的图像 2,2
    • Flip the laptop over so the bottom is facing up.

  2. Sony Vaio VPCF115FM Back Panel Assembly Replacement: 步骤 2 中的图像 1,3 Sony Vaio VPCF115FM Back Panel Assembly Replacement: 步骤 2 中的图像 2,3 Sony Vaio VPCF115FM Back Panel Assembly Replacement: 步骤 2 中的图像 3,3
    • Unlock the left tab on the battery.

    • Glide the right battery tab to release the battery pack from the laptop.

    • Keeping the battery tab in the released position, lift the battery up.

  3. Sony Vaio VPCF115FM Back Panel Assembly Replacement, RAM: 步骤 3 中的图像 1,2 Sony Vaio VPCF115FM Back Panel Assembly Replacement, RAM: 步骤 3 中的图像 2,2
    • Remove the 9mm Phillips #1 screw located on the back cover.

    • Remove cover.

    • Push out metal tabs.

    • Remove card.

  4. Sony Vaio VPCF115FM Back Panel Assembly Replacement, Hard Drive: 步骤 4 中的图像 1,1
    • Remove two 9mm Phillips #1 screws.

  5. Sony Vaio VPCF115FM Back Panel Assembly Replacement: 步骤 5 中的图像 1,3 Sony Vaio VPCF115FM Back Panel Assembly Replacement: 步骤 5 中的图像 2,3 Sony Vaio VPCF115FM Back Panel Assembly Replacement: 步骤 5 中的图像 3,3
    • Remove the panel.

    • Gently remove the hard drive.

    • Remove screws securing caddy to hard drive.

  6. Sony Vaio VPCF115FM Back Panel Assembly Replacement, Disk Drive: 步骤 6 中的图像 1,2 Sony Vaio VPCF115FM Back Panel Assembly Replacement, Disk Drive: 步骤 6 中的图像 2,2
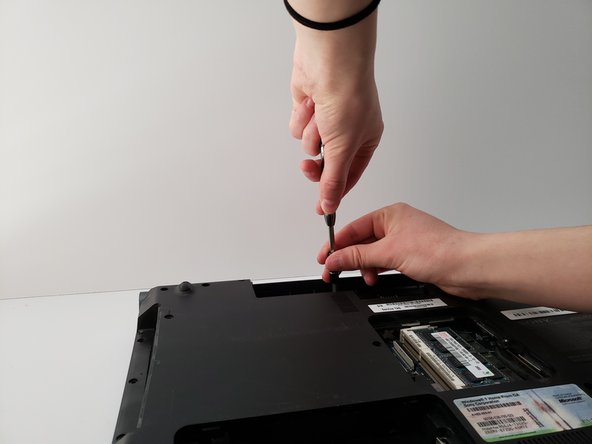
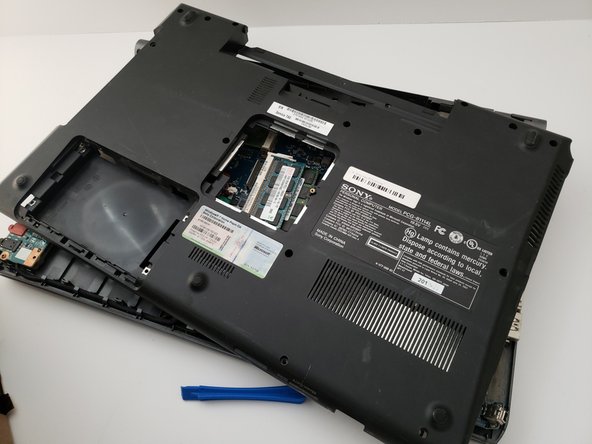
    • Remove the 9mm Phillips #1 screw holding the disk drive in place.

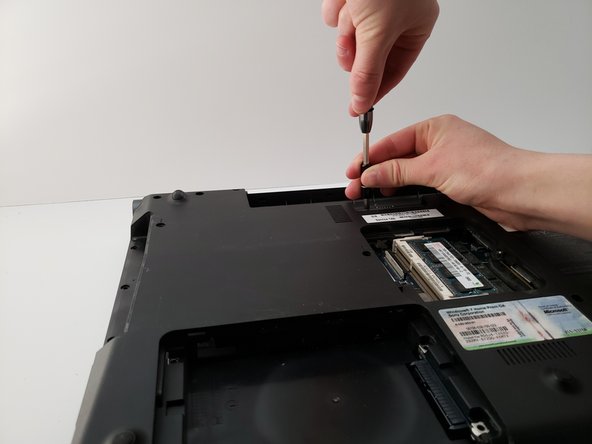
    • Remove the 9mm screw near the memory stick.

  7. Sony Vaio VPCF115FM Back Panel Assembly Replacement: 步骤 7 中的图像 1,1
    • Using an iFixit opening tool, carefully pry the disk drive away from the device.

  8. Sony Vaio VPCF115FM Back Panel Assembly Replacement, Back Panel Assembly: 步骤 8 中的图像 1,2 Sony Vaio VPCF115FM Back Panel Assembly Replacement, Back Panel Assembly: 步骤 8 中的图像 2,2
    • Remove three 3mm Phillips #1 screws on the side panel.

  9. Sony Vaio VPCF115FM Back Panel Assembly Replacement: 步骤 9 中的图像 1,3 Sony Vaio VPCF115FM Back Panel Assembly Replacement: 步骤 9 中的图像 2,3 Sony Vaio VPCF115FM Back Panel Assembly Replacement: 步骤 9 中的图像 3,3
    • On the top of the panel, remove four 3mm Phillips #1 screws.

  10. Sony Vaio VPCF115FM Back Panel Assembly Replacement: 步骤 10 中的图像 1,1
    • Remove the rest of the twelve 9mm Phillips #1 screws on the back panel.

    • Remove the final screw.

  11. Sony Vaio VPCF115FM Back Panel Assembly Replacement: 步骤 11 中的图像 1,3 Sony Vaio VPCF115FM Back Panel Assembly Replacement: 步骤 11 中的图像 2,3 Sony Vaio VPCF115FM Back Panel Assembly Replacement: 步骤 11 中的图像 3,3
    • Using an iFixit opening tool, pry the back panel off.

    • At this point, the back panel should very easily pop off.

    • Be careful around mechanical components on the edges of the laptop (audio output, USB ports).

  12. Sony Vaio VPCF115FM Back Panel Assembly Replacement: 步骤 12 中的图像 1,3 Sony Vaio VPCF115FM Back Panel Assembly Replacement: 步骤 12 中的图像 2,3 Sony Vaio VPCF115FM Back Panel Assembly Replacement: 步骤 12 中的图像 3,3
    • Continue popping the back panel off.

    • The back panel should now be off.

结论

To reassemble your device, follow these instructions in reverse order.

另外一个人完成了本指南。

Haylie Hotte

于03/20/19注册

638 声望

创作了5篇指南

团队

UMass Dartmouth, Team S6-G6, Peak Spring 2019 UMass Dartmouth, Team S6-G6, Peak Spring 2019 的会员

UMASSD-PEAK-S19S6G6

3 名成员

创作了10篇指南

2条评论

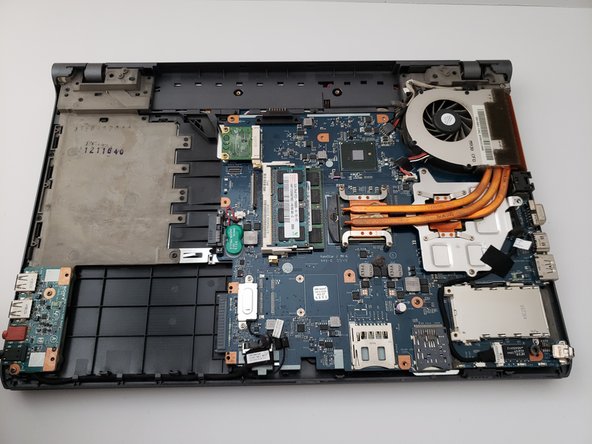
The fan ran at high speed and the laptop would randomly shut down. I suspected a cooling problem. Turned out there was a layer of dust caked on the “fan side” of the cooling fins. I removed the fan/heat sink assembly and used a vacuum and an artist’s brush to clean the fins and fan blades. Put a fresh layer of thermal compound on the CPU and GPU heat sinks and reassembled everything. This back panel removal/replacement instruction page was a great help. Everything went back together successfully and, to my amazement, there were no screws left over!

Wil Higdon - 回复

Ganhei um Sony Vaio PCG-81114L usado porem nao tem os parafusos (todos) e nao estou encontrado aqui no Brasil. Tem como ajudar? O procedimento esta 10 e é bem simples. My email: joaocastelor@hotmail.com

joaocastelor - 回复

添加评论

浏览统计数据:

过去 24 小时: 0

过去 7 天: 0

过去 30 天: 12

总计 1,773