跳转到主内容

Sony Vaio Tap 11 Audio Jack Replacement

你所需要的

  1. Sony Vaio Tap 11 Audio Jack Replacement, Screen Assembly: 步骤 1 中的图像 1,1
    • Begin by opening the HDMI/USB port cover on the left edge.

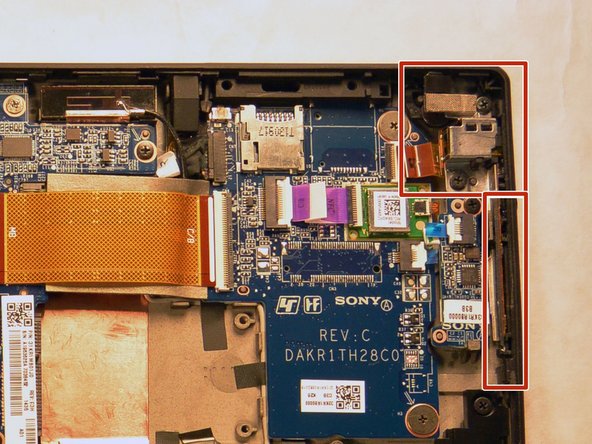
    • Remove the three #000 headed, 3 mm long screws located underneath the port cover.

  2. Sony Vaio Tap 11 Audio Jack Replacement: 步骤 2 中的图像 1,1
    • Locate and open the Micro SD slot on the top side of the device.

    • Remove the two screws located beneath the cover.

  3. Sony Vaio Tap 11 Audio Jack Replacement: 步骤 3 中的图像 1,2 Sony Vaio Tap 11 Audio Jack Replacement: 步骤 3 中的图像 2,2
    • Attach the suction cup to the top right area of the screen.

    • Pull to separate the screen from the rest of the device.

    • Be aware of the front camera cable that is still connected to the rest of the device.

    • Detach the display ribbon cable.

  4. Sony Vaio Tap 11 Audio Jack Replacement, Audio Jack: 步骤 4 中的图像 1,1
    • After removing the screen, disconnect the battery from the motherboard to avoid shock or the shorting of circuits.

  5. Sony Vaio Tap 11 Audio Jack Replacement: 步骤 5 中的图像 1,2 Sony Vaio Tap 11 Audio Jack Replacement: 步骤 5 中的图像 2,2
    • Once the battery is disconnected, locate the audio jack.

  6. Sony Vaio Tap 11 Audio Jack Replacement: 步骤 6 中的图像 1,2 Sony Vaio Tap 11 Audio Jack Replacement: 步骤 6 中的图像 2,2
    • Using the Phillips #000, remove the two 3 mm screws.

  7. Sony Vaio Tap 11 Audio Jack Replacement: 步骤 7 中的图像 1,3 Sony Vaio Tap 11 Audio Jack Replacement: 步骤 7 中的图像 2,3 Sony Vaio Tap 11 Audio Jack Replacement: 步骤 7 中的图像 3,3
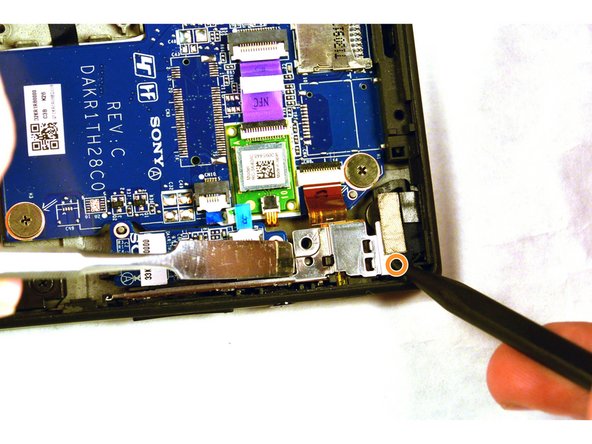
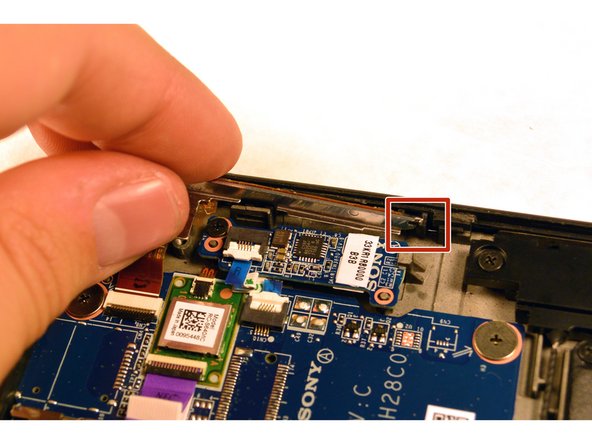
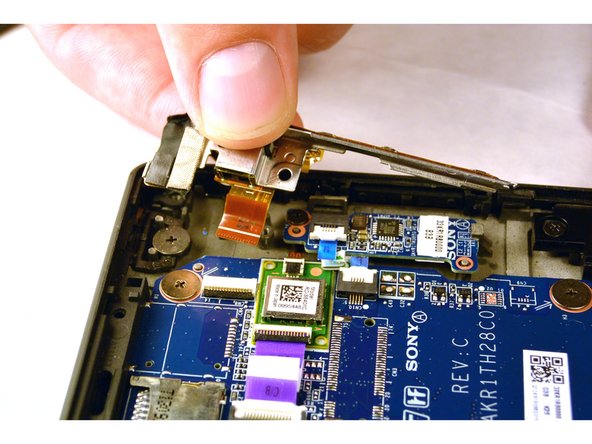
    • With the screws removed, use a plastic opening tool to lightly pry the board up over a plastic positioning peg.

    • Though these images show a metal spudger, you should use plastic opening tools to avoid damage.

    • Insert the tip of a spudger where the upper screw was located and push the board inward while prying up with the plastic opening tool.

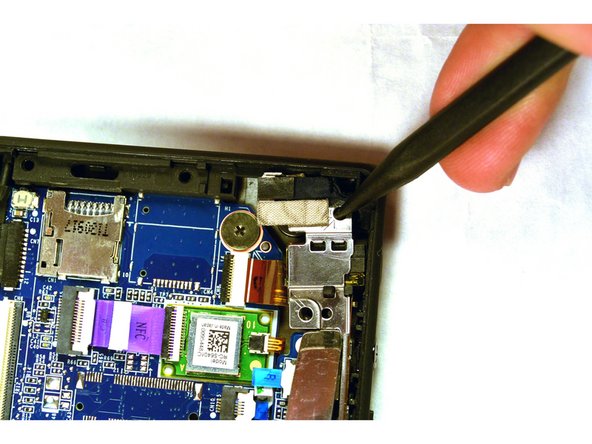
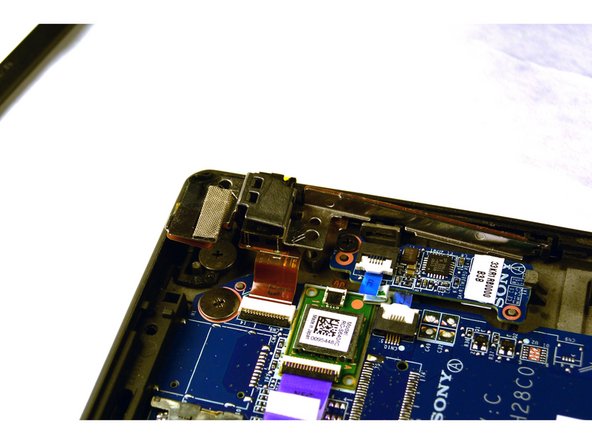
    • Lightly pry with the opening tool, enough for the board to lift off the positioning peg and then push inward with the spudger. The board should begin to separate from the corner.

  8. Sony Vaio Tap 11 Audio Jack Replacement: 步骤 8 中的图像 1,3 Sony Vaio Tap 11 Audio Jack Replacement: 步骤 8 中的图像 2,3 Sony Vaio Tap 11 Audio Jack Replacement: 步骤 8 中的图像 3,3
    • If Step 4 was done correctly, the board should dislodge from the corner mold.

    • Remove the rest of the board by pulling it up and out.

    • Pull the small narrow end of the board horizontally towards the corner, freeing the board from the panel with the exception of the connector.

  9. Sony Vaio Tap 11 Audio Jack Replacement: 步骤 9 中的图像 1,2 Sony Vaio Tap 11 Audio Jack Replacement: 步骤 9 中的图像 2,2
    • Disconnect the audio jack connector and remove the entire audio jack power volume button board assembly.

结论

To reassemble your device, follow these instructions in reverse order.

2等其他人完成本指南。

Kevin

于09/16/15注册

258 声望

创作了2篇指南

团队

IUPUI, Team 1-2, Harley Fall 2015 IUPUI, Team 1-2, Harley Fall 2015 的会员

IUPUI-HARLEY-F15S1G2

4 名成员

创作了20篇指南

0条评论

添加评论

浏览统计数据:

过去 24 小时: 0

过去 7 天: 1

过去 30 天: 3

总计 1,014