跳转到主内容

Sony Vaio PCG-F360 Floppy Drive Replacement

  1. Sony Vaio PCG-F360 Floppy Drive Replacement, Battery: 步骤 1 中的图像 1,1
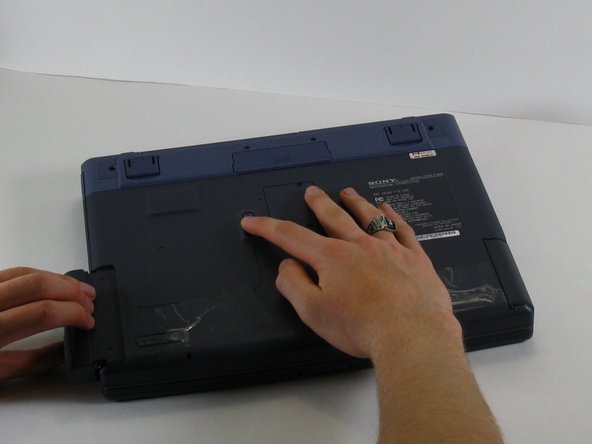
    • Position the laptop screen-side down as shown.

    • In this position the battery housing will be located on the right hand side.

  2. Sony Vaio PCG-F360 Floppy Drive Replacement: 步骤 2 中的图像 1,1
    • Lift the panel up and then out to gain access to the battery.

  3. Sony Vaio PCG-F360 Floppy Drive Replacement: 步骤 3 中的图像 1,1
    • Use the indentations to pull the old battery out.

  4. Sony Vaio PCG-F360 Floppy Drive Replacement: 步骤 4 中的图像 1,1
    • The battery is now removed and it is safe to move on to uninstalling other components.

  5. Sony Vaio PCG-F360 Floppy Drive Replacement, Floppy Drive: 步骤 5 中的图像 1,2 Sony Vaio PCG-F360 Floppy Drive Replacement, Floppy Drive: 步骤 5 中的图像 2,2
    • With one hand slide and hold the tab shown.

    • With your other hand, pull the floppy drive out of the floppy drive bay.

    • To replace the floppy drive, simply slide the drive into the slot until it clicks.

结论

To reassemble your device, follow these instructions in reverse order.

ahintz

于04/21/10注册

28 声望

创作了8篇指南

团队

Cal Poly, Team 16-3, Maness Spring 2010 Cal Poly, Team 16-3, Maness Spring 2010 的会员

CPSU-MANESS-S10S16G3

3 名成员

创作了8篇指南

0条评论

添加评论

浏览统计数据:

过去 24 小时: 0

过去 7 天: 3

过去 30 天: 3

总计 2,758