跳转到主内容

Sony Vaio PCG-61411L RAM Replacement

已存档的指南
本指南只作为历史记录保留。请使用指南的最新版本来进行维修。

你所需要的

  1. Sony Vaio PCG-61411L RAM Replacement, Battery: 步骤 1 中的图像 1,3 Sony Vaio PCG-61411L RAM Replacement, Battery: 步骤 1 中的图像 2,3 Sony Vaio PCG-61411L RAM Replacement, Battery: 步骤 1 中的图像 3,3
    • Be sure to disconnect the device charger and power down the device before beginning.

    • Turn the device over onto its back, where the battery is at the top of the device. Slide the "lock" switch to the right.

  2. Sony Vaio PCG-61411L RAM Replacement: 步骤 2 中的图像 1,3 Sony Vaio PCG-61411L RAM Replacement: 步骤 2 中的图像 2,3 Sony Vaio PCG-61411L RAM Replacement: 步骤 2 中的图像 3,3
    • Slide the "release" switch to the left and gently lift the battery up to remove it.

    • Completely remove the battery from the device.

  3. Sony Vaio PCG-61411L RAM Replacement, RAM: 步骤 3 中的图像 1,1
    • The RAM cards reside in the rectangle shaped plate in the center of the back panel of the device.

  4. Sony Vaio PCG-61411L RAM Replacement: 步骤 4 中的图像 1,2 Sony Vaio PCG-61411L RAM Replacement: 步骤 4 中的图像 2,2
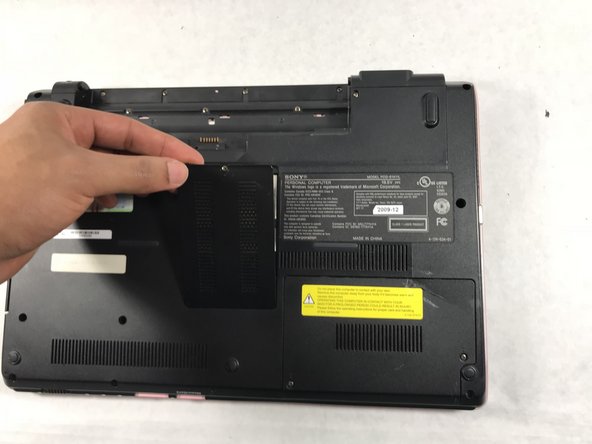
    • Unscrew the single PH1 6mm screw at the top of the panel. The screw remains in the panel.

    • Remove the panel by lifting it towards yourself.

  5. Sony Vaio PCG-61411L RAM Replacement: 步骤 5 中的图像 1,3 Sony Vaio PCG-61411L RAM Replacement: 步骤 5 中的图像 2,3 Sony Vaio PCG-61411L RAM Replacement: 步骤 5 中的图像 3,3
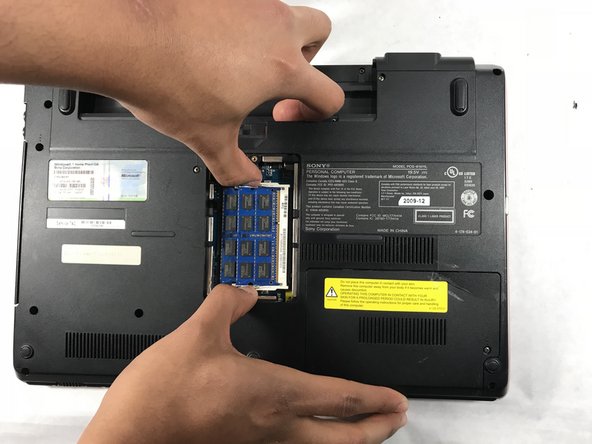
    • To remove the individual RAM card panels, snap back the metal latches on each side of the cards.

  6. Sony Vaio PCG-61411L RAM Replacement: 步骤 6 中的图像 1,2 Sony Vaio PCG-61411L RAM Replacement: 步骤 6 中的图像 2,2
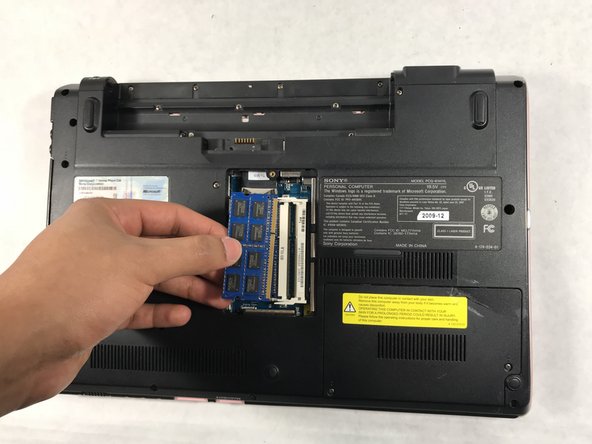
    • After pinching the metal latches, the RAM card should pop out slightly upward.

    • Remove the cards by pulling them out to the left.

    • Repeat for the second panel of RAM cards.

结论

To reassemble your device, follow these instructions in reverse order.

Sean Lyon

于03/01/18注册

381 声望

创作了3篇指南

团队

0条评论

添加评论

浏览统计数据:

过去 24 小时: 1

过去 7 天: 1

过去 30 天: 1

总计 1,147