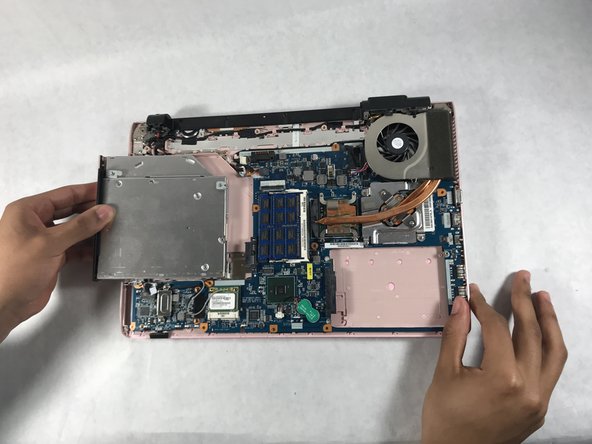
跳转到主内容

Sony Vaio PCG-61411L Optical Disc Drive Replacement

你所需要的

  1. Sony Vaio PCG-61411L Optical Disc Drive Replacement, Battery: 步骤 1 中的图像 1,3 Sony Vaio PCG-61411L Optical Disc Drive Replacement, Battery: 步骤 1 中的图像 2,3 Sony Vaio PCG-61411L Optical Disc Drive Replacement, Battery: 步骤 1 中的图像 3,3
    • Be sure to disconnect the device charger and power down the device before beginning.

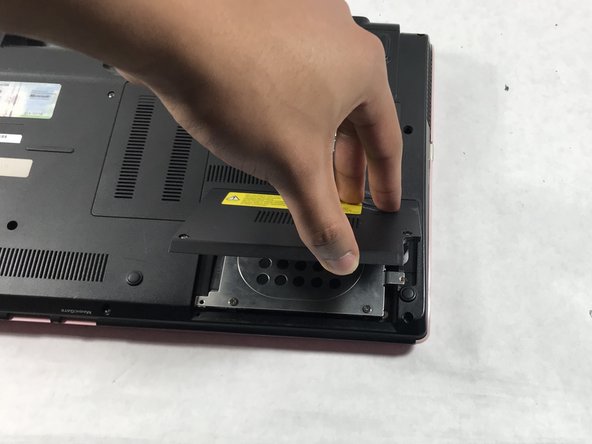
    • Turn the device over onto its back, where the battery is at the top of the device. Slide the "lock" switch to the right.

  2. Sony Vaio PCG-61411L Optical Disc Drive Replacement: 步骤 2 中的图像 1,3 Sony Vaio PCG-61411L Optical Disc Drive Replacement: 步骤 2 中的图像 2,3 Sony Vaio PCG-61411L Optical Disc Drive Replacement: 步骤 2 中的图像 3,3
    • Slide the "release" switch to the left and gently lift the battery up to remove it.

    • Completely remove the battery from the device.

  3. Sony Vaio PCG-61411L Optical Disc Drive Replacement, Hard Drive: 步骤 3 中的图像 1,1
    • The hard drive panel is located in the bottom right corner of the device.

  4. Sony Vaio PCG-61411L Optical Disc Drive Replacement: 步骤 4 中的图像 1,2 Sony Vaio PCG-61411L Optical Disc Drive Replacement: 步骤 4 中的图像 2,2
    • Using the PH #0 screwdriver, unscrew the two 6.5mm screws located in the bottom left and middle right of the panel. The screws remain in the panels.

    • Remove the panel by pulling it up towards yourself.

  5. Sony Vaio PCG-61411L Optical Disc Drive Replacement: 步骤 5 中的图像 1,3 Sony Vaio PCG-61411L Optical Disc Drive Replacement: 步骤 5 中的图像 2,3 Sony Vaio PCG-61411L Optical Disc Drive Replacement: 步骤 5 中的图像 3,3
    • Using a PH0 screwdriver, remove the four 3mm silver screws located in the external hard drive cover.

    • Using a PH00 screwdriver, remove the final 3mm black screw located in the top right section of the hard drive cover.

    • Carefully remove the silver hard drive cover.

  6. Sony Vaio PCG-61411L Optical Disc Drive Replacement: 步骤 6 中的图像 1,3 Sony Vaio PCG-61411L Optical Disc Drive Replacement: 步骤 6 中的图像 2,3 Sony Vaio PCG-61411L Optical Disc Drive Replacement: 步骤 6 中的图像 3,3
    • Detach the hard drive by disconnecting it from the motherboard, pulling it gently from left to right.

  7. Sony Vaio PCG-61411L Optical Disc Drive Replacement, Optical Disc Drive: 步骤 7 中的图像 1,2 Sony Vaio PCG-61411L Optical Disc Drive Replacement, Optical Disc Drive: 步骤 7 中的图像 2,2
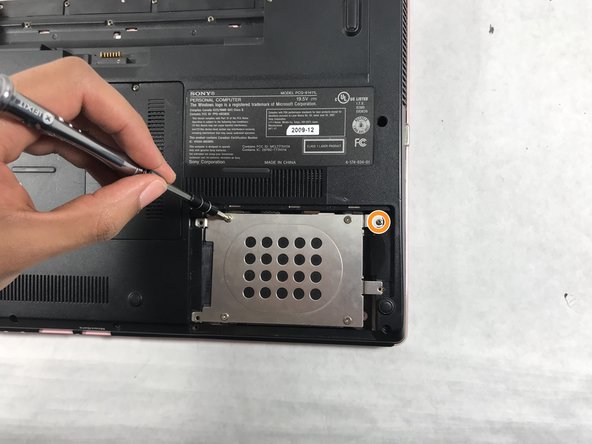
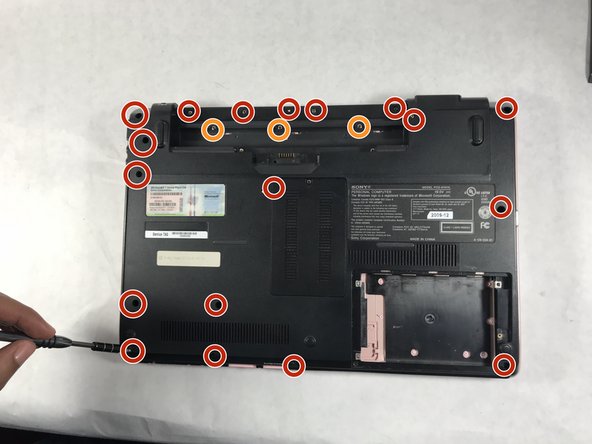
    • Remove the 5mm screws with the PH0 screwdriver.

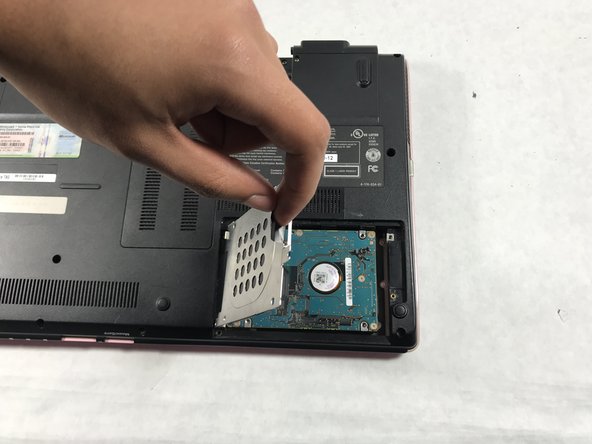
    • Remove the 3mm screws with the PH0 screwdriver.

  8. Sony Vaio PCG-61411L Optical Disc Drive Replacement: 步骤 8 中的图像 1,2 Sony Vaio PCG-61411L Optical Disc Drive Replacement: 步骤 8 中的图像 2,2
    • Lift the backplate from bottom right and left corner and remove it from the laptop.

  9. Sony Vaio PCG-61411L Optical Disc Drive Replacement: 步骤 9 中的图像 1,2 Sony Vaio PCG-61411L Optical Disc Drive Replacement: 步骤 9 中的图像 2,2
    • Slide your finger from the right of the optical disc and pull the optical disc from right to left.

结论

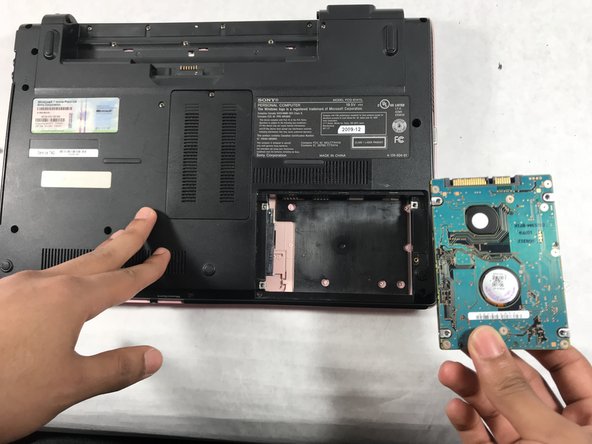
To reassemble your device, follow these instructions in reverse order.

团队

0条评论

添加评论

浏览统计数据:

过去 24 小时: 0

过去 7 天: 1

过去 30 天: 9

总计 573