当前版本的文档还未经巡查,您可以查看最新的已查核版本 。
Remove the battery by pinching the two lock tabs towards the center.
Next, lift up on the battery to remove it.
Using a Phillips #00 screwdriver, remove the twenty-two 5.6 mm screws from the back of the laptop.
Be sure to remove all screws, including those that are typically covered by the battery.
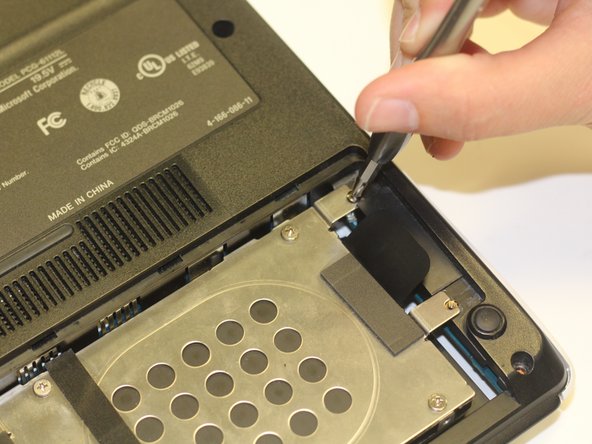
Now, remove the small covers from the back of the case.
Using a Phillips #00 screwdriver, unscrew the three 5.6 mm screws from the covers (one screw on the RAM cover [middle] and two screws on the Hard Drive cover [bottom right]).
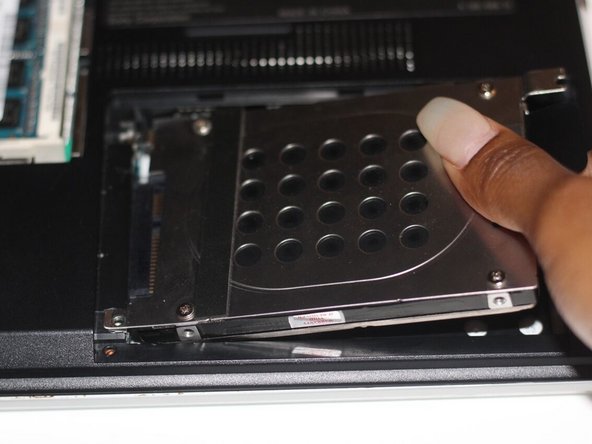
Then, lift up on and remove these covers as shown in the third image.
Remove the hard drive.
Using a Phillips #00 screwdriver, unscrew the two remaining 4.9 mm screws holding the hard drive into place.
Next, lift up and pull outwards to release the hard drive from its socket.
Locate the fan (top-right corner of the computer).
Using a Phillips #00 screwdriver, unscrew the six 2.7 mm screws that secure the fan to the motherboard.
This step can be skipped if you are just removing the fan to access another part of the device (such as the motherboard).
Using a Japanese Industrial Standard #00 screwdriver, unscrew four 3.7 mm screws located on the casing of the fan.
Using your fingers, grasp the white tab and firmly, yet gently, pull up on the wire to disconnect it from the motherboard.
嵌入本指南
选择一个尺寸并复制下面的代码,将本指南作为一个小插件嵌入到你的网站/论坛中。
单个步骤
完整指南
小——600像素
中——800像素
大——1200像素
预览