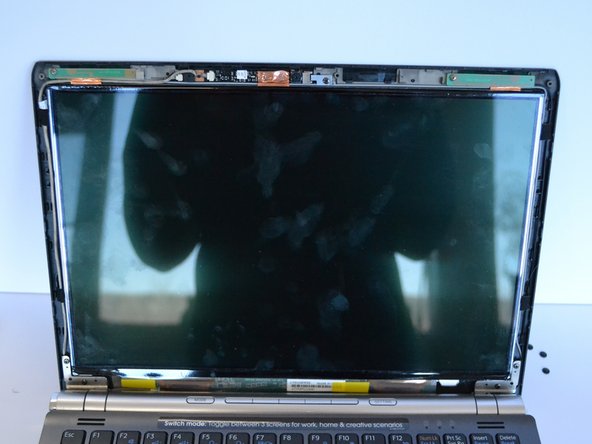
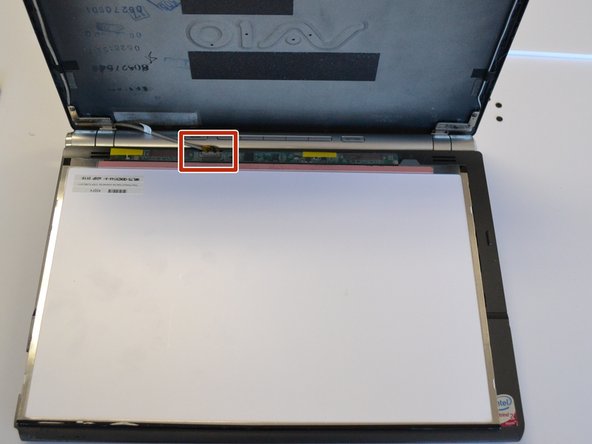
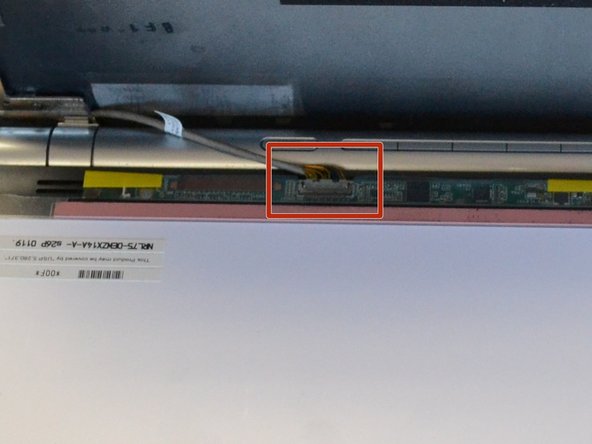
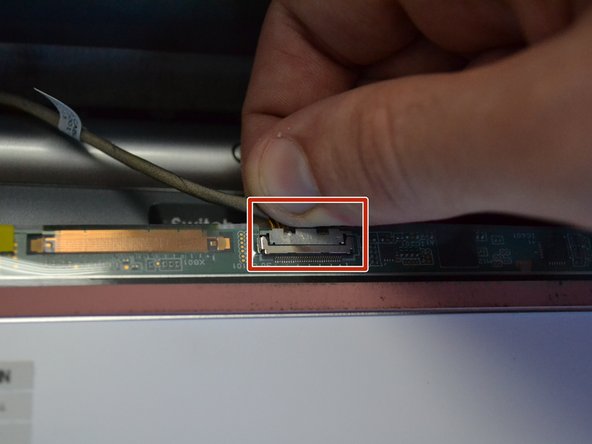
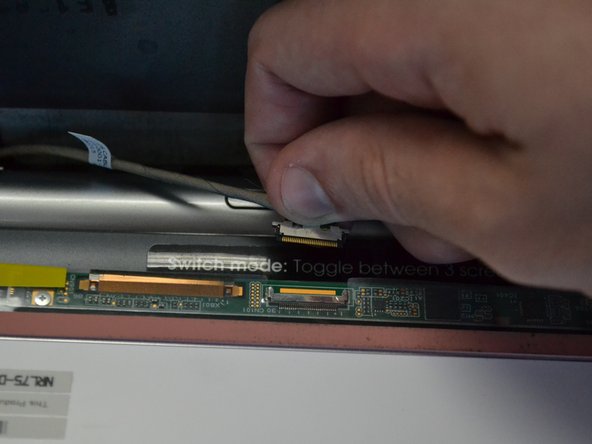
跳转到主内容

Sony Vaio VGN-SR140E Screen Replacement

你所需要的

  1. Sony Vaio VGN-SR140E Screen Replacement, Battery: 步骤 1 中的图像 1,1
    • Turn the laptop over and orient it as shown in the figure.

  2. Sony Vaio VGN-SR140E Screen Replacement: 步骤 2 中的图像 1,1
    • Slide the lock latch to the right to release the battery lock.

    • Slide and hold the release latch to the left.

  3. Sony Vaio VGN-SR140E Screen Replacement: 步骤 3 中的图像 1,2 Sony Vaio VGN-SR140E Screen Replacement: 步骤 3 中的图像 2,2
    • Use a fingernail or plastic opening tool lift the battery while holding the release latch.Rotate the battery up and away from you to remove it from the laptop.

  4. Sony Vaio VGN-SR140E Screen Replacement, Screen: 步骤 4 中的图像 1,3 Sony Vaio VGN-SR140E Screen Replacement, Screen: 步骤 4 中的图像 2,3 Sony Vaio VGN-SR140E Screen Replacement, Screen: 步骤 4 中的图像 3,3
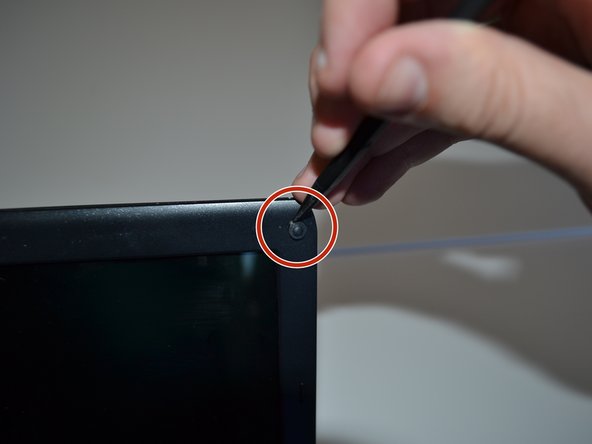
    • Remove the rubber pads at all four corners of the screen bezel using a spudger. This will reveal four 5mm Phillips screws.

    • Use a Phillips #1 screwdriver to remove the four screws and set them aside.

  5. Sony Vaio VGN-SR140E Screen Replacement: 步骤 5 中的图像 1,1
    • Remove the screen's plastic bezel. You may need to use slight pressure to release the clips that secure the bezel to the laptop.

  6. Sony Vaio VGN-SR140E Screen Replacement: 步骤 6 中的图像 1,2 Sony Vaio VGN-SR140E Screen Replacement: 步骤 6 中的图像 2,2
    • Lift screen bezel up and off of the laptop.

  7. Sony Vaio VGN-SR140E Screen Replacement: 步骤 7 中的图像 1,3 Sony Vaio VGN-SR140E Screen Replacement: 步骤 7 中的图像 2,3 Sony Vaio VGN-SR140E Screen Replacement: 步骤 7 中的图像 3,3
    • Close the laptop carefully and slowly while holding the screen with your thumb to prevent it from falling.

    • Lay the screen gently on the keyboard. This will reveal the screen's connector.

  8. Sony Vaio VGN-SR140E Screen Replacement: 步骤 8 中的图像 1,3 Sony Vaio VGN-SR140E Screen Replacement: 步骤 8 中的图像 2,3 Sony Vaio VGN-SR140E Screen Replacement: 步骤 8 中的图像 3,3
    • Grasp the connector and gently pull it out.

  9. Sony Vaio VGN-SR140E Screen Replacement: 步骤 9 中的图像 1,1
    • The screen can now be removed.

结论

To reassemble your device, follow these instructions in reverse order.

Jeremy

于03/18/15注册

722 声望

创作了4篇指南

团队

Michigan Tech, Team 1-6, Lauer Spring 2015 Michigan Tech, Team 1-6, Lauer Spring 2015 的会员

MTU-LAUER-S15S1G6

2 名成员

创作了10篇指南

0条评论

添加评论

浏览统计数据:

过去 24 小时: 0

过去 7 天: 2

过去 30 天: 4

总计 1,113