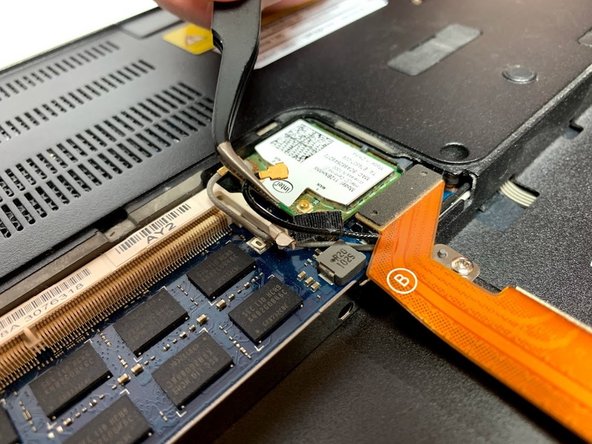
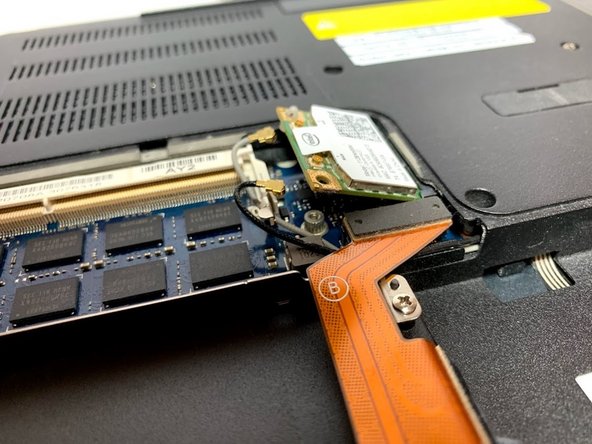
跳转到主内容

Sony Vaio PCG-41216L Network Card Replacement

你所需要的

  1. Sony Vaio PCG-41216L Network Card Replacement, Network Card: 步骤 1 中的图像 1,2 Sony Vaio PCG-41216L Network Card Replacement, Network Card: 步骤 1 中的图像 2,2
    • Flip the laptop over to begin the process.

    • Make sure the laptop is turned off and unplugged from the power cable.

  2. Sony Vaio PCG-41216L Network Card Replacement: 步骤 2 中的图像 1,3 Sony Vaio PCG-41216L Network Card Replacement: 步骤 2 中的图像 2,3 Sony Vaio PCG-41216L Network Card Replacement: 步骤 2 中的图像 3,3
    • Remove the two 7mm Phillips #1 screws holding the battery cover.

  3. Sony Vaio PCG-41216L Network Card Replacement: 步骤 3 中的图像 1,3 Sony Vaio PCG-41216L Network Card Replacement: 步骤 3 中的图像 2,3 Sony Vaio PCG-41216L Network Card Replacement: 步骤 3 中的图像 3,3
    • Locate the networking card above the hard drive and next to the RAM.

    • Carefully pop out the two connection cables from the networking card.

  4. Sony Vaio PCG-41216L Network Card Replacement: 步骤 4 中的图像 1,3 Sony Vaio PCG-41216L Network Card Replacement: 步骤 4 中的图像 2,3 Sony Vaio PCG-41216L Network Card Replacement: 步骤 4 中的图像 3,3
    • Remove the black tape to uncover the screw underneath.

    • Remove the 3mm Phillips head screw.

    • When loosening the screw, the network card will automatically lift itself to a diagonal position. This is normal.

  5. Sony Vaio PCG-41216L Network Card Replacement: 步骤 5 中的图像 1,2 Sony Vaio PCG-41216L Network Card Replacement: 步骤 5 中的图像 2,2
    • Pull the network card straight out in the direction it is resting in.

    • Reinsert the new network card diagonally and into the same position as the previous one.

    • To screw the new network card back into place, you will need to push the network card back down onto the motherboard.

结论

To reassemble your device, follow these instructions in reverse order.

另外一个人完成了本指南。

0条评论

添加评论

浏览统计数据:

过去 24 小时: 3

过去 7 天: 6

过去 30 天: 15

总计 579