跳转到主内容

Sony Vaio PCG-161L Keyboard Replacement

你所需要的

  1. Sony Vaio PCG-161L Keyboard Replacement, Keyboard: 步骤 1 中的图像 1,1
    • Turn your device upside down and remove the 6 10mm screws attaching the back casing to the device using a phillips head screwdriver.

  2. Sony Vaio PCG-161L Keyboard Replacement: 步骤 2 中的图像 1,2 Sony Vaio PCG-161L Keyboard Replacement: 步骤 2 中的图像 2,2
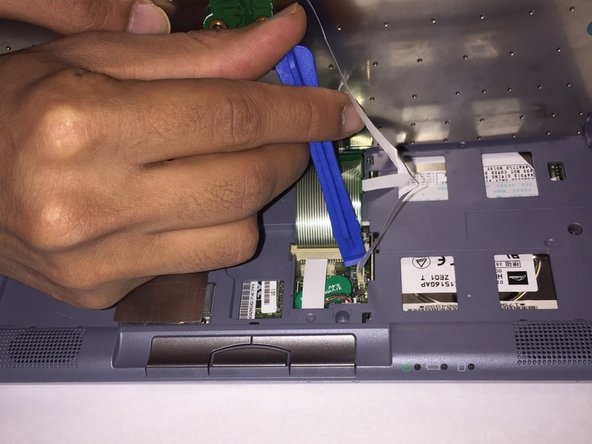
    • Lift up underneath the keyboard using the iFixit opening tool to expose the ribbon wires connecting the keyboard to the motherboard.

  3. Sony Vaio PCG-161L Keyboard Replacement: 步骤 3 中的图像 1,2 Sony Vaio PCG-161L Keyboard Replacement: 步骤 3 中的图像 2,2
    • The two ribbon cables connecting the keyboard to the motherboard are held in using zero insertion force (ZIF) connectors.

    • Use a plastic opening tool or your fingernail to flip up the small retaining flaps, then pull the ribbon cables out of their connectors.

结论

To reassemble your device, follow these instructions in reverse order.

Roman Alshehri

于03/08/17注册

407 声望

创作了4篇指南

团队

0条评论

添加评论

浏览统计数据:

过去 24 小时: 1

过去 7 天: 4

过去 30 天: 8

总计 299