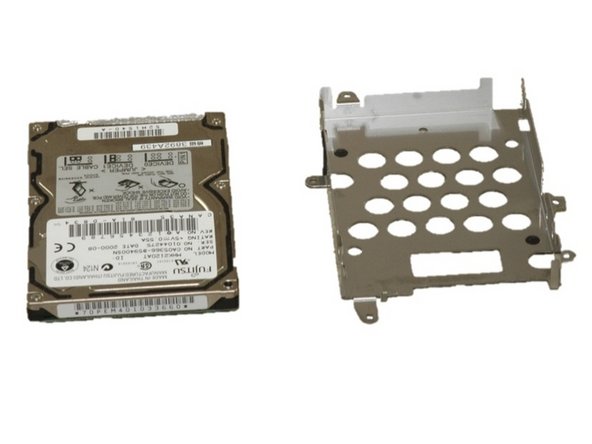
跳转到主内容

Sony VAIO PCG-933A Hard Drive Replacement

你所需要的

  1. Sony VAIO PCG-933A Hard Drive Replacement, Battery: 步骤 1 中的图像 1,2 Sony VAIO PCG-933A Hard Drive Replacement, Battery: 步骤 1 中的图像 2,2
    • Turn the laptop upside down so that the top is sitting on a flat surface.

    • If you are looking at the bottom of the laptop the battery is located on the front right side of the laptop; the opposite side from the floppy disk drive.

  2. Sony VAIO PCG-933A Hard Drive Replacement: 步骤 2 中的图像 1,3 Sony VAIO PCG-933A Hard Drive Replacement: 步骤 2 中的图像 2,3 Sony VAIO PCG-933A Hard Drive Replacement: 步骤 2 中的图像 3,3
    • As shown by the arrow, slide the plastic cover up and then pull out and downwards.

    • You should now be able to pull the battery out.

  3. Sony VAIO PCG-933A Hard Drive Replacement, Keyboard: 步骤 3 中的图像 1,1
    • Remove the four 16 mm screws bordering the edge of the laptop using a Phillips #0 screwdriver.

  4. Sony VAIO PCG-933A Hard Drive Replacement: 步骤 4 中的图像 1,2 Sony VAIO PCG-933A Hard Drive Replacement: 步骤 4 中的图像 2,2
    • Remove the 4mm screw on the right rear side of the laptop next to the audio ports using a Phillips #0 screwdriver.

    • This will release the speaker grille.

  5. Sony VAIO PCG-933A Hard Drive Replacement: 步骤 5 中的图像 1,1
    • Flip the computer so the key board is facing up.

  6. Sony VAIO PCG-933A Hard Drive Replacement: 步骤 6 中的图像 1,3 Sony VAIO PCG-933A Hard Drive Replacement: 步骤 6 中的图像 2,3 Sony VAIO PCG-933A Hard Drive Replacement: 步骤 6 中的图像 3,3
    • Slide the blue speaker grille (located above the keyboard) to the right and gently pull upward. The grille will still be connected by a white electrical strip.

    • Carefully pull out the white electrical strip. By doing this you will remove the speaker grille.

  7. Sony VAIO PCG-933A Hard Drive Replacement: 步骤 7 中的图像 1,3 Sony VAIO PCG-933A Hard Drive Replacement: 步骤 7 中的图像 2,3 Sony VAIO PCG-933A Hard Drive Replacement: 步骤 7 中的图像 3,3
    • Remove the 4mm screw in the center using a Phillips screwdriver.

    • Carefully and slowly pull the green strip straight up (away from the laptop) to disconnect it. Make sure not to pull too hard to avoid breaking.

    • The keyboard can now be removed.

  8. Sony VAIO PCG-933A Hard Drive Replacement, Hard Drive: 步骤 8 中的图像 1,2 Sony VAIO PCG-933A Hard Drive Replacement, Hard Drive: 步骤 8 中的图像 2,2
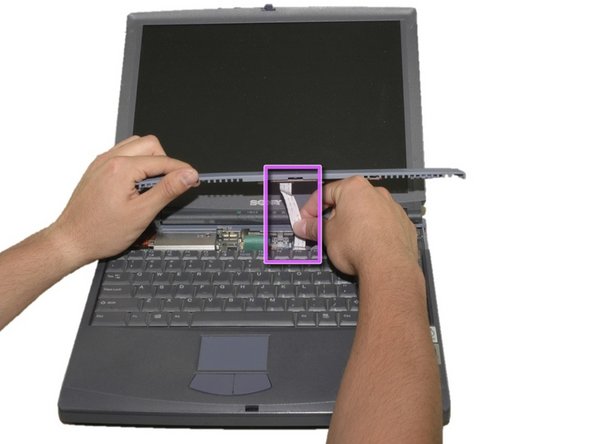
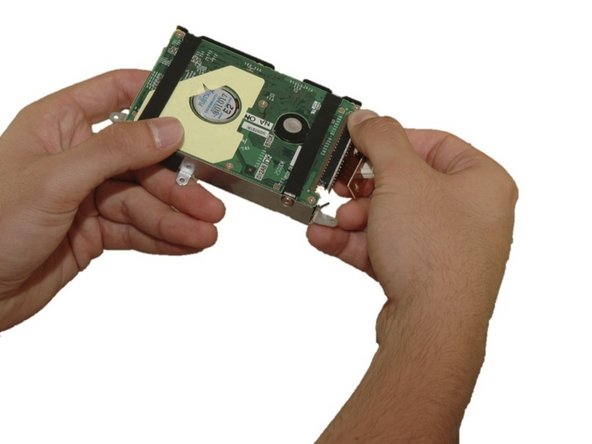
    • Remove the two 4mm Phillips screws in the center of the computer located on each side of the copper electrical strip.

  9. Sony VAIO PCG-933A Hard Drive Replacement: 步骤 9 中的图像 1,3 Sony VAIO PCG-933A Hard Drive Replacement: 步骤 9 中的图像 2,3 Sony VAIO PCG-933A Hard Drive Replacement: 步骤 9 中的图像 3,3
    • Remove the four 4mm Phillips screws around the hard drive cage.

    • WARNING: DVD drive is now loose as well.

    • Carefully lift the hard drive cage out.

    • Carefully disconnect the copper strip to pull out the hard drive.

  10. Sony VAIO PCG-933A Hard Drive Replacement: 步骤 10 中的图像 1,3 Sony VAIO PCG-933A Hard Drive Replacement: 步骤 10 中的图像 2,3 Sony VAIO PCG-933A Hard Drive Replacement: 步骤 10 中的图像 3,3
    • Remove the four 4mm Phillips screws that hold the hard drive in the hard drive cage.

    • Gently remove the hard drive from the cage.

    • Gently remove the copper electrical strip from the harddrive.

结论

To reassemble your device, follow these instructions in reverse order.

4等其他人完成本指南。

Sara Lillard

于04/11/11注册

165 声望

创作了8篇指南

团队

Cal Poly, Team 12-36, Maness Spring 2011 Cal Poly, Team 12-36, Maness Spring 2011 的会员

CPSU-MANESS-S11S12G36

4 名成员

创作了16篇指南

2条评论

Totally dident expect to find a guide for taking this one apart. Appreciate it!

pat - 回复

Complete Life Saver Thank you Very much for taking the time to Make an Easily Fallowed guide for this laptop. very very much Appreciated

colbailey1 - 回复

添加评论

浏览统计数据:

过去 24 小时: 0

过去 7 天: 5

过去 30 天: 25

总计 7,378