跳转到主内容

Sony VAIO PCG-3E2L Hard Drive Replacement

你所需要的

  1. Sony VAIO PCG-3E2L Hard Drive Replacement, Hard Drive: 步骤 1 中的图像 1,1
    • Using a #00 Phillips screwdriver, remove the screw

  2. Sony VAIO PCG-3E2L Hard Drive Replacement: 步骤 2 中的图像 1,1
    • Remove the cover

  3. Sony VAIO PCG-3E2L Hard Drive Replacement: 步骤 3 中的图像 1,1
    • Using a #00 Phillips screwdriver, remove the screw

  4. Sony VAIO PCG-3E2L Hard Drive Replacement: 步骤 4 中的图像 1,2 Sony VAIO PCG-3E2L Hard Drive Replacement: 步骤 4 中的图像 2,2
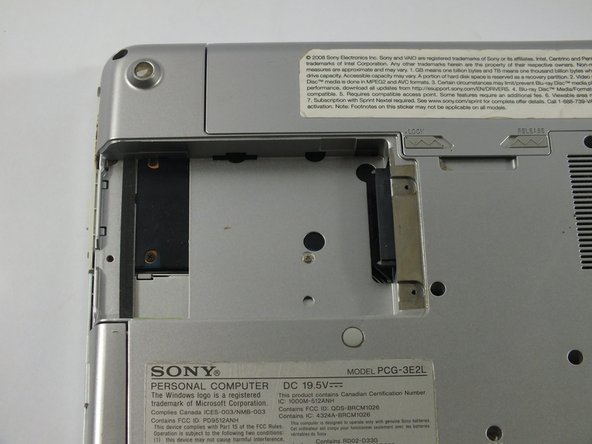
    • Grab the black plastic handle and pull the hard drive out slowly.

    • Only pull the hard drive horizontally. Do not lift the hard drive vertically

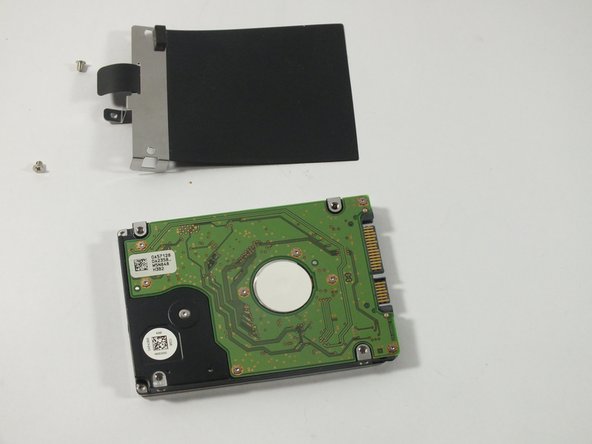
  5. Sony VAIO PCG-3E2L Hard Drive Replacement: 步骤 5 中的图像 1,2 Sony VAIO PCG-3E2L Hard Drive Replacement: 步骤 5 中的图像 2,2
    • Using a #00 Phillips screwdriver, remove the screw

结论

To reassemble your device, follow these instructions in reverse order.

Chengyang Chen

于03/27/15注册

918 声望

创作了5篇指南

团队

UMass Dartmouth, Team 5-2, Kish Spring 2015 UMass Dartmouth, Team 5-2, Kish Spring 2015 的会员

UMASSD-KISH-S15S5G2

4 名成员

创作了10篇指南

0条评论

添加评论

浏览统计数据:

过去 24 小时: 0

过去 7 天: 3

过去 30 天: 13

总计 2,120