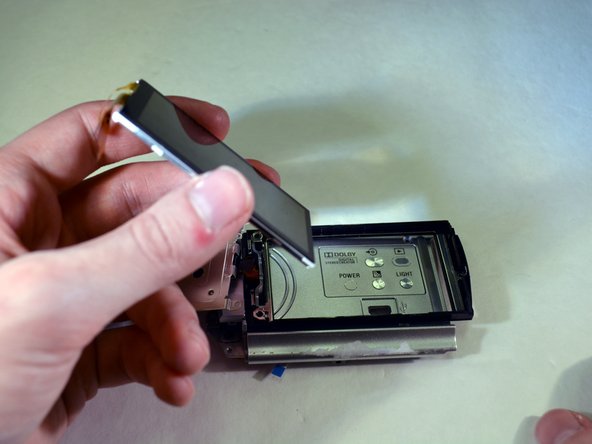
跳转到主内容

Sony Handycam DCR-SR68 LCD Screen Replacement

你所需要的

  1. Sony Handycam DCR-SR68 LCD Screen Replacement, HDD: 步骤 1 中的图像 1,1
    在这个步骤中使用的工具:
    Anti-Static Wrist Strap
    $7.95
    购买
    • Wash and dry your hands, then put on a properly grounded anti-static wrist strap, before handling internal electronic components. To ground the wrist strap, attach it to the metal chassis of a plugged-in three prong power supply, of a computer for example.

    • Unfasten the hand strap.

    • Remove the battery.

  2. Sony Handycam DCR-SR68 LCD Screen Replacement: 步骤 2 中的图像 1,2 Sony Handycam DCR-SR68 LCD Screen Replacement: 步骤 2 中的图像 2,2
    • Place device on left side with front lens facing right.

    • Using a JIS size #00 precision Phillips screwdriver, unscrew the left middle 3mm Phillips screw.

    • Open the "DC IN" plastic tab (Second 3mm Phillips screw is revealed).

    • Unscrew the second 3mm Phillips screw.

  3. Sony Handycam DCR-SR68 LCD Screen Replacement: 步骤 3 中的图像 1,1
    • Turn device over onto its top with the front lens facing right.

    • Unscrew the top left and top right 3mm Philips screws.

    • The right side case panel is now unfastened (the case panel facing up in the photo).

  4. Sony Handycam DCR-SR68 LCD Screen Replacement: 步骤 4 中的图像 1,2 Sony Handycam DCR-SR68 LCD Screen Replacement: 步骤 4 中的图像 2,2
    • Remove the right side case panel by pulling up.

    • The Hard Drive (HDD) is now revealed.

  5. Sony Handycam DCR-SR68 LCD Screen Replacement: 步骤 5 中的图像 1,3 Sony Handycam DCR-SR68 LCD Screen Replacement: 步骤 5 中的图像 2,3 Sony Handycam DCR-SR68 LCD Screen Replacement: 步骤 5 中的图像 3,3
    • Using your fingers, lift the HDD from its right end, pivoting on its left end.

    • The HDD ribbon wire is now exposed.

  6. Sony Handycam DCR-SR68 LCD Screen Replacement: 步骤 6 中的图像 1,2 Sony Handycam DCR-SR68 LCD Screen Replacement: 步骤 6 中的图像 2,2
    • While securely holding the HDD in your left hand, use the soft pad of your right hand fingers to gently pull the ribbon wire out of its socket, toward your right.

    • The HDD is now free from the device.

    • Replace HDD.

  7. Sony Handycam DCR-SR68 LCD Screen Replacement, LCD Screen: 步骤 7 中的图像 1,1
    • Follow steps steps 1-6 on HDD removal.

    • Once completed set aside HDD.

  8. Sony Handycam DCR-SR68 LCD Screen Replacement: 步骤 8 中的图像 1,2 Sony Handycam DCR-SR68 LCD Screen Replacement: 步骤 8 中的图像 2,2
    • Remove the A/V tab

  9. Sony Handycam DCR-SR68 LCD Screen Replacement: 步骤 9 中的图像 1,2 Sony Handycam DCR-SR68 LCD Screen Replacement: 步骤 9 中的图像 2,2
    • Remove the right and middle bottom 3mm Philips screws from the bottom of the device.

    • Then remove panel.

  10. Sony Handycam DCR-SR68 LCD Screen Replacement: 步骤 10 中的图像 1,2 Sony Handycam DCR-SR68 LCD Screen Replacement: 步骤 10 中的图像 2,2
    • On the left side of the device, remove all visible 3mm Philips screws.

  11. Sony Handycam DCR-SR68 LCD Screen Replacement: 步骤 11 中的图像 1,2 Sony Handycam DCR-SR68 LCD Screen Replacement: 步骤 11 中的图像 2,2
    • On the right side of the device, remove the two black 3mm Philips screws.

    • The grey tray is now loose.

    • Remove the grey tray by lifting out and away.

  12. Sony Handycam DCR-SR68 LCD Screen Replacement: 步骤 12 中的图像 1,2 Sony Handycam DCR-SR68 LCD Screen Replacement: 步骤 12 中的图像 2,2
    • Using the black spudger, carefully open the little black clasp on the large ribbon wire port.

    • These clasps are known to be fragile.

    • On reassembly, this wire and clasp can be troublesome to reinstall.

  13. Sony Handycam DCR-SR68 LCD Screen Replacement: 步骤 13 中的图像 1,3 Sony Handycam DCR-SR68 LCD Screen Replacement: 步骤 13 中的图像 2,3 Sony Handycam DCR-SR68 LCD Screen Replacement: 步骤 13 中的图像 3,3
    • Using the blunt tweezers, unplug the red and black wire by gently pulling out and away.

    • Unplug the small ribbon wire.

  14. Sony Handycam DCR-SR68 LCD Screen Replacement: 步骤 14 中的图像 1,1
    • On the right side of the device, remove the top three right 3mm Philips screws.

  15. Sony Handycam DCR-SR68 LCD Screen Replacement: 步骤 15 中的图像 1,1
    • On the back of the device, remove the top 3mm Philips screw.

    • The top of the device is now free.

  16. Sony Handycam DCR-SR68 LCD Screen Replacement: 步骤 16 中的图像 1,2 Sony Handycam DCR-SR68 LCD Screen Replacement: 步骤 16 中的图像 2,2
    • Remove top of device by lifting up and away.

  17. Sony Handycam DCR-SR68 LCD Screen Replacement: 步骤 17 中的图像 1,2 Sony Handycam DCR-SR68 LCD Screen Replacement: 步骤 17 中的图像 2,2
    • On the top of the device, remove the top right 3mm Philips screw.

    • On the left side of the device, remove the bottom left 3mm Philips screw.

  18. Sony Handycam DCR-SR68 LCD Screen Replacement: 步骤 18 中的图像 1,2 Sony Handycam DCR-SR68 LCD Screen Replacement: 步骤 18 中的图像 2,2
    • Use the blue plastic opening tool to pop the shutter assembly off the device.

  19. Sony Handycam DCR-SR68 LCD Screen Replacement: 步骤 19 中的图像 1,1
    • On the left side of the device, remove the middle left 3mm Philips screw.

  20. Sony Handycam DCR-SR68 LCD Screen Replacement: 步骤 20 中的图像 1,2 Sony Handycam DCR-SR68 LCD Screen Replacement: 步骤 20 中的图像 2,2
    • Carefully pivot the loose left side of the device until the ribbon wires are fully exposed.

  21. Sony Handycam DCR-SR68 LCD Screen Replacement: 步骤 21 中的图像 1,3 Sony Handycam DCR-SR68 LCD Screen Replacement: 步骤 21 中的图像 2,3 Sony Handycam DCR-SR68 LCD Screen Replacement: 步骤 21 中的图像 3,3
    • Using the blunt tweezers, unplug the small orange ribbon wire.

    • Unplug the small white ribbon wire.

    • The left side of the device is now free.

  22. Sony Handycam DCR-SR68 LCD Screen Replacement: 步骤 22 中的图像 1,3 Sony Handycam DCR-SR68 LCD Screen Replacement: 步骤 22 中的图像 2,3 Sony Handycam DCR-SR68 LCD Screen Replacement: 步骤 22 中的图像 3,3
    • Open the screen and rotate it 90 degrees until the two black screws are exposed.

    • Remove the two black 3mm Philips screws.

  23. Sony Handycam DCR-SR68 LCD Screen Replacement: 步骤 23 中的图像 1,3 Sony Handycam DCR-SR68 LCD Screen Replacement: 步骤 23 中的图像 2,3 Sony Handycam DCR-SR68 LCD Screen Replacement: 步骤 23 中的图像 3,3
    • Use a plastic opening tool to pop open the casing around the screen.

    • The casing may require some finesse to pop open.

  24. Sony Handycam DCR-SR68 LCD Screen Replacement: 步骤 24 中的图像 1,1
    • Remove two silver 3mm Philips screws on left side.

  25. Sony Handycam DCR-SR68 LCD Screen Replacement: 步骤 25 中的图像 1,2 Sony Handycam DCR-SR68 LCD Screen Replacement: 步骤 25 中的图像 2,2
    • Use the blunt tweezers to unplug both right side ribbon wires.

  26. Sony Handycam DCR-SR68 LCD Screen Replacement: 步骤 26 中的图像 1,2 Sony Handycam DCR-SR68 LCD Screen Replacement: 步骤 26 中的图像 2,2
    • Lift the framework up and pivot to the left.

    • The screen is now expose.

  27. Sony Handycam DCR-SR68 LCD Screen Replacement: 步骤 27 中的图像 1,2 Sony Handycam DCR-SR68 LCD Screen Replacement: 步骤 27 中的图像 2,2
    • Lift out the screen by grabbing the ribbon wire and lifting up and out.

结论

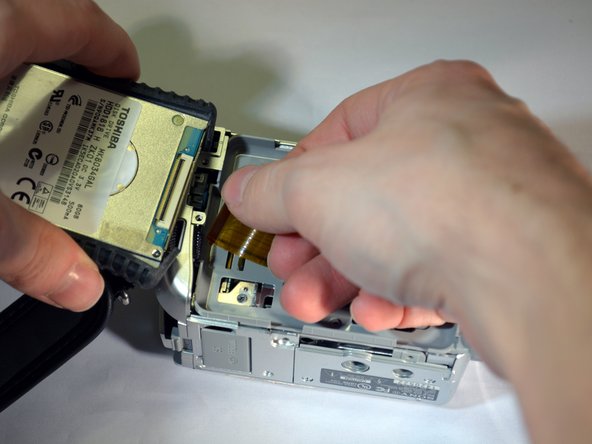
To reassemble your device, follow these instructions in reverse order in addition to the HDD Replacement guide.

2等其他人完成本指南。

0条评论

添加评论

浏览统计数据:

过去 24 小时: 2

过去 7 天: 8

过去 30 天: 20

总计 1,244