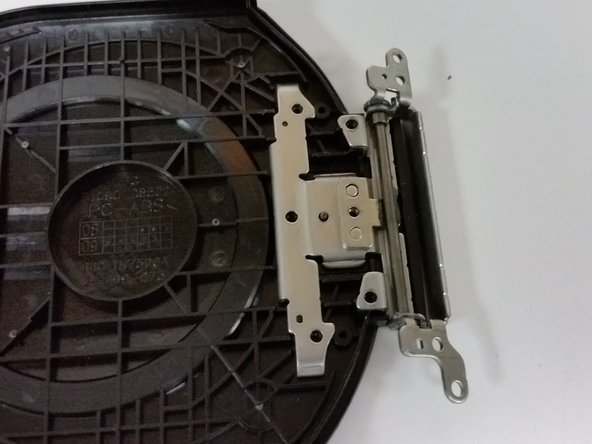
跳转到主内容

Sony Handycam DCR-DVD650 Door Hinge Replacement

你所需要的

  1. Sony Handycam DCR-DVD650 Door Hinge Replacement, Disk Door: 步骤 1 中的图像 1,3 Sony Handycam DCR-DVD650 Door Hinge Replacement, Disk Door: 步骤 1 中的图像 2,3 Sony Handycam DCR-DVD650 Door Hinge Replacement, Disk Door: 步骤 1 中的图像 3,3
    • The hand strap can become a hindrance at times. It's best to begin by unlatching it.

    • On the padded section of the hand strap, pry up the Velcro and peel out the thin strap sandwiched between them.

    • Push the thin strap through the metal loop at the front of the device.

    • The strap will still be connected at one end to the device, but will be able to be moved out of the way to provide a more stable working surface.

  2. Sony Handycam DCR-DVD650 Door Hinge Replacement: 步骤 2 中的图像 1,3 Sony Handycam DCR-DVD650 Door Hinge Replacement: 步骤 2 中的图像 2,3 Sony Handycam DCR-DVD650 Door Hinge Replacement: 步骤 2 中的图像 3,3
    • Flip open the LCD screen and find the screw located above the micro USB port.

    • Remove the screw (4mm, Phillips #00)

    • Using a spudger, or another small plastic prying tool, pop up the silver panel.

    • It may also help to flip up the SD card cover and tug gently on that piece to assist in prying up the panel.

  3. Sony Handycam DCR-DVD650 Door Hinge Replacement: 步骤 3 中的图像 1,3 Sony Handycam DCR-DVD650 Door Hinge Replacement: 步骤 3 中的图像 2,3 Sony Handycam DCR-DVD650 Door Hinge Replacement: 步骤 3 中的图像 3,3
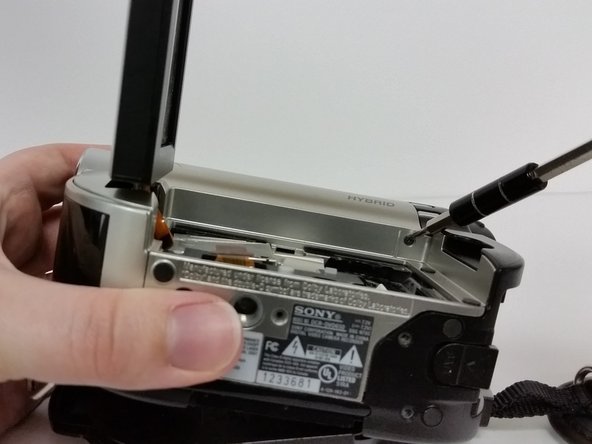
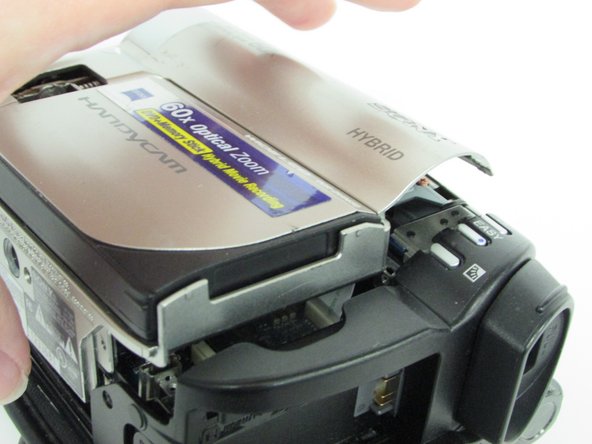
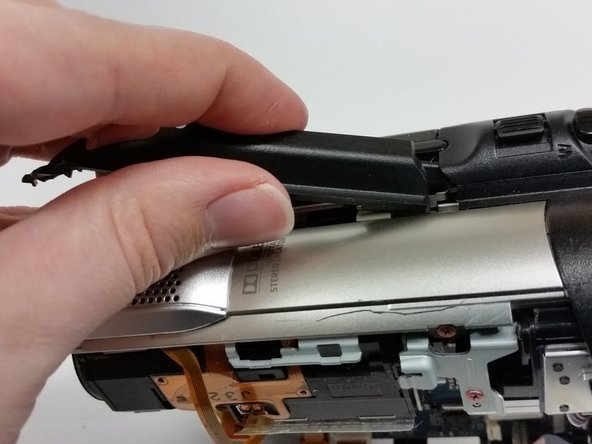
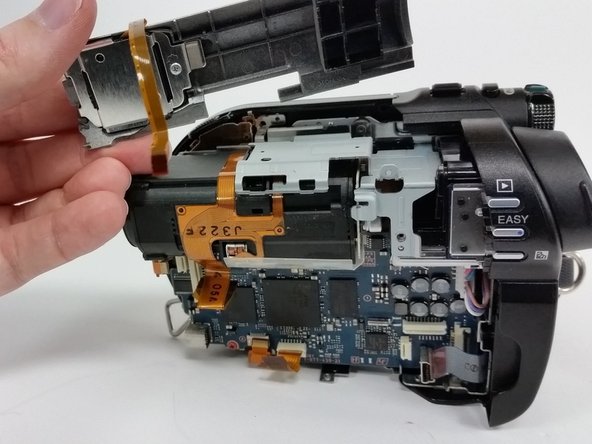
    • Once the silver cover is pried up, slip the piece out to the right.

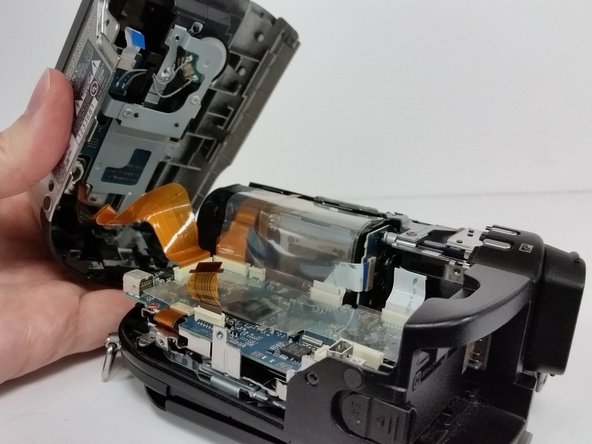
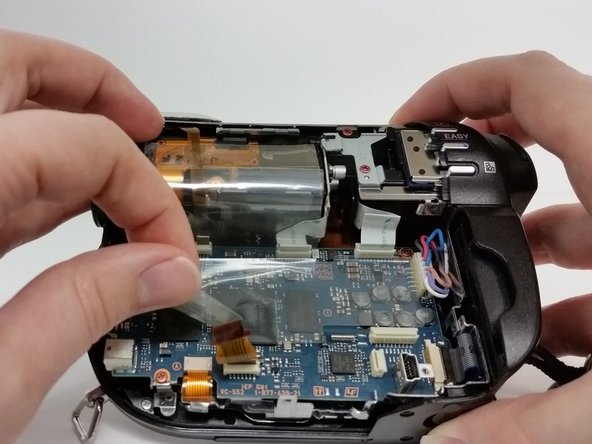
    • There are two cables attached to the board beneath that need to be disconnected.

    • Disconnect both of the no-fuss ribbon cables.

    • Use your fingernails or a pair of tweezers to pull on the tabs on either side of the ribbon cable to remove.

    • Remove the other cable by pulling up on the cable itself.

    • Remember: cables are very fragile, be as delicate as you can removing and connecting them.

  4. Sony Handycam DCR-DVD650 Door Hinge Replacement: 步骤 4 中的图像 1,2 Sony Handycam DCR-DVD650 Door Hinge Replacement: 步骤 4 中的图像 2,2
    • Locate the screw (Phillips #00) found in the top right corner of the housing.

    • Remove the screw.

  5. Sony Handycam DCR-DVD650 Door Hinge Replacement: 步骤 5 中的图像 1,3 Sony Handycam DCR-DVD650 Door Hinge Replacement: 步骤 5 中的图像 2,3 Sony Handycam DCR-DVD650 Door Hinge Replacement: 步骤 5 中的图像 3,3
    • Close the LCD screen and turn the device over.

    • Insert your spudger or other plastic pry tool into the small gap between the device housing and the door.

    • It's best to do it just above where the word 'close' is printed as that is where the locking mechanism is located within.

    • Pry open the door with the spudger, using your other hand to tug the door as you work it open.

    • Caution: this has the potential to damage the plastic piece that locks the door into place.

  6. Sony Handycam DCR-DVD650 Door Hinge Replacement: 步骤 6 中的图像 1,2 Sony Handycam DCR-DVD650 Door Hinge Replacement: 步骤 6 中的图像 2,2
    • Once the disc door is open, locate the screw (Phillips #00) on the inside, top right corner, closest to the camcorder lens.

    • Remove the screw.

  7. Sony Handycam DCR-DVD650 Door Hinge Replacement: 步骤 7 中的图像 1,2 Sony Handycam DCR-DVD650 Door Hinge Replacement: 步骤 7 中的图像 2,2
    • Turn to view the bottom of the device and locate the four screws on the bottom (4mm, Phillips #00).

    • Remove all four screws.

  8. Sony Handycam DCR-DVD650 Door Hinge Replacement: 步骤 8 中的图像 1,3 Sony Handycam DCR-DVD650 Door Hinge Replacement: 步骤 8 中的图像 2,3 Sony Handycam DCR-DVD650 Door Hinge Replacement: 步骤 8 中的图像 3,3
    • With the screws removed, the black and silver housing pieces should be able to shift apart from one another.

    • Caution: do not pull the device apart willy-nilly. There is an internal ribbon cable attached to both halves of the housing that can easily be damaged by doing so. Slow and steady wins the race.

    • Gently work the black and silver housing pieces away from one another.

    • If the housing is a bit resistant to separating, it may help to use a pry tool along the bottom of the device where the two colors meet.

  9. Sony Handycam DCR-DVD650 Door Hinge Replacement: 步骤 9 中的图像 1,3 Sony Handycam DCR-DVD650 Door Hinge Replacement: 步骤 9 中的图像 2,3 Sony Handycam DCR-DVD650 Door Hinge Replacement: 步骤 9 中的图像 3,3
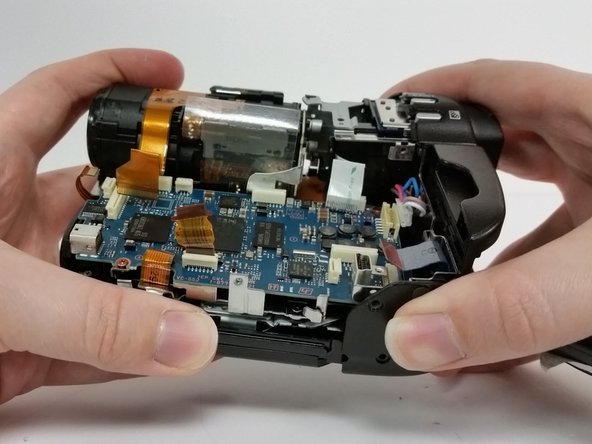
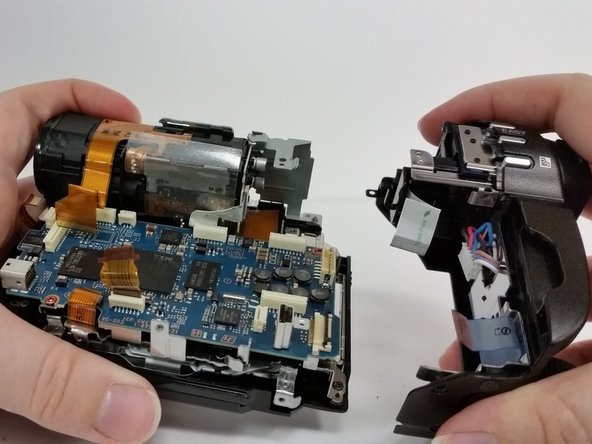
    • Once the device is open, carefully remove the no-fuss ribbon cable from the motherboard and set aside the silver portion of the device.

    • There may be a piece of plastic adhesive shielding the motherboard. Remove gently, being careful not to pull on the ribbon cables beneath it, and set aside.

  10. Sony Handycam DCR-DVD650 Door Hinge Replacement: 步骤 10 中的图像 1,3 Sony Handycam DCR-DVD650 Door Hinge Replacement: 步骤 10 中的图像 2,3 Sony Handycam DCR-DVD650 Door Hinge Replacement: 步骤 10 中的图像 3,3
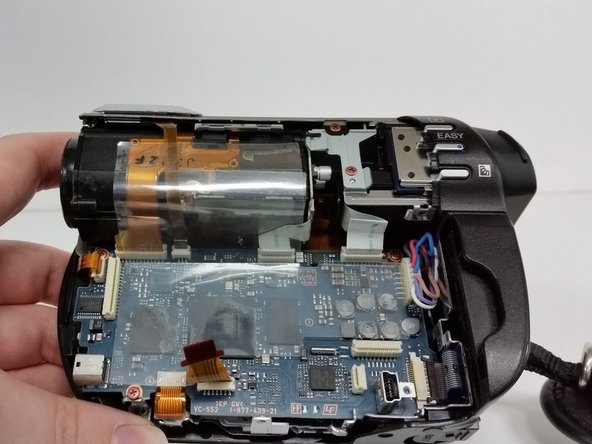
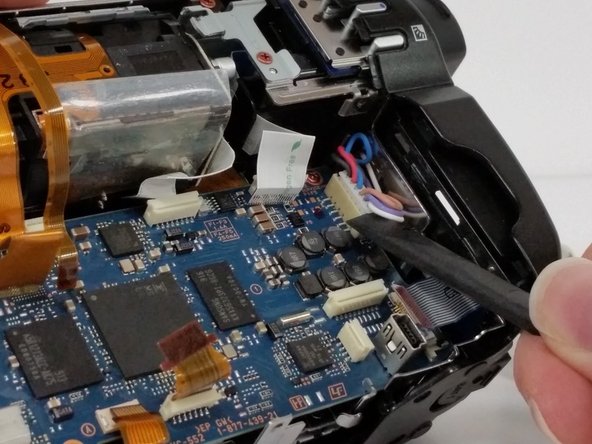
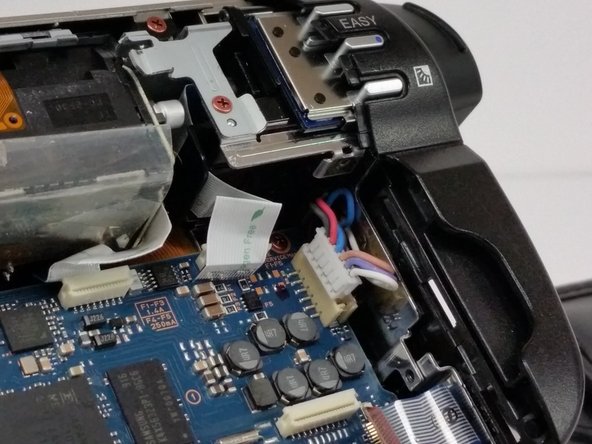
    • Locate all of the cables attached to the motherboard.

    • Carefully disconnect all cables.

    • There are four orange no-fuss ribbon connectors. To disconnect these cables pull up on the tabs protruding from both sides of the cable rather than pulling on the cable itself.

    • There are two white no-fuss ribbon cable connectors. To disconnect these cables, pull them straight out of the connector.

    • In the lower corner on the far right, disconnect the Zero-Insertion Force (ZIF) connector by flipping up the small black bar before removing the cable.

    • Power Cable: Disconnect the bundled cable connector by prying up gently from the edges. If you need to, collect the cables between you fingers and pull gently to remove. Try not to pull more on one wire than the rest as this can strain and separate the wires.

  11. Sony Handycam DCR-DVD650 Door Hinge Replacement: 步骤 11 中的图像 1,3 Sony Handycam DCR-DVD650 Door Hinge Replacement: 步骤 11 中的图像 2,3 Sony Handycam DCR-DVD650 Door Hinge Replacement: 步骤 11 中的图像 3,3
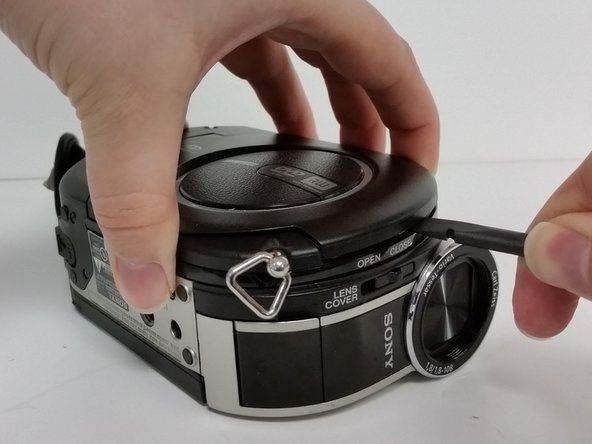
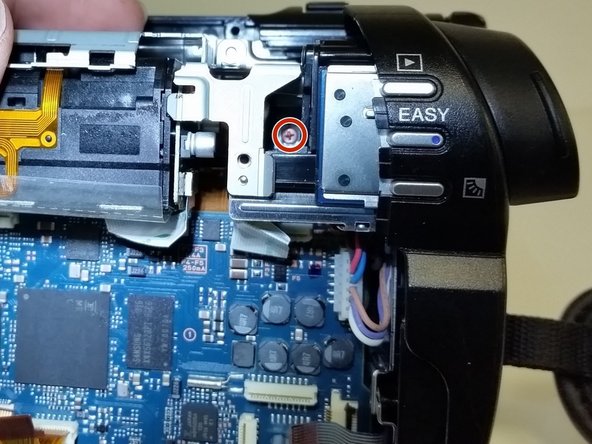
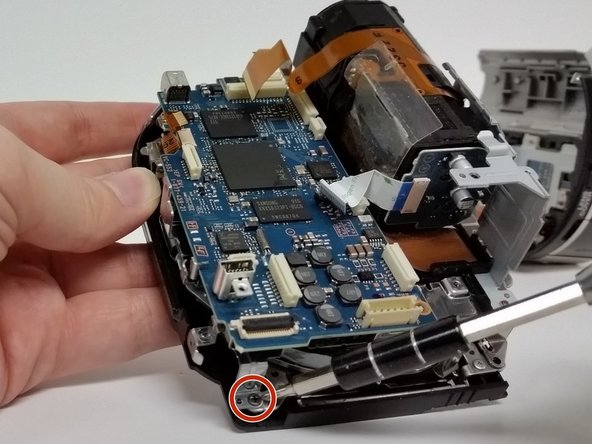
    • Now that all of the cables are disconnected, remove the two bronze screws (2mm, Phillips #00) on the lens housing.

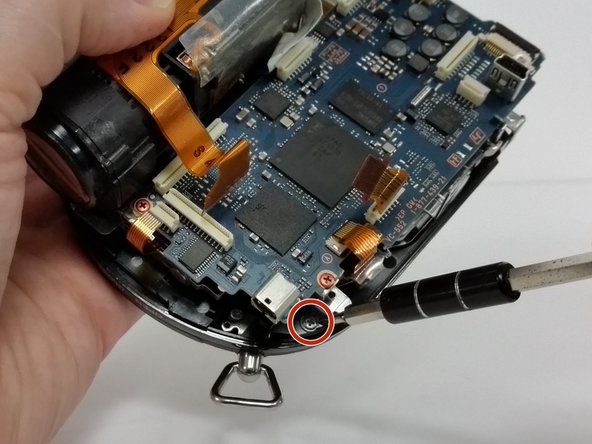
    • Next we'll need to remove some screws from inside the disc housing.

    • If the disc door has closed at some point, turn the camcorder lens toward you and locate a small cylindrical lever to the left of the lens.

    • Pushing down on this lever will manually release the door.

  12. Sony Handycam DCR-DVD650 Door Hinge Replacement: 步骤 12 中的图像 1,3 Sony Handycam DCR-DVD650 Door Hinge Replacement: 步骤 12 中的图像 2,3 Sony Handycam DCR-DVD650 Door Hinge Replacement: 步骤 12 中的图像 3,3
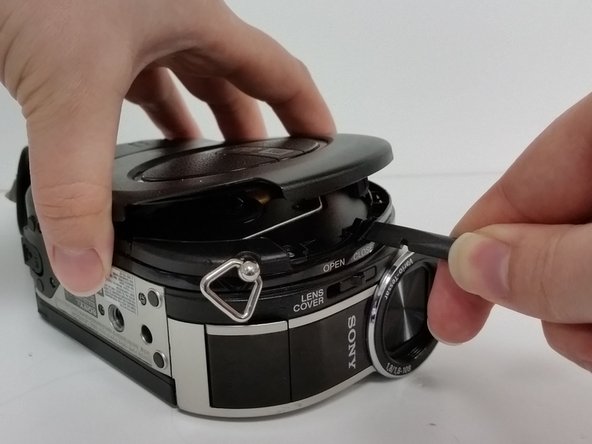
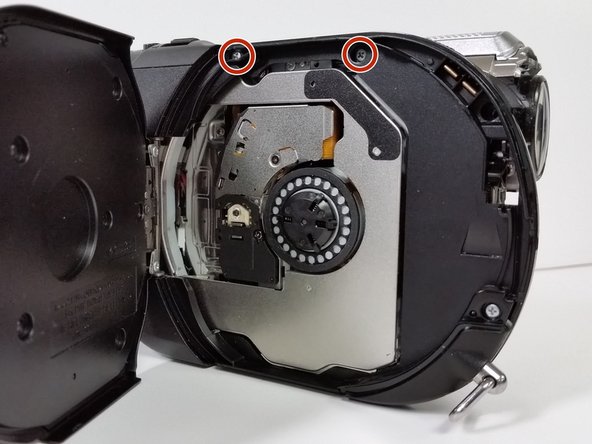
    • Remove the top two upper screws (4mm, Phillips #00) on the interior of the DVD housing.

    • Pry up the black strip of housing between the open slider and the remaining silver housing above the lens.

    • A bit of a gentle tug and wiggle of the piece towards the lens side of the device, should allow you to completely remove the piece.

  13. Sony Handycam DCR-DVD650 Door Hinge Replacement: 步骤 13 中的图像 1,3 Sony Handycam DCR-DVD650 Door Hinge Replacement: 步骤 13 中的图像 2,3 Sony Handycam DCR-DVD650 Door Hinge Replacement: 步骤 13 中的图像 3,3
    • Remove the bronze screw (2 mm, Phillips #00) attaching the rear housing to the frame.

    • If you are using a screwdriver that uses interchangeable tips, the connecting base of the screwdriver is too wide for reaching this screw. You will need to use a standard (and magnetic, if possible) Phillips #00 screwdriver.

    • Once the screw is removed, the rear housing can be gently pulled away.

  14. Sony Handycam DCR-DVD650 Door Hinge Replacement: 步骤 14 中的图像 1,3 Sony Handycam DCR-DVD650 Door Hinge Replacement: 步骤 14 中的图像 2,3 Sony Handycam DCR-DVD650 Door Hinge Replacement: 步骤 14 中的图像 3,3
    • With the screw removed, lift up the silver panel above the lens assembly and slide it out towards the lens.

    • The rear housing should be able to be tugged apart with a small snap.

    • Set aside the rear housing.

  15. Sony Handycam DCR-DVD650 Door Hinge Replacement: 步骤 15 中的图像 1,3 Sony Handycam DCR-DVD650 Door Hinge Replacement: 步骤 15 中的图像 2,3 Sony Handycam DCR-DVD650 Door Hinge Replacement: 步骤 15 中的图像 3,3
    • Remove the three black screws (5 mm, Phillips #00) connecting the frame to the disc housing.

  16. Sony Handycam DCR-DVD650 Door Hinge Replacement: 步骤 16 中的图像 1,1
    • Remove the motherboard and frame and set aside.

    • If your replacement part includes the full disc door assembly, you can stop here and reassemble your device.

  17. Sony Handycam DCR-DVD650 Door Hinge Replacement: 步骤 17 中的图像 1,3 Sony Handycam DCR-DVD650 Door Hinge Replacement: 步骤 17 中的图像 2,3 Sony Handycam DCR-DVD650 Door Hinge Replacement: 步骤 17 中的图像 3,3
    • Remove the two outer screws (4mm, Phillips #00) from the hinge.

    • Opening the door to a full 90 degrees, should allow the door to be tugged up and out from the disc door frame.

  18. Sony Handycam DCR-DVD650 Door Hinge Replacement, Door Hinge: 步骤 18 中的图像 1,3 Sony Handycam DCR-DVD650 Door Hinge Replacement, Door Hinge: 步骤 18 中的图像 2,3 Sony Handycam DCR-DVD650 Door Hinge Replacement, Door Hinge: 步骤 18 中的图像 3,3
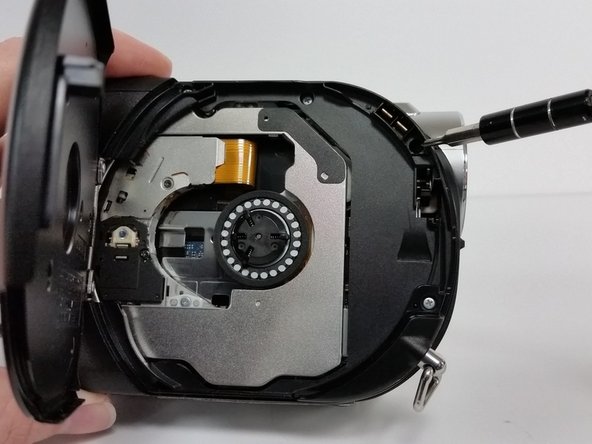
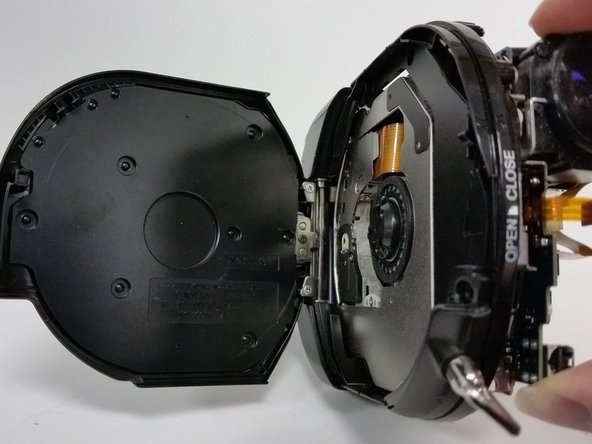
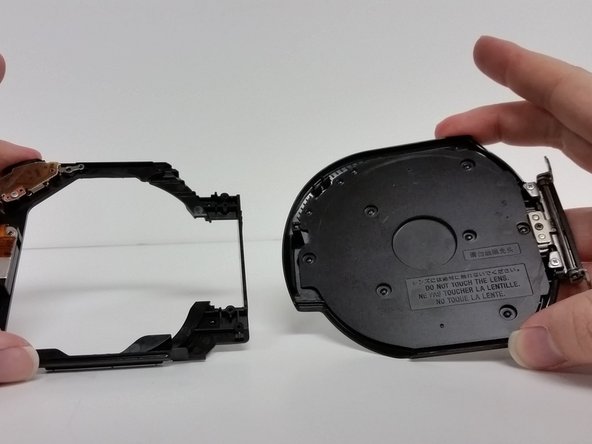
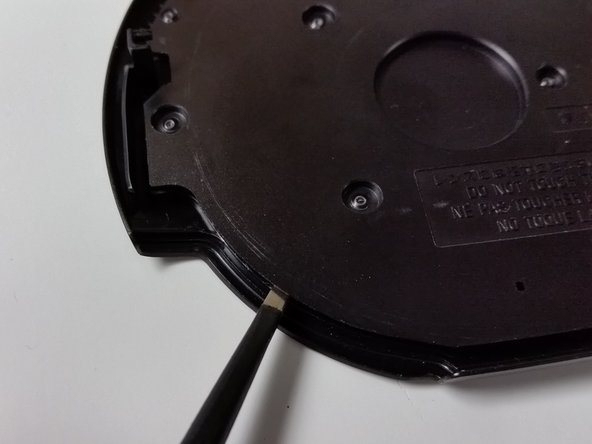
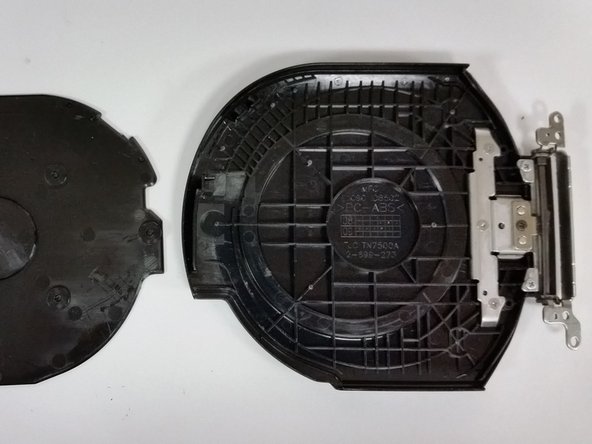
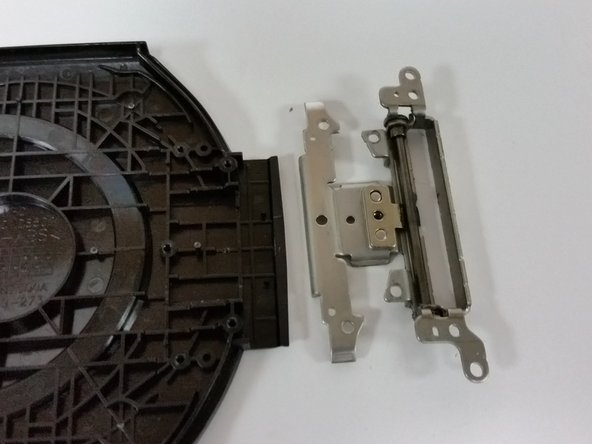
    • Once the door is detached, the plastic panel on the inside of the door will need to be removed.

    • Proceed with caution when prying up the plastic panel. With the way the device is assembled, the panel may not snap back into place once removed.

    • Use a spudger, pry tool, or tweezers to separate the panel from the outer door.

  19. Sony Handycam DCR-DVD650 Door Hinge Replacement: 步骤 19 中的图像 1,3 Sony Handycam DCR-DVD650 Door Hinge Replacement: 步骤 19 中的图像 2,3 Sony Handycam DCR-DVD650 Door Hinge Replacement: 步骤 19 中的图像 3,3
    • Locate and remove the screws (2 silver 4mm - right top/bottom, 1 black 4mm - right center, and 3 silver 3mm -left, Phillips #00).

    • Remove the hinge from the door.

结论

To reassemble your device, follow these instructions in reverse order.

另外一个人完成了本指南。

0条评论

添加评论

浏览统计数据:

过去 24 小时: 0

过去 7 天: 2

过去 30 天: 18

总计 1,451