跳转到主内容

Sony Ericsson Xperia Pro MK16A Logic Board Replacement

你所需要的

  1. Sony Ericsson Xperia Pro MK16A Logic Board Replacement, Taking the Back Off: 步骤 1 中的图像 1,3 Sony Ericsson Xperia Pro MK16A Logic Board Replacement, Taking the Back Off: 步骤 1 中的图像 2,3 Sony Ericsson Xperia Pro MK16A Logic Board Replacement, Taking the Back Off: 步骤 1 中的图像 3,3
    • Use a plastic opening tool to get the back cover off your phone.

    • The plastic opener will work on any side, but be careful and pry gently.

  2. Sony Ericsson Xperia Pro MK16A Logic Board Replacement, Removing the Battery: 步骤 2 中的图像 1,1
    • Locate the battery in your phone.

    • Find the divot below the battery.

    • Use your thumb to lift the battery out of the phone.

  3. Sony Ericsson Xperia Pro MK16A Logic Board Replacement, Remove Screws: 步骤 3 中的图像 1,3 Sony Ericsson Xperia Pro MK16A Logic Board Replacement, Remove Screws: 步骤 3 中的图像 2,3 Sony Ericsson Xperia Pro MK16A Logic Board Replacement, Remove Screws: 步骤 3 中的图像 3,3
    • Remove the 4 black screws with the Phillips screwdriver.

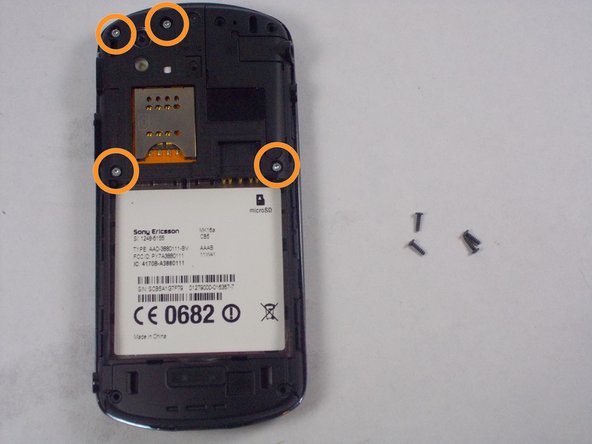
    • Remove the 4 silver screws with the Torx screwdriver.

  4. Sony Ericsson Xperia Pro MK16A Logic Board Replacement, Remove Back Case: 步骤 4 中的图像 1,1
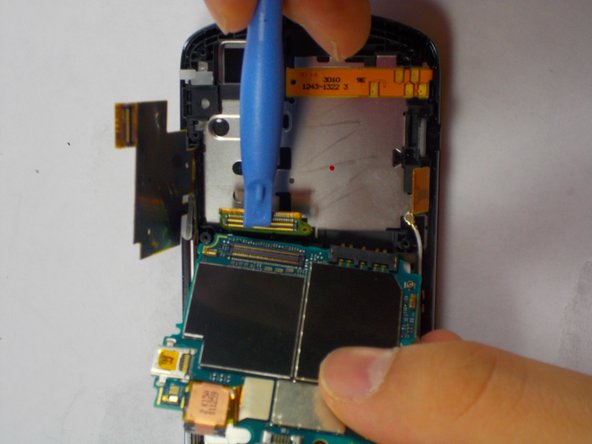
    • Insert the plastic opening tool in between the two halves of the case. Pry around the phone to detach the back case.

  5. Sony Ericsson Xperia Pro MK16A Logic Board Replacement, Access the Logic Board: 步骤 5 中的图像 1,3 Sony Ericsson Xperia Pro MK16A Logic Board Replacement, Access the Logic Board: 步骤 5 中的图像 2,3 Sony Ericsson Xperia Pro MK16A Logic Board Replacement, Access the Logic Board: 步骤 5 中的图像 3,3
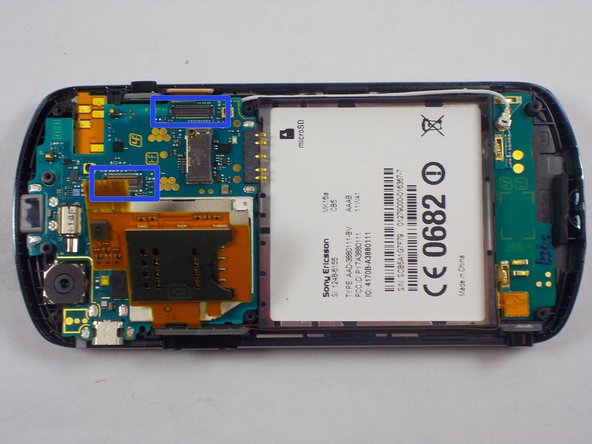
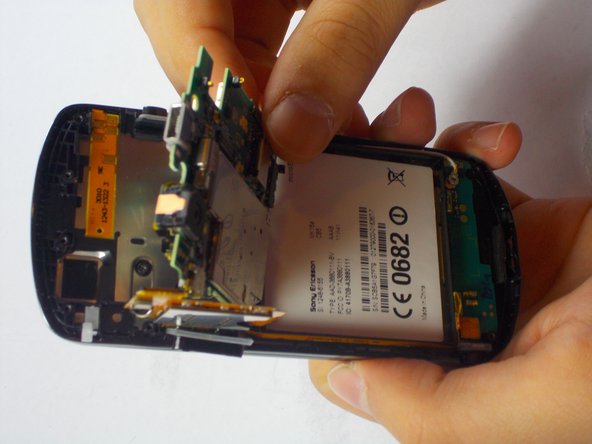
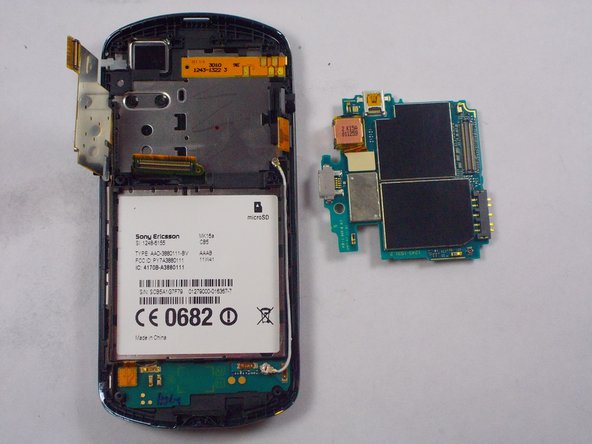
    • Remove the last screw that is connecting the logic board using the Phillips screwdriver.

    • Undo the two ribbons.

  6. Sony Ericsson Xperia Pro MK16A Logic Board Replacement, Remove the Logic Board: 步骤 6 中的图像 1,3 Sony Ericsson Xperia Pro MK16A Logic Board Replacement, Remove the Logic Board: 步骤 6 中的图像 2,3 Sony Ericsson Xperia Pro MK16A Logic Board Replacement, Remove the Logic Board: 步骤 6 中的图像 3,3
    • Undo that last connector.

结论

To reassemble your device, follow these instructions in reverse order.

Craig

于10/21/14注册

55 声望

撰写一个指南

团队

UMass Dartmouth, Team 6-5, Vijaybhaskar Fall 2014 UMass Dartmouth, Team 6-5, Vijaybhaskar Fall 2014 的会员

UMASSD-VIJAYBHASKAR-F14S6G5

3 名成员

创作了4篇指南

0条评论

添加评论

浏览统计数据:

过去 24 小时: 0

过去 7 天: 1

过去 30 天: 1

总计 1,055