跳转到主内容

Sony Cyber-shot DSC-TX100V OLED/LCD Assembly Replacement

你所需要的

  1. Sony Cyber-shot DSC-TX100V OLED/LCD Assembly Replacement, OLED/LCD Assembly: 步骤 1 中的图像 1,3 Sony Cyber-shot DSC-TX100V OLED/LCD Assembly Replacement, OLED/LCD Assembly: 步骤 1 中的图像 2,3 Sony Cyber-shot DSC-TX100V OLED/LCD Assembly Replacement, OLED/LCD Assembly: 步骤 1 中的图像 3,3
    • Remove the battery

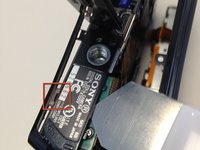
    • Remove the five 2.5mm Philips #0 screws.

    • Remove the one 2.5mm Philips #0 screw inside the HDMI case.

  2. Sony Cyber-shot DSC-TX100V OLED/LCD Assembly Replacement: 步骤 2 中的图像 1,1
    • Gently work and pull the front cover off of the camera

  3. Sony Cyber-shot DSC-TX100V OLED/LCD Assembly Replacement: 步骤 3 中的图像 1,1
    • Gently pull and disconnect the ribbon cable connecting the front cover to the main body

  4. Sony Cyber-shot DSC-TX100V OLED/LCD Assembly Replacement: 步骤 4 中的图像 1,3 Sony Cyber-shot DSC-TX100V OLED/LCD Assembly Replacement: 步骤 4 中的图像 2,3 Sony Cyber-shot DSC-TX100V OLED/LCD Assembly Replacement: 步骤 4 中的图像 3,3
    在这个步骤中使用的工具:
    iSesamo Opening Tool
    $9.99
    购买
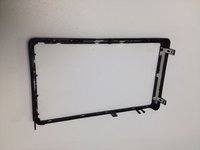
    • Using an iSesamo Opening Tool, Spudger, or flat dull opening tool, gently pry off the cover of the OLED/LCD assembly.

    • Take care of the tab/clip at the bottom, it can be a little tricky.

    • iSesamo Opening Tool is highly recommended

  5. Sony Cyber-shot DSC-TX100V OLED/LCD Assembly Replacement: 步骤 5 中的图像 1,2 Sony Cyber-shot DSC-TX100V OLED/LCD Assembly Replacement: 步骤 5 中的图像 2,2
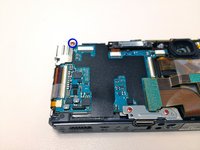
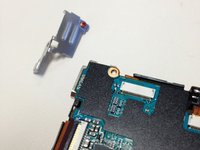
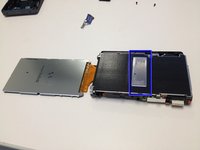
    • Remove the copper phillips screw holding the HDMI mounting plate and detach the mounting plate.

  6. Sony Cyber-shot DSC-TX100V OLED/LCD Assembly Replacement: 步骤 6 中的图像 1,3 Sony Cyber-shot DSC-TX100V OLED/LCD Assembly Replacement: 步骤 6 中的图像 2,3 Sony Cyber-shot DSC-TX100V OLED/LCD Assembly Replacement: 步骤 6 中的图像 3,3
    在这个步骤中使用的工具:
    iSesamo Opening Tool
    $9.99
    购买
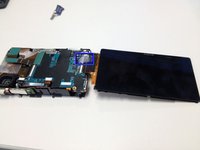
    • Using an iSesamo Opening Tool, Spudger, or flat dull opening tool, gently pry the OLED/LCD assembly from the adhesive strip on the main body.

    • Note: where the adhesive strip is located.

    • Turn the device over and remove the clear tape and black tape.

    • Important: Save the clear and black tape, they will be used for the replacement unit.

  7. Sony Cyber-shot DSC-TX100V OLED/LCD Assembly Replacement: 步骤 7 中的图像 1,1
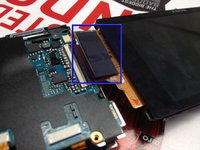
    • Gently pull the small flat ribbon cable from the main body

    • In order to disconnect the large flat ribbon cable, you need to flip up the black ribbon clamp located on the main body where the socket is located

  8. Sony Cyber-shot DSC-TX100V OLED/LCD Assembly Replacement: 步骤 8 中的图像 1,1
    • Reattach new display, and reconnect all components

    • Test camera to ensure the new screen is working

    • Congrats!

结论

To reassemble your device, follow these instructions in reverse order.

另外一个人完成了本指南。

Tim

于03/12/12注册

2,163 声望

创作了2篇指南

0条评论

添加评论

浏览统计数据:

过去 24 小时: 0

过去 7 天: 0

过去 30 天: 19

总计 4,299