跳转到主内容

Sony Clie PEG-UX50 Tilt Screen Replacement

你所需要的

  1. Sony Clie PEG-UX50 Tilt Screen Replacement, Tilt Screen: 步骤 1 中的图像 1,3 Sony Clie PEG-UX50 Tilt Screen Replacement, Tilt Screen: 步骤 1 中的图像 2,3 Sony Clie PEG-UX50 Tilt Screen Replacement, Tilt Screen: 步骤 1 中的图像 3,3
    • Take off the screws located on the two sides of the tilt screen.

    • Unscrew the screw located at the tilt base of the screen.

  2. Sony Clie PEG-UX50 Tilt Screen Replacement: 步骤 2 中的图像 1,3 Sony Clie PEG-UX50 Tilt Screen Replacement: 步骤 2 中的图像 2,3 Sony Clie PEG-UX50 Tilt Screen Replacement: 步骤 2 中的图像 3,3
    • Gently remove the back plate of the tilt screen by sliding it upward.

    • With caution, lift the wires from the track in the back plate.

  3. Sony Clie PEG-UX50 Tilt Screen Replacement: 步骤 3 中的图像 1,2 Sony Clie PEG-UX50 Tilt Screen Replacement: 步骤 3 中的图像 2,2
    • Disconnect the thin USB cable attached to the Integrated Circuit.

  4. Sony Clie PEG-UX50 Tilt Screen Replacement: 步骤 4 中的图像 1,2 Sony Clie PEG-UX50 Tilt Screen Replacement: 步骤 4 中的图像 2,2
    • Detach the plastic black frame from in between the plate and the LCD.

    • Do not disconnect the display from the board yet.

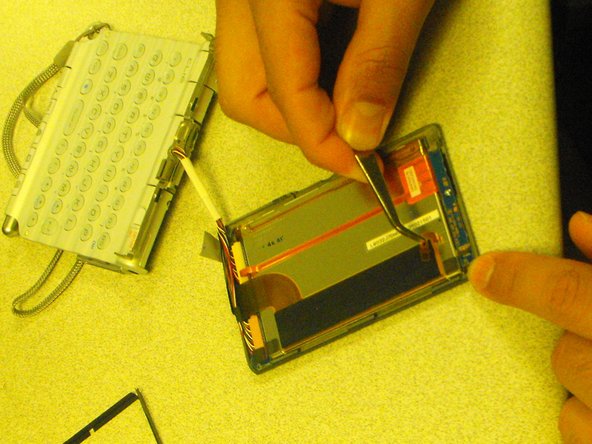
  5. Sony Clie PEG-UX50 Tilt Screen Replacement: 步骤 5 中的图像 1,1
    • Disconnect the thin connector from the face plate using tweezers.

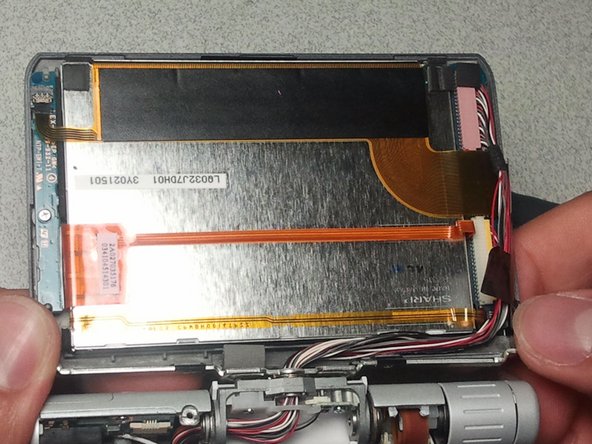
  6. Sony Clie PEG-UX50 Tilt Screen Replacement: 步骤 6 中的图像 1,1
    • Quickly release and disconnect the thick cable with your hands.

结论

Follow these instructions in reverse order to reassemble your device.

Rishad R Rai

于04/28/11注册

1 声望

撰写一个指南

团队

CSU Los Angeles, Team 1-4, Nelson Spring 2011 CSU Los Angeles, Team 1-4, Nelson Spring 2011 的会员

CSULA-NELSON-S11S1G4

5 名成员

创作了2篇指南

0条评论

添加评论

浏览统计数据:

过去 24 小时: 0

过去 7 天: 3

过去 30 天: 12

总计 2,732