跳转到主内容
加入维修社区 - 创建账户

Sony CDX-GT540UI Motherboard Replacement

你所需要的

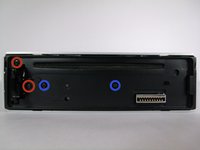
    1. Sony CDX-GT540UI Motherboard Replacement, Front Panel: 步骤 1 中的图像 1,1
      • Locate face-plate eject button.

      询问修复机器人

      添加评论

    2. Sony CDX-GT540UI Motherboard Replacement: 步骤 2 中的图像 1,2 Sony CDX-GT540UI Motherboard Replacement: 步骤 2 中的图像 2,2
      • Press the eject button.

      • Remove the face-plate.

      添加评论

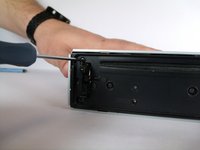
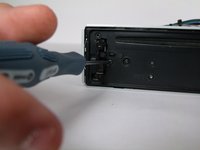
    3. Sony CDX-GT540UI Motherboard Replacement: 步骤 3 中的图像 1,3 Sony CDX-GT540UI Motherboard Replacement: 步骤 3 中的图像 2,3 Sony CDX-GT540UI Motherboard Replacement: 步骤 3 中的图像 3,3
      • Remove two 4.9mm Phillips #00screws on the front of the device.

      • Remove two 7.5mm Phillips #00screws on the front of the device.

      • When the screws are removed, the eject lever may fall into the device. Make sure the device is held horizontal and level.

      添加评论

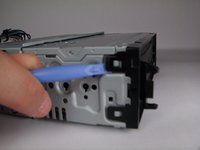
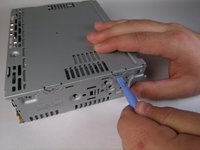
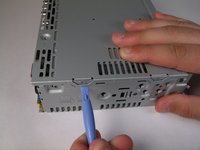
    4. Sony CDX-GT540UI Motherboard Replacement: 步骤 4 中的图像 1,2 Sony CDX-GT540UI Motherboard Replacement: 步骤 4 中的图像 2,2
      • Rotate device 90 degrees to either side.

      • Use the plastic opening tool to pry open the top and bottom tab respectively.

      • Repeat on opposite side.

      询问修复机器人
      添加评论

    5. Sony CDX-GT540UI Motherboard Replacement: 步骤 5 中的图像 1,1
      • Remove front panel.

      询问修复机器人
      添加评论

    1. Sony CDX-GT540UI Motherboard Replacement, Wiring Harness: 步骤 6 中的图像 1,1
      • Locate the clip on the wiring harness.

      询问修复机器人

      添加评论

    2. Sony CDX-GT540UI Motherboard Replacement: 步骤 7 中的图像 1,2 Sony CDX-GT540UI Motherboard Replacement: 步骤 7 中的图像 2,2
      • Press down on the clip like you would an Ethernet cable.

      • Rock harness side to side, pulling gently towards you until harness detaches.

      询问修复机器人

      添加评论

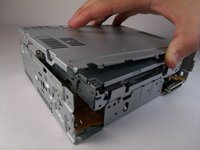
    1. Sony CDX-GT540UI Motherboard Replacement, Back Panel: 步骤 8 中的图像 1,1
      • Locate back panel.

      询问修复机器人
      添加评论

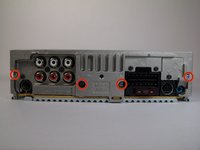
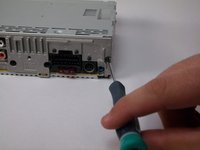
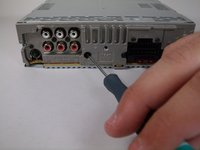
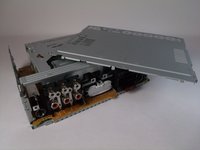
    2. Sony CDX-GT540UI Motherboard Replacement: 步骤 9 中的图像 1,3 Sony CDX-GT540UI Motherboard Replacement: 步骤 9 中的图像 2,3 Sony CDX-GT540UI Motherboard Replacement: 步骤 9 中的图像 3,3
      • Remove four 11.5mm Phillips #00 (silver) screws from back panel.

      询问修复机器人
      添加评论

    3. Sony CDX-GT540UI Motherboard Replacement: 步骤 10 中的图像 1,1
      • Remove four 9.5mm Phillips #00 (black) screws from back panel.

      • Remove two 7.5mm Phillips #00 (black) screws from back panel.

      询问修复机器人

      添加评论

    4. Sony CDX-GT540UI Motherboard Replacement: 步骤 11 中的图像 1,1
      • Remove back panel.

      • On the back panel there will be thermal (white) paste. Do not touch.

      询问修复机器人

      添加评论

    1. Sony CDX-GT540UI Motherboard Replacement, CD Drive: 步骤 12 中的图像 1,1
      • Remove one 9.5mm Phillips #00 screw.

      • Rotate device 180 degrees and repeat step.

      询问修复机器人

      添加评论

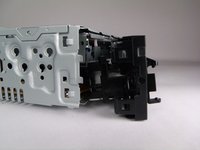
    2. Sony CDX-GT540UI Motherboard Replacement: 步骤 13 中的图像 1,2 Sony CDX-GT540UI Motherboard Replacement: 步骤 13 中的图像 2,2
      • Using plastic opening tool, detach the tabs. There are two on either side.

      • You will need to apply a decent amount of force to detach.

      询问修复机器人

      添加评论

    3. Sony CDX-GT540UI Motherboard Replacement: 步骤 14 中的图像 1,2 Sony CDX-GT540UI Motherboard Replacement: 步骤 14 中的图像 2,2
      • Remove top panel.

      询问修复机器人

      添加评论

    4. Sony CDX-GT540UI Motherboard Replacement: 步骤 15 中的图像 1,1
      • Pull up CD drive slightly.

      询问修复机器人

      添加评论

    5. Sony CDX-GT540UI Motherboard Replacement: 步骤 16 中的图像 1,1
      • Disconnect motherboard connection.

      询问修复机器人

      添加评论

    6. Sony CDX-GT540UI Motherboard Replacement: 步骤 17 中的图像 1,1
      • Remove CD drive.

      询问修复机器人

      添加评论

    1. Sony CDX-GT540UI Motherboard Replacement, Motherboard: 步骤 18 中的图像 1,1
      • Remove three 6.7mm Phillips 300 screws.

      询问修复机器人

      添加评论

    2. Sony CDX-GT540UI Motherboard Replacement: 步骤 19 中的图像 1,1
      • Pull motherboard up.

      询问修复机器人

      添加评论

结论

To reassemble your device, follow these instructions in reverse order.

取消:我没有完成这个指南。

4等其他人完成本指南。

团队

USF Tampa, Team 10-2, Brown Fall 2014 USF Tampa, Team 10-2, Brown Fall 2014 的会员

USFT-BROWN-F14S10G2

3 名成员

创作了14篇指南

1指南评论

Card reader light bling but not on my car audio

Deepak Kumar - 回复 分享

添加评论

浏览统计数据:

过去 24 小时: 0

过去 7 天: 3

过去 30 天: 29

总计 2,870