跳转到主内容

Solid-State Drive Replacement in ThinkPad E14 Gen 2 (AMD)

你所需要的

  1. Solid-State Drive Replacement in ThinkPad E14 Gen 2 (AMD), Solid-State Drive: 步骤 1 中的图像 1,1
    • Ensure the laptop is powered off.

  2. Solid-State Drive Replacement in ThinkPad E14 Gen 2 (AMD): 步骤 2 中的图像 1,3 Solid-State Drive Replacement in ThinkPad E14 Gen 2 (AMD): 步骤 2 中的图像 2,3 Solid-State Drive Replacement in ThinkPad E14 Gen 2 (AMD): 步骤 2 中的图像 3,3
    • Unscrew all 7 of the Phillips #0 back plate screws on the bottom of the laptop.

    • These will be "captive" and will not come out of the backplate, so you do not need to worry about them getting lost.

    • Separate the back from the laptop assembly using the opening pick tool.

    • If you have trouble with just using one pick tool, feel free to use multiple ones to keep sections of the back plate separated.

  3. Solid-State Drive Replacement in ThinkPad E14 Gen 2 (AMD): 步骤 3 中的图像 1,2 Solid-State Drive Replacement in ThinkPad E14 Gen 2 (AMD): 步骤 3 中的图像 2,2
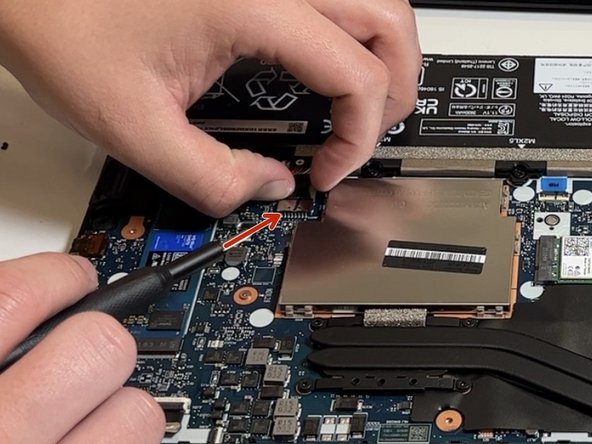
    • Unplug the battery connector and press the power button to ensure the device has no power running.

  4. Solid-State Drive Replacement in ThinkPad E14 Gen 2 (AMD): 步骤 4 中的图像 1,2 Solid-State Drive Replacement in ThinkPad E14 Gen 2 (AMD): 步骤 4 中的图像 2,2
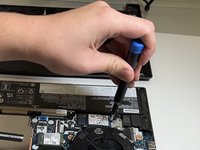
    • Use a Phillips #0 screwdriver to remove the single 4 mm screw that secures the solid-state drive.

  5. Solid-State Drive Replacement in ThinkPad E14 Gen 2 (AMD): 步骤 5 中的图像 1,3 Solid-State Drive Replacement in ThinkPad E14 Gen 2 (AMD): 步骤 5 中的图像 2,3 Solid-State Drive Replacement in ThinkPad E14 Gen 2 (AMD): 步骤 5 中的图像 3,3
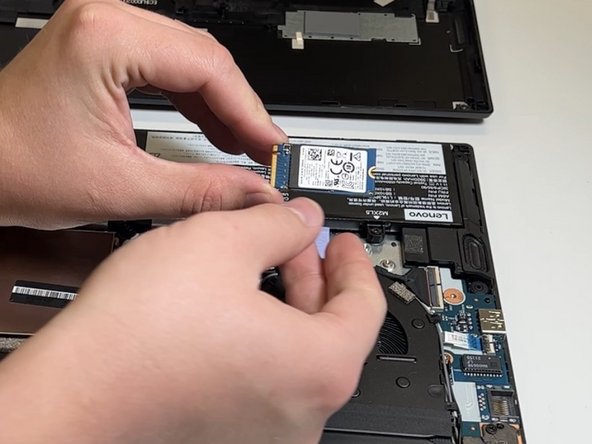
    • Slide the Solid-State Drive out of its slot.

  6. Solid-State Drive Replacement in ThinkPad E14 Gen 2 (AMD): 步骤 6 中的图像 1,3 Solid-State Drive Replacement in ThinkPad E14 Gen 2 (AMD): 步骤 6 中的图像 2,3 Solid-State Drive Replacement in ThinkPad E14 Gen 2 (AMD): 步骤 6 中的图像 3,3
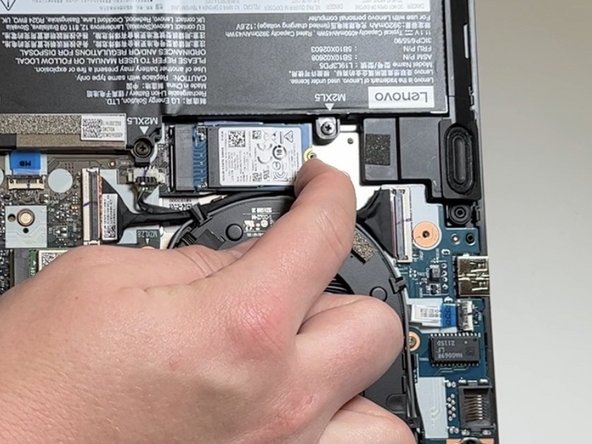
    • Replace the Solid-State Drive with the new one.

  7. Solid-State Drive Replacement in ThinkPad E14 Gen 2 (AMD): 步骤 7 中的图像 1,1
    • Screw in the Solid-State Drive 4 mm Retaining screw in the new Solid-State Drive using the phillips #0 screwdriver.

  8. Solid-State Drive Replacement in ThinkPad E14 Gen 2 (AMD): 步骤 8 中的图像 1,1
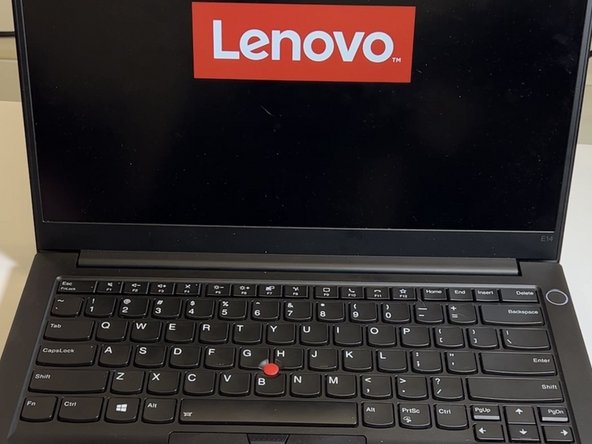
    • Power the laptop back on to ensure the computer starts up without issues.

结论

A good end of repair practice is to check to make sure that your laptop powers up safely and is able to boot into the new drive that has been installed in your laptop. Following this repair if your Operating System has not been installed, the next step is to install Windows / whichever Operating System you prefer.

Ahmed Alrimawi

于10/06/22注册

157 声望

撰写一个指南

0条评论

添加评论

浏览统计数据:

过去 24 小时: 2

过去 7 天: 23

过去 30 天: 100

总计 1,528