跳转到主内容

你所需要的

本篇指南是分解流程而非维修指南。 如果您要维修您的Smart Keyboard,应参考我们的维修指南

  1. 智能键盘拆解, 智能键盘拆解: 步骤 1 中的图像 1,3 智能键盘拆解, 智能键盘拆解: 步骤 1 中的图像 2,3 智能键盘拆解, 智能键盘拆解: 步骤 1 中的图像 3,3
    • 这款键盘的参数:

    • 智能接点为键盘和 iPad 提供电力和数据传输

    • 64键,QWERTY 布局

    • 防水防尘

  2. 智能键盘拆解: 步骤 2 中的图像 1,3 智能键盘拆解: 步骤 2 中的图像 2,3 智能键盘拆解: 步骤 2 中的图像 3,3
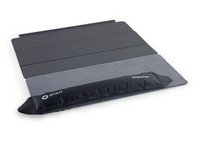
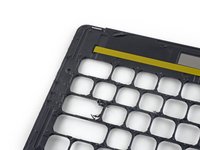
    • 键盘底部印有所有的产品信息:法规表示,生产国家,以及全新的产品型号 A1636.

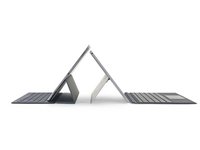
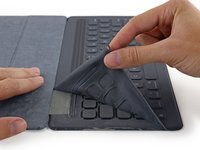
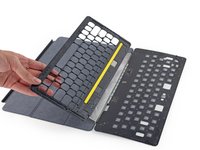
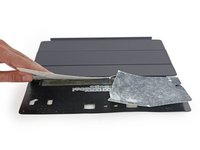
    • 键盘为多片折叠设计,可以说是最令人困惑的折叠方式。

    • 或许 Apple 也认为这种折叠设计会让很多人无从下手,所以在使用说明中印上了正确的折叠方式。

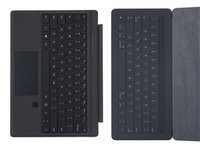
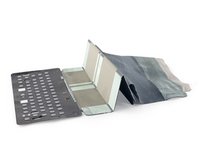
    • 参照使用说明中的图解,终于搞清楚了如何正确合上这款键盘/保护盖。盖子几乎是平整的,键盘部分凸起(每个按键有 4mm 的键程)。三片式设计看上去和拆解后的 iPad Pro 内部结构十分类似。

  3. 智能键盘拆解: 步骤 3 中的图像 1,3 智能键盘拆解: 步骤 3 中的图像 2,3 智能键盘拆解: 步骤 3 中的图像 3,3
    • 左侧是搭配智能键盘的 iPad Pro,右侧是 Surface Pro 4。两款设备的差异显而易见。

    • 键盘布局的最大差异是 Surface 配有触控板。

    • 当前版本的 iOS 不支持任何鼠标输入,因此即使加入触控板也没有意义。但是随着 iPad 应用程序的增加,还是希望可以加入鼠标控制。

    • 智能键盘上有许多 iOS 特征,例如圆角的按键,以及用于切换输入语言的地球键。

    • 智能键盘也参照了许多 MacBook 的键盘设计,加入了 control, option, command 键。

  4. 智能键盘拆解: 步骤 4 中的图像 1,3 智能键盘拆解: 步骤 4 中的图像 2,3 智能键盘拆解: 步骤 4 中的图像 3,3
    在这个步骤中使用的工具:
    Precision Utility Knife
    $4.99
    • 为了让智能键盘可以抗水防尘,Apple 将智能键盘的机身完全包裹在一层纺织材料中。

    • 由于看不到任何可见的拆解入手点,用刀割开布料是唯一的选择。

    • 沿着超细纤维布的边缘割开这一层布料。

    • 这种拆解的意味着这款产品的维修将是不可修复的破坏性操作。

  5. 智能键盘拆解: 步骤 5 中的图像 1,3 智能键盘拆解: 步骤 5 中的图像 2,3 智能键盘拆解: 步骤 5 中的图像 3,3
    • 撕去顶部的一层神秘纺织材料(拆解工程师认为是尼龙布,因为和冲锋衣上的布料感觉类似),露出空白的按键。

    • 或许 Jony Ive 怕按键会冷?

    • 移除纺织布料后,尝试撬出单个按键,查看内部的结构。

    • 与 Apple 所说的相同,这些按键使用了与2015款 MacBook 相同的蝶式键盘。

    • 空格键的额外配重是一个有趣的设计。

    • 这种设计可以保持空格键按键的硬挺,保证不论按下哪个位置,按键都不会晃动,并且准确识别输入。

  6. 智能键盘拆解: 步骤 6 中的图像 1,3 智能键盘拆解: 步骤 6 中的图像 2,3 智能键盘拆解: 步骤 6 中的图像 3,3
    在这个步骤中使用的工具:
    Pro Tech Toolkit
    $74.95
    • 这里用上了 iOpener 对键盘的超细纤维布进行加热,以便于对智能键盘的更深一层进行拆解。

    • 开始感觉像在从事考古工作一样,一层一层的挖掘下去。

    • 在超细纤维布之下的是......一片空白。

    • 此时就要隆重介绍 iFixit 全新推出的经过重新设计的 Pro Tech 工具包。该套件包含维修需要的所有工具,没有一样是多余的。

    • 键盘外壳是一层坚固的塑料材质,此时就需要用到工具包中的一个工具......

  7. 智能键盘拆解: 步骤 7 中的图像 1,3 智能键盘拆解: 步骤 7 中的图像 2,3 智能键盘拆解: 步骤 7 中的图像 3,3
    • 从工具包中取出塑料拆机片。

    • 撬动键盘边缘的塑料卡扣,使外壳分离。

    • 这样就可以看到键盘内部的所有电路板,以及64个穹顶型按键。

    • 但除此之外什么都没有,没有 LED,没有电池,也没有散热风扇。

  8. 智能键盘拆解: 步骤 8 中的图像 1,2 智能键盘拆解: 步骤 8 中的图像 2,2
    • 取下键盘框架,以便更好地观察内部结构。

    • 这块塑料框架上有一些弯曲的线条,不知道作用是什么。

    • 经过查看,这些凹槽导向键盘顶部的透气孔。

    • 猜测这种设计可以防止智能键盘在按下按键时充气鼓胀。

    • 希望这些透气孔不会进水。

  9. 智能键盘拆解: 步骤 9 中的图像 1,3 智能键盘拆解: 步骤 9 中的图像 2,3 智能键盘拆解: 步骤 9 中的图像 3,3
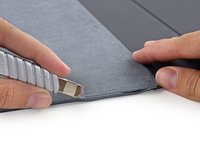
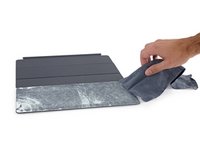
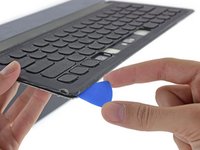
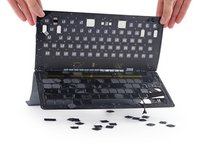
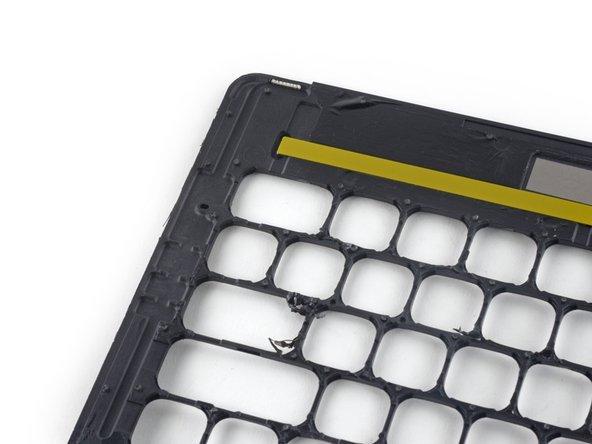
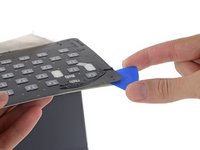
    • 该拆解下面的一层了。这一层也就是前面遇到的塑料盖板。它被大量粘胶固定,拆解时也需要使用大力.....将其折成两段。

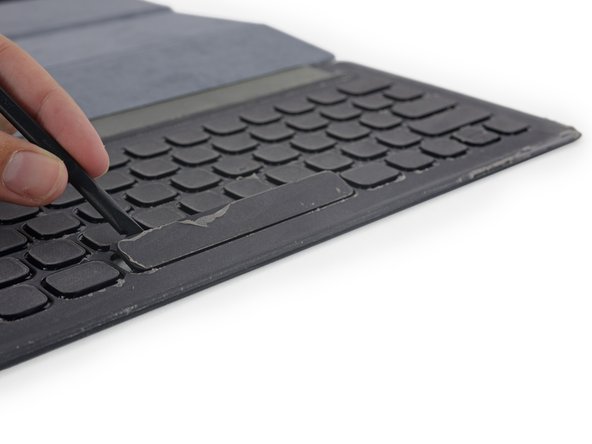
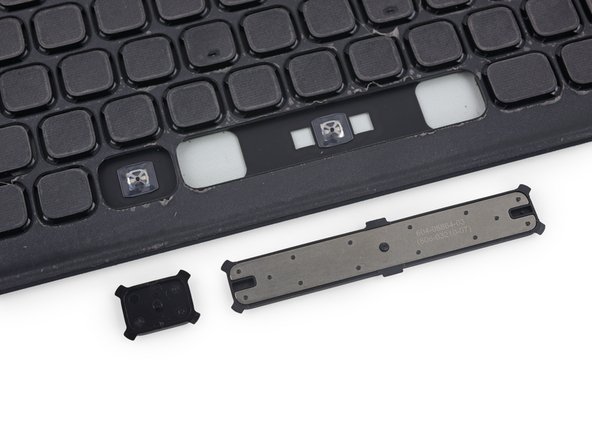
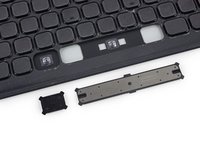
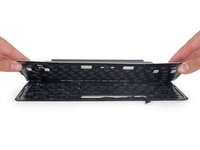
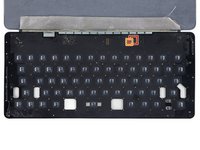
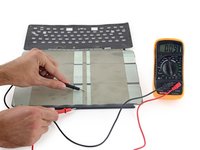
    • 此时,真正的键盘就显露出来——一层电路板,上面有按键结构和芯片。

    • 智能键盘的大脑和其他 Apple 推出的配件(妙控键盘妙控板妙控鼠标)相同:

    • STMicroelectronics STM32F103VB 72 MHz 32-bit RISC ARM Cortex-M3

    • Macronix MX25L4006EZUI-12G 4 Mb 闪存

  10. 智能键盘拆解: 步骤 10 中的图像 1,2 智能键盘拆解: 步骤 10 中的图像 2,2
    • 撕开智能键盘的纺织材料,三条特殊的布料引起了注意。

    • 这三条特殊布料具有导电性,负责连接 iPad 上的智能接点和智能键盘,实现双向电力和数据传输。

    • 这是一个不错的设计,因为导电布的寿命应该会超过柔性排线。

    • Apple 甚至声称“和传统导线相比,这种导电布可以终生抵御弯折”。

  11. 智能键盘拆解: 步骤 11 中的图像 1,2 智能键盘拆解: 步骤 11 中的图像 2,2
    • Apple 智能键盘的可维修性评分为 0/10 (10分代表最易于维修):

    • 虽然键盘的设计以耐用为先,但在发生故障时完全无法拆解进行维修,意味着想要更换内部元件必须要破坏性拆解。

由衷感谢以下译者:

en zh

100%

Ennis正在帮助我们修复这个世界! 您也想加入吗?
开始翻译 ›

Dante Mazzanti

于07/13/15注册

36,523 声望

创作了26篇指南

34指南评论

Another disposable product from Apple, if it ever goes wrong, that is =)

I am not surpised

Marhowl - 回复

I'm not either. I think that's going to be the norm (if not already) as devices become smaller and more complex. Not only from just Apple. I think the need to repair rather than replace will get less and less. I think this is a good thing, but it means scores like 'reparability' when reviewing or tearing down will continue to mean less and less to consumers over time. For myself, I already think it's a pretty glorified/meaningless statistic when reviewing a product I'm going to buy. As long as it's quality, and/or the manufacturer has a good warranty program, it's much more convenient for me to go that route. I can't remember the last time I needed to fix or pay to get fixed one of my electronic devices who isn't the manufacturer.

Nick - 回复

well, at some point of time maybe even you will grow up, take responsibility and try not to waste our beautiful planet with one-time, throw-away products..

Guido Boehm -

i suppose most products of companies have a limited warranty of, let's say, 2-3 years maximum.

what happens if after the warranty ends and the keyboard fails to work?

since you can't repair it your self, you can only use it as a placemat for your dinner.

alexios -

Guido, there's this thing called recycling, perhaps you've heard of it?

rpe33 -

添加评论

浏览统计数据:

过去 24 小时: 11

过去 7 天: 111

过去 30 天: 535

总计 109,139