跳转到主内容

当前版本的文档还未经巡查,您可以查看最新的已查核版本

你所需要的

  1. 这个步骤还没有翻译 帮忙翻译一下

    : 步骤 1 中的图像 1,1
    • Grip the drill. Locate the red locking switch on the back of the battery. Hold the switch down.

  2. 这个步骤还没有翻译 帮忙翻译一下

    : 步骤 2 中的图像 1,3 : 步骤 2 中的图像 2,3 : 步骤 2 中的图像 3,3
    • While holding down the red locking switch, slide the battery towards the back of the drill until the battery is fully removed from the drill.

  3. 这个步骤还没有翻译 帮忙翻译一下

    : 步骤 3 中的图像 1,3 : 步骤 3 中的图像 2,3 : 步骤 3 中的图像 3,3
    • Grip cordless drill firmly with left hand. Grip the cordless drill handle firmly with the right hand. Rotate the handle counterclockwise in order to remove the handle from the drill.

  4. 这个步骤还没有翻译 帮忙翻译一下

    : 步骤 4 中的图像 1,3 : 步骤 4 中的图像 2,3 : 步骤 4 中的图像 3,3
    • The chuck sleeve is held on by a 20mm Phillips #2 screw in the center.This screw is reverse threaded. Insert a Phillips #2 screwdriver and rotate it clockwise to loosen and remove it.

  5. 这个步骤还没有翻译 帮忙翻译一下

    : 步骤 5 中的图像 1,2 : 步骤 5 中的图像 2,2
    • The threaded hole the screw was in is in the shape of a 6-point star. Insert a T40 Torx Key and rotate it clockwise to loosen and remove the chuck sleeve.

终点

Jameson

于09/23/14注册

258 声望

创作了2篇指南

团队

USF Tampa, Team 2-3, Blackwell Fall 2014 USF Tampa, Team 2-3, Blackwell Fall 2014 的会员

USFT-BLACKWELL-F14S2G3

5 名成员

创作了9篇指南

一条评论

For my drill, the Torx screw had to be rotated *counter-clockwise to remove. I'm not sure if that was an error in step #5 or some drills are different.

Thank you for the location of those screws btw.

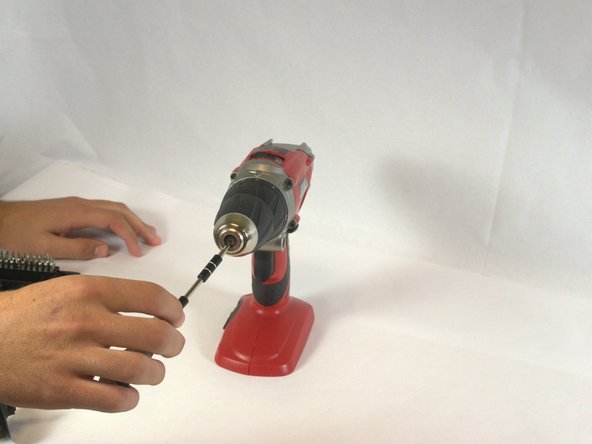
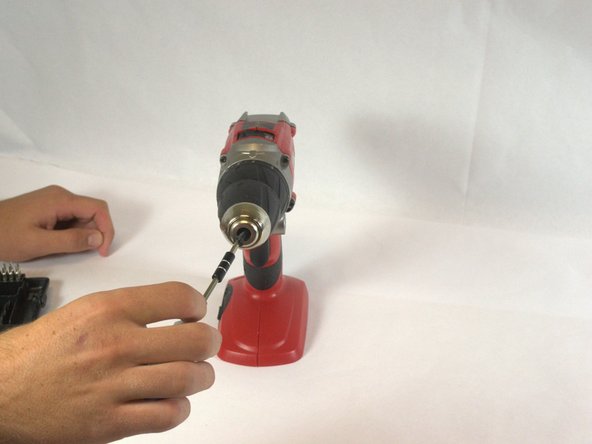
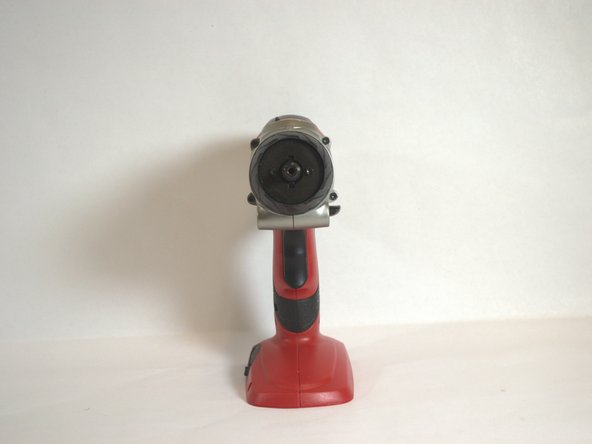
"Step 5 — Remove the chuck sleeve

The threaded hole the screw was in is in the

shape of a 6-point star. Insert a T40 Torx Key

and rotate it *clockwise to loosen and remove

the chuck sleeve."

Joe Bailey - 回复

添加评论

浏览统计数据:

过去 24 小时: 2

过去 7 天: 8

过去 30 天: 15

总计 1,514