跳转到主内容

Simagic Alpha Mini Direct Drive Wheelbase Magnet Positional Sensor Replacement

你所需要的

  1. Simagic Alpha Mini Direct Drive Wheelbase Magnet Positional Sensor Replacement, Magnet positional sensor: 步骤 1 中的图像 1,1
    • Ensure the power connector is switched OFF before plugging in or unplugging the wheelbase. Leaving it on while plugging or unplugging the power connector could damage your device.

    • Turn the power off.

  2. Simagic Alpha Mini Direct Drive Wheelbase Magnet Positional Sensor Replacement: 步骤 2 中的图像 1,1
    • Disconnect all cables from the wheelbase.

  3. Simagic Alpha Mini Direct Drive Wheelbase Magnet Positional Sensor Replacement: 步骤 3 中的图像 1,2 Simagic Alpha Mini Direct Drive Wheelbase Magnet Positional Sensor Replacement: 步骤 3 中的图像 2,2
    • Use a 2.5 mm Hex Key to remove the two 10 mm screws that connect the wheelbase to the mounting plate.

  4. Simagic Alpha Mini Direct Drive Wheelbase Magnet Positional Sensor Replacement: 步骤 4 中的图像 1,1
    • Lay the wheelbase right side up, ensuring the "Simagic" logo is on top.

  5. Simagic Alpha Mini Direct Drive Wheelbase Magnet Positional Sensor Replacement: 步骤 5 中的图像 1,2 Simagic Alpha Mini Direct Drive Wheelbase Magnet Positional Sensor Replacement: 步骤 5 中的图像 2,2
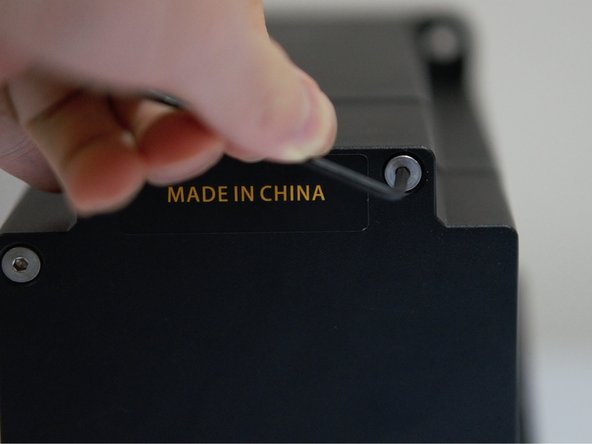
    • Rotate the wheelbase 180 degrees so the bolts on the back of the device are facing you.

    • Use a 2.5mm M3 Hex Key to remove four 4 mm screws.

  6. Simagic Alpha Mini Direct Drive Wheelbase Magnet Positional Sensor Replacement: 步骤 6 中的图像 1,1
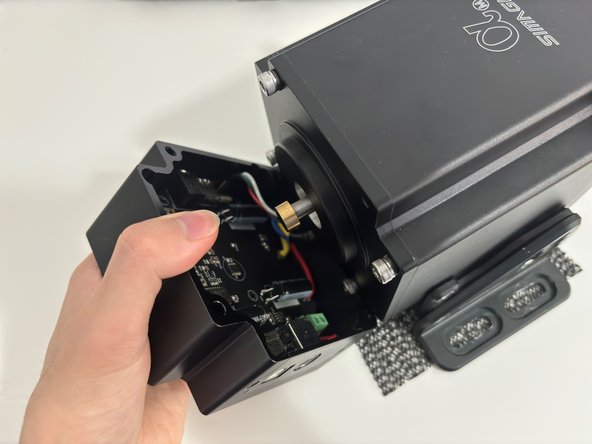
    • Open the electronics cover.

    • As you open the electronics cover, be careful not to unplug or tear the wires connecting the cover to the wheelbase.

  7. Simagic Alpha Mini Direct Drive Wheelbase Magnet Positional Sensor Replacement: 步骤 7 中的图像 1,2 Simagic Alpha Mini Direct Drive Wheelbase Magnet Positional Sensor Replacement: 步骤 7 中的图像 2,2
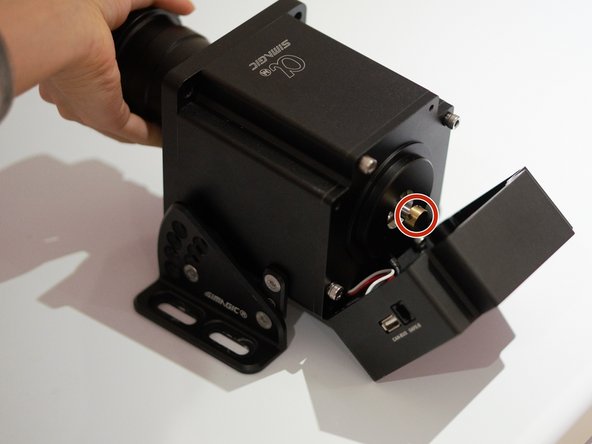
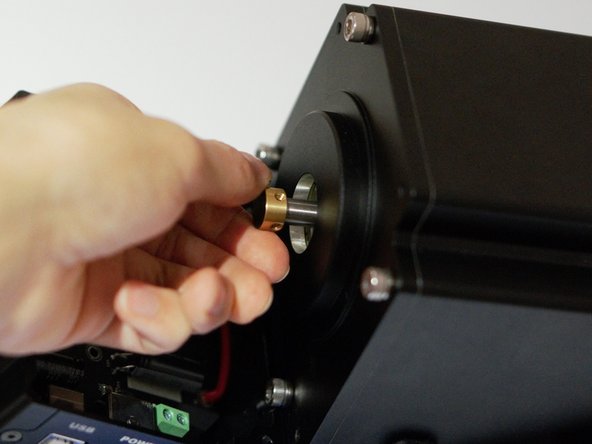
    • Use a 1.5mm M1 Hex Key two remove two 5 mm screws from the back magnet.

  8. Simagic Alpha Mini Direct Drive Wheelbase Magnet Positional Sensor Replacement: 步骤 8 中的图像 1,2 Simagic Alpha Mini Direct Drive Wheelbase Magnet Positional Sensor Replacement: 步骤 8 中的图像 2,2
    • Turn the wheel shaft until the Wi-Fi symbol is facing up.

    • The wheelbase was rotated 180 degrees in this picture. However, if your workspace allows it, leave the device with the back facing you, like in the previous step.

  9. Simagic Alpha Mini Direct Drive Wheelbase Magnet Positional Sensor Replacement: 步骤 9 中的图像 1,2 Simagic Alpha Mini Direct Drive Wheelbase Magnet Positional Sensor Replacement: 步骤 9 中的图像 2,2
    • Ensure the Wi-Fi symbol located on the front of the wheelbase is facing straight up prior to turning the magnet.

    • Turn the magnet clockwise until one of the screw holes is facing up and the other screw hole is facing right to realign the positional sensor (magnet).

  10. Simagic Alpha Mini Direct Drive Wheelbase Magnet Positional Sensor Replacement: 步骤 10 中的图像 1,1
    • Use a 1.5 mm M1 Hex Key to tighten two 5 mm screws and secure the sensor into position.

  11. Simagic Alpha Mini Direct Drive Wheelbase Magnet Positional Sensor Replacement: 步骤 11 中的图像 1,1
    • To check if you have aligned the sensor correctly, launch the Alpha Manager application. On the screen that follows, ensure the wheel is 0.0.

结论

To reassemble your device, follow these instructions in reverse order.

Hugo Lai

于02/05/24注册

193 声望

撰写一个指南

团队

York University, Team M-6, Allen Winter 2024 York University, Team M-6, Allen Winter 2024 的会员

YORK-ALLEN-W24SMG6

3 名成员

创作了1篇指南

0条评论

添加评论

浏览统计数据:

过去 24 小时: 1

过去 7 天: 8

过去 30 天: 33

总计 138