跳转到主内容

Opening the Grinder

你所需要的

  1. Opening the  Grinder, Opening the Siemens Surpresso Compact: 步骤 1 中的图像 1,1
    • Unplug your coffee maker!

    • Remove the water container, the brew group and the drip tray with pomace container.

    • Using a spoon, remove as much of the coffee beans as possible from the coffee bean container.

    • Depending on the model, additional sensors with cables may be installed on the top and side panels. You have to remove these before you can completely remove the housing parts.

  2. Opening the  Grinder: 步骤 2 中的图像 1,1
    • Remove the two Torx T10 screws on the top.

  3. Opening the  Grinder: 步骤 3 中的图像 1,2 Opening the  Grinder: 步骤 3 中的图像 2,2
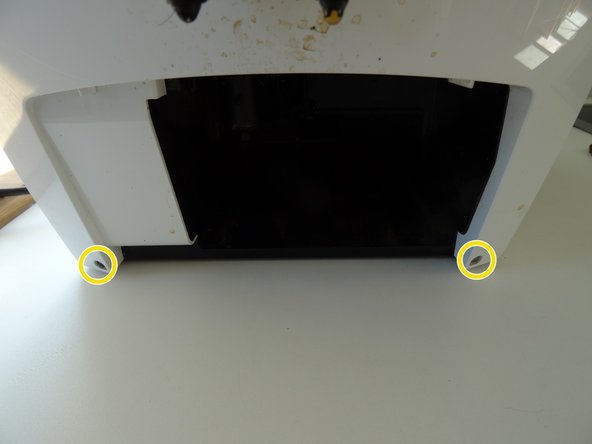
    • Remove seven T10 Torx screws on the back.

    • The two screws at the bottom of the front can remain.

  4. Opening the  Grinder: 步骤 4 中的图像 1,2 Opening the  Grinder: 步骤 4 中的图像 2,2
    • Press with a flat-head screwdriver into the openings on the side with the water tank. This releases the latches on the top.

    • Press the flat-head screwdriver into the opening on the side with the brew group. This will release the last notch on the top.

    • Lift the top off.

    • On some models, a cable leads to the sensor on the powder tray. Unplug the connector on this cable first.

  5. Opening the  Grinder: 步骤 5 中的图像 1,2 Opening the  Grinder: 步骤 5 中的图像 2,2
    • Slide the side section of the brewing unit about 2 cm to the rear. This sometimes gets stuck and may require some force to remove.

    • Remove the two tabs from the power switch.

    • Take off the side panel with the brew group.

  6. Opening the  Grinder: 步骤 6 中的图像 1,1
    • Do the same with the panel on the other side.

    • To remove the water tank hose simply pull it of the pump.

    • Remove the side panel.

  7. Opening the  Grinder, Opening the  Grinder: 步骤 7 中的图像 1,2 Opening the  Grinder, Opening the  Grinder: 步骤 7 中的图像 2,2
    • The grinder is situated on the top right rearside of the device. The adjuster and the outer ring can just be taken off, but this is only necessary if the grinder has to be completely replaced. Be careful and do not use excessive force.

    • Beyond the white ring with the holes there is a small springloaded ball (3.2 mm diameter). It ensures that the ring clicks into place, hence the click. Be careful, it can fall out and get lost.

    • The following pictures show a grinder of a Jura and there are slight differences. But since the grinder is the same, the repair is basically the same.

结论

To reassemble your device, follow these instructions in reverse order.

另外一个人完成了本指南。

由衷感谢以下译者:

de en

100%

VauWeh正在帮助我们修复这个世界! 您也想加入吗?
开始翻译 ›

VauWeh

于10/19/15注册

202,409 声望

创作了246篇指南

团队

Repair is War on Entropy Repair is War on Entropy 的会员

Community

25 名成员

创作了1,103篇指南

0条评论

添加评论

浏览统计数据:

过去 24 小时: 0

过去 7 天: 2

过去 30 天: 16

总计 1,697