跳转到主内容
加入维修社区 - 创建账户

Shower Arm Replacement

你所需要的

  1. Shower Arm Replacement, Shower Arm: 步骤 1 中的图像 1,3 Shower Arm Replacement, Shower Arm: 步骤 1 中的图像 2,3 Shower Arm Replacement, Shower Arm: 步骤 1 中的图像 3,3
    • Turn off the main water supply. Turn the wheel clockwise (right) to shut off water (if there is 2 wheels, turn both of them clockwise). Turn it until it stops — do not force it.

    • If the valve has a lever handle, rotate it 90° so it is perpendicular to the pipe.

    • In a house, the main shutoff valve is typically located in the basement, near the water meter, or where the main water line enters the home. In a condo, the shutoff may be inside a utility closet, mechanical panel, or bathroom access panel. If unsure, contact building management.

  2. Shower Arm Replacement: 步骤 2 中的图像 1,3 Shower Arm Replacement: 步骤 2 中的图像 2,3 Shower Arm Replacement: 步骤 2 中的图像 3,3
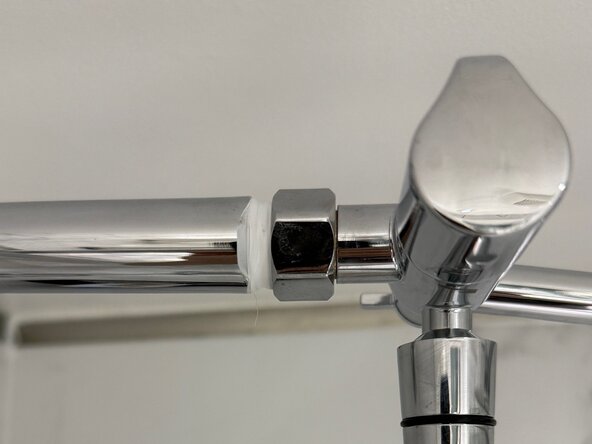
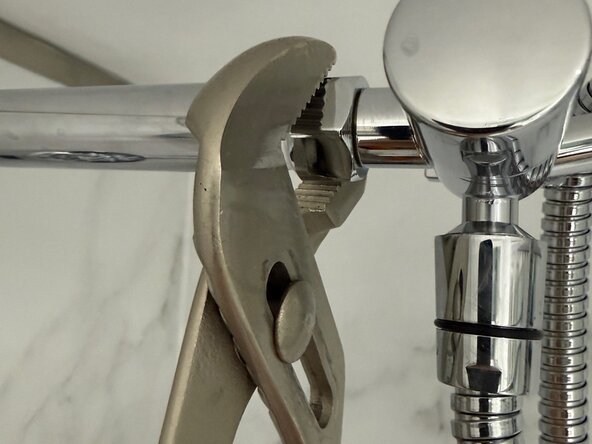
    • Use an adjustable wrench to loosen the nut that connects the shower head to the shower arm.

    • Turn the nut counterclockwise until the shower head comes off.

  3. Shower Arm Replacement: 步骤 3 中的图像 1,1
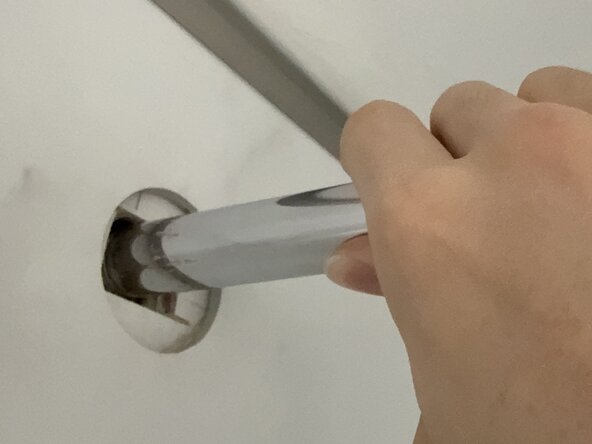
    • Gently slide the decorative flange (the round metal cover) away from the wall.

    • This exposes the threaded connection where the shower arm enters the wall.

  4. Shower Arm Replacement: 步骤 4 中的图像 1,1
    • Grip the shower arm with a wrench covered with a cloth or rag to protect the finish and turn it counterclockwise. Continue turning until the shower arm fully unscrews from the wall fitting.

    • Use a cloth or rag between the wrench and the shower arm to prevent scratching the finish.

  5. Shower Arm Replacement: 步骤 5 中的图像 1,1
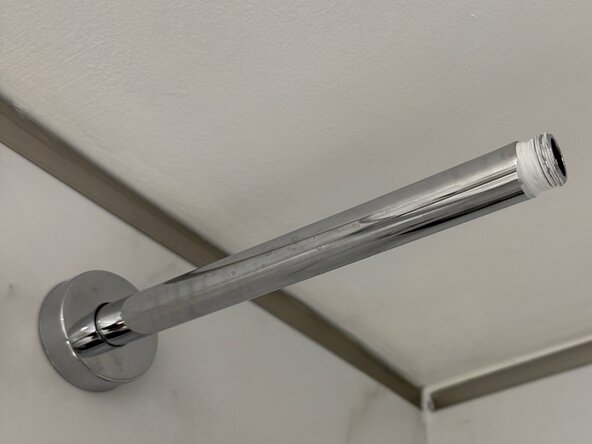
    • Use a cloth or a rag to remove old plumber’s tape residue or debris from the threaded fitting inside the wall.

  6. Shower Arm Replacement: 步骤 6 中的图像 1,1
    • Wrap plumber’s tape clockwise 2–4 times around the threaded end of the new shower arm.

  7. Shower Arm Replacement: 步骤 7 中的图像 1,3 Shower Arm Replacement: 步骤 7 中的图像 2,3 Shower Arm Replacement: 步骤 7 中的图像 3,3
    • Screw the new shower arm clockwise into the wall fitting until it is securely installed.

    • Slide the decorative flange back against the wall.

  8. Shower Arm Replacement: 步骤 8 中的图像 1,2 Shower Arm Replacement: 步骤 8 中的图像 2,2
    • Reattach the showerhead and use an adjustable wrench to turn the nut clockwise to secure it to the shower arm.

  9. Shower Arm Replacement: 步骤 9 中的图像 1,1
    • Turn the water supply back on and test the shower for leaks around the connection.

结论

After installing the new shower arm and reconnecting the shower head, turn the main water supply back on and test the shower for leaks. If you notice any dripping around the connection, tighten the fittings slightly or apply additional plumber’s tape. Once the connections are secure, your shower arm replacement is complete.

另外一个人完成了本指南。

Tim

于01/20/26注册

193 声望

撰写一个指南

团队

0指南评论

添加评论

浏览统计数据:

过去 24 小时: 1

过去 7 天: 7

过去 30 天: 33

总计 138